The brake warning light on your 1968 Thunderbird serves as a crucial safety indicator, alerting you to potential issues within the braking system. When this light illuminates and refuses to turn off, it signifies a problem that demands immediate attention. Ignoring a persistent brake warning light can compromise your safety and lead to more extensive damage down the road.
This comprehensive guide will delve into the common causes behind a perpetually illuminated brake warning light on a 1968 Thunderbird and provide you with a step-by-step approach to diagnose and address the issue.
Understanding the Brake Warning Light System
Before diving into troubleshooting, it’s helpful to grasp the fundamentals of the brake warning light system in your 1968 Thunderbird. The system primarily comprises three key components:
- Brake Fluid Level Sensor: This sensor monitors the brake fluid level in the master cylinder. A significant drop in fluid level, often indicating a leak, will trigger the warning light.
- Parking Brake Switch: Engaging the parking brake activates this switch, illuminating the brake warning light as a reminder. The light should extinguish when the parking brake is fully released.
- Hydraulic Pressure Differential: A pressure differential valve within the brake system detects any imbalances in hydraulic pressure between the front and rear brakes. Such discrepancies, often caused by a leak or failing brake component, activate the warning light.
Common Causes and Troubleshooting Steps
A perpetually lit brake warning light in your 1968 Thunderbird can stem from several culprits. Here are the most frequent offenders and how to address them:
1. Low Brake Fluid Level
The Problem: Insufficient brake fluid, often due to a leak, is the most prevalent reason for a persistent brake warning light.
Troubleshooting:
- Check the Master Cylinder: Park your Thunderbird on level ground and pop the hood. Locate the master cylinder, typically positioned on the driver’s side firewall. Visually inspect the reservoir for adequate brake fluid. The fluid level should fall between the “Min” and “Max” markings.
- Inspect for Leaks: If the fluid level is low, carefully examine the master cylinder, brake lines, hoses, and calipers for any signs of leakage. Look for wet spots, drips, or evidence of fluid spray.
- Address Leaks and Refill: Should you discover a leak, it’s crucial to have it repaired by a qualified mechanic immediately. Once fixed, refill the master cylinder with the appropriate brake fluid, as specified in your owner’s manual.
2. Faulty Parking Brake Switch
The Problem: A malfunctioning parking brake switch can cause the brake warning light to remain on even when the parking brake is disengaged.
Troubleshooting:
- Inspect the Switch: Locate the parking brake switch, typically found near the parking brake lever or pedal assembly.
- Test for Continuity: With the parking brake disengaged, use a multimeter to check for continuity across the switch terminals. A closed circuit indicates a properly functioning switch. If the circuit remains open with the parking brake off, the switch likely needs replacement.
- Switch Replacement: Replacing the parking brake switch is a straightforward task. Disconnect the negative battery cable, locate and unplug the switch connector, and remove the retaining clip or bolts. Install the new switch in reverse order.
3. Worn Brake Pads or Shoes
The Problem: While less common, excessively worn brake pads or shoes can trigger the warning light. Some 1968 Thunderbird models may have a wear indicator that activates the light when the pads or shoes reach a critical wear point.
Troubleshooting:
- Inspect Brake Pad/Shoe Thickness: Examine your Thunderbird’s brake pads and shoes. If the friction material is significantly thin or nearing the metal backing plate, replacement is necessary.
- Check for Wear Indicators: Inspect for the presence of wear indicators, small metal tabs designed to contact the rotor or drum when the pads or shoes are worn. If you hear a squealing or screeching sound during braking, it’s a telltale sign of worn pads or shoes.
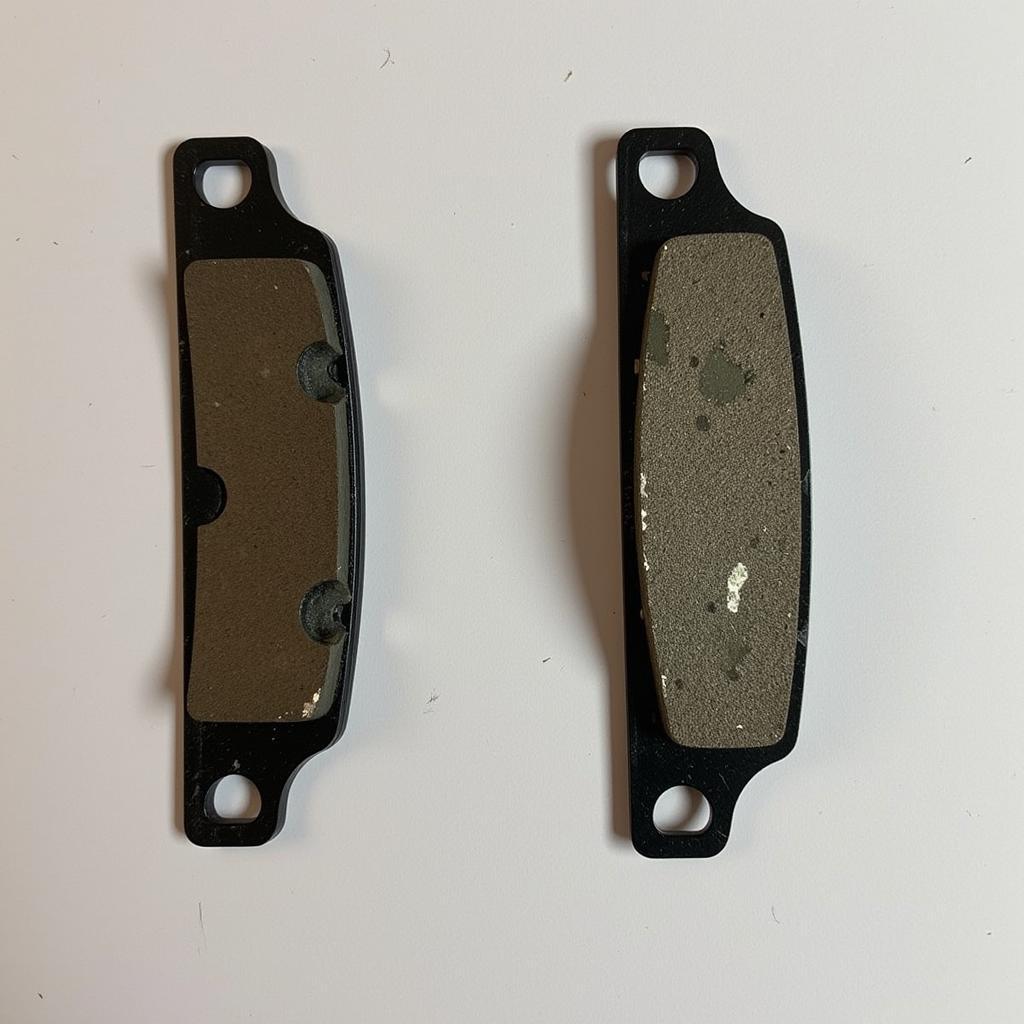 Worn Brake Pad on a 1968 Thunderbird
4. Hydraulic System Issues
The Problem: Problems within the hydraulic system itself, such as air in the lines or a failing master cylinder, can also illuminate the brake warning light.
Troubleshooting:
- Inspect for Air in Lines: Air trapped within the brake lines can lead to a spongy brake pedal feel and potentially activate the warning light. Bleeding the brake system to remove any air is essential. This procedure is best left to a qualified mechanic.
- Consider Master Cylinder Failure: In some cases, a failing master cylinder can cause hydraulic pressure imbalances and trigger the warning light. Signs of a failing master cylinder include a sinking or spongy brake pedal, along with difficulty stopping the vehicle. Replacing the master cylinder is a complex task best handled by a professional.
Seeking Expert Assistance
While this guide provides a foundational understanding of common brake warning light issues, it’s essential to remember that automotive systems can be intricate. If you’re uncomfortable performing any of these diagnostic or repair procedures, or if the problem persists, seeking assistance from a qualified mechanic specializing in classic Thunderbirds is highly recommended.
“Diagnosing brake issues on a classic car like a ’68 Thunderbird requires an understanding of both vintage systems and modern diagnostic techniques. Don’t hesitate to consult an expert to ensure your safety and preserve the integrity of your vehicle.” – John Miller, Classic Car Restoration Specialist
Conclusion
A persistent brake warning light in your 1968 Thunderbird should never be ignored. Promptly addressing the underlying issue is crucial for your safety and the longevity of your vehicle. By following the troubleshooting steps outlined in this guide, you can gain a better understanding of the potential causes and take the appropriate actions to remedy the problem. However, always remember that when in doubt, consulting a qualified mechanic is the safest course of action.