If your 2001 Chevy Malibu’s brake warning light is stubbornly glowing on your dashboard, don’t ignore it! This light serves as your car’s early warning system for brake issues. Ignoring it could lead to dangerous situations on the road. In this comprehensive guide, we’ll delve into the common culprits behind a 2001 Chevy Malibu brake warning light and provide you with the knowledge to address them.
Understanding Your Brake Warning Light
Before we jump into the potential issues, it’s important to understand what triggers your brake warning light. There are a few possibilities:
- Low Brake Fluid: This is the most common reason. Brake fluid is the lifeblood of your braking system, and a leak or low fluid level can seriously compromise your ability to stop.
- Engaged Parking Brake: Sometimes the simplest explanation is the right one. Leaving your parking brake even partially engaged can illuminate the warning light.
- Faulty Brake Light Switch: This switch is responsible for activating your brake lights when you press the pedal. A malfunctioning switch can interfere with the brake light circuit, triggering the warning.
- Worn Brake Pads: Your brake pads are designed to wear down over time. When they reach a certain level of wear, your Malibu activates the warning light as a heads-up to get them replaced.
- ABS Issue: If there’s a problem with your Anti-lock Braking System (ABS), the brake warning light might illuminate along with the dedicated ABS warning light.
Common Causes and DIY Troubleshooting for a 2001 Chevy Malibu Brake Warning Light
Let’s explore the potential causes in more detail and discuss some troubleshooting steps you can take:
1. Low Brake Fluid
Symptoms: Besides the illuminated warning light, you might notice a spongy or soft brake pedal feel.
Troubleshooting:
- Check the brake fluid reservoir. Locate the reservoir under the hood (refer to your owner’s manual if needed).
- Inspect the fluid level. The reservoir will have “Min” and “Max” markings. If the fluid is below the “Min” line, it needs to be topped up.
- Add brake fluid. If the level is low, carefully add the correct type of brake fluid (DOT 3 or DOT 4, check your owner’s manual) to the “Max” line.
- Inspect for leaks. If the fluid level is significantly low or you’ve had to add fluid recently, there’s likely a leak. Carefully examine the area around the master cylinder, brake lines, and near the wheels for signs of fluid leakage.
 Brake Fluid Leak
Important: If you find a leak or are uncomfortable adding brake fluid, it’s best to consult a mechanic. Driving with a brake fluid leak is extremely dangerous.
2. Engaged Parking Brake
Troubleshooting:
This one’s easy! Ensure your parking brake is fully disengaged. If the light stays on, there may be another issue at hand.
3. Faulty Brake Light Switch
Symptoms: Your brake lights might not illuminate when the brake pedal is pressed.
Troubleshooting:
Diagnosing a faulty brake light switch typically requires a multimeter and some electrical know-how. If you’re comfortable with basic electrical work:
- Locate the brake light switch. It’s usually positioned above the brake pedal arm under the dashboard.
- Test the switch with a multimeter. Refer to a vehicle-specific repair manual for guidance on testing procedures.
Important: If you’re not confident in your electrical skills, it’s safest to have a mechanic diagnose and replace the brake light switch.
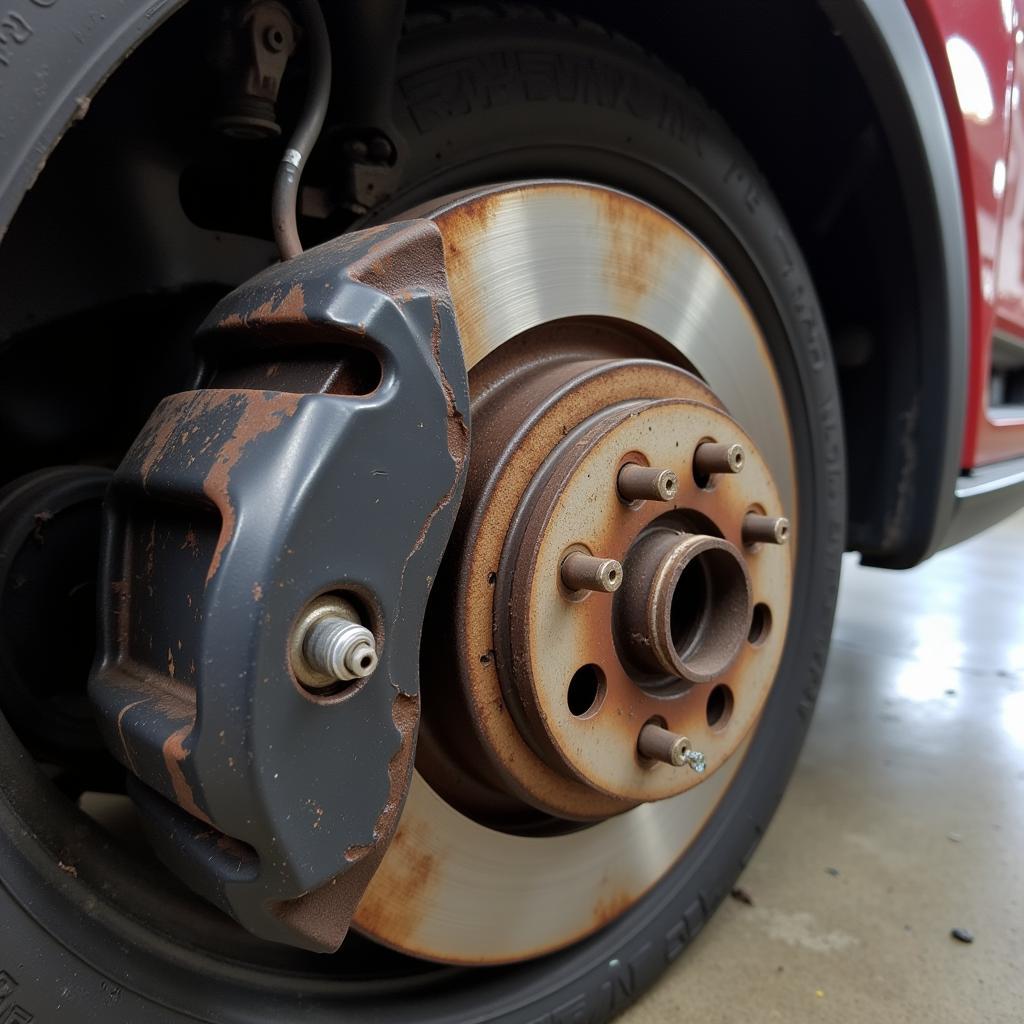
4. Worn Brake Pads
Symptoms: A squealing or grinding noise when you apply the brakes is a telltale sign of worn brake pads.
Troubleshooting:
Visually inspecting your brake pads will require removing a wheel. If you’re comfortable with this:
- Safely lift and secure your vehicle. Use jack stands for support.
- Remove the wheel.
- Inspect the brake pads. Look through the caliper to see the brake pad. There’s a metal indicator tab on most pads; if it’s touching the rotor or the pad material is very thin, it’s time for new pads.
Important: Brake pad replacement is best left to a mechanic unless you have experience with brake work.
5. ABS Issues
Symptoms: If the ABS system is faulty, you might also notice the ABS warning light illuminated on your dashboard.
Troubleshooting:
Diagnosing ABS problems can be complex and typically requires a specialized scanner to read the ABS module’s fault codes. If you suspect an ABS issue, it’s best to consult a mechanic.
Remote Diagnostics and Programming: The Future of Car Repair
As technology advances, so does the way we diagnose and repair vehicles. Remote diagnostics and programming are rapidly gaining popularity in the automotive industry, offering convenient and efficient solutions for car owners.
Here are a few benefits:
- Convenience: No more trips to the mechanic for initial diagnostics.
- Speed: Remote diagnostics can often identify issues faster than traditional methods.
- Cost Savings: Early detection through remote diagnostics can help prevent minor issues from escalating into major (and expensive) problems.
- Software Updates: Remote programming allows for software updates and recalibrations without the need for a physical visit to a service center.
Consider exploring remote diagnostic services if you’re looking for a convenient and proactive approach to maintaining your 2001 Chevy Malibu.
Conclusion
A glowing brake warning light in your 2001 Chevy Malibu should never be ignored. By understanding the potential causes and following the troubleshooting tips outlined in this guide, you can address the issue promptly and ensure your safety on the road. Remember, when in doubt, it’s always best to consult a qualified mechanic for diagnosis and repair. Drive safely!