Upgrading your car audio system with a DAB radio opens up a world of crystal-clear audio and a wider selection of stations. While the process might seem daunting, this comprehensive guide will walk you through each step, making it a smooth and rewarding experience.
Understanding DAB Car Radio
Before diving into the installation process, it’s essential to understand what DAB car radio offers and the common issues you might encounter.
What is DAB Car Radio and Why Should You Consider It?
DAB (Digital Audio Broadcasting) car radio provides a digital alternative to traditional FM/AM radio. The key benefits include:
- Superior Sound Quality: Experience crystal-clear audio with less interference and static compared to analog signals.
- Wider Station Selection: Access a broader range of stations, including specialized channels and digital-only broadcasts.
- Additional Features: Many DAB car radios come equipped with advanced features like Bluetooth connectivity, USB input, and smartphone integration.
Common Issues with Car Radios and How to Diagnose Them
Car radio problems can stem from various factors, both hardware and software related:
- Poor Reception: This could be due to a weak antenna signal, faulty antenna connections, or the location of your vehicle.
- No Power: Check the fuse related to your car radio. A blown fuse could be the culprit.
- Sound Distortion: Damaged speakers or loose wiring can lead to distorted audio output.
- Software Glitches: Modern car radios often rely on software. Bugs or outdated firmware can cause unexpected behavior.
Diagnosing these issues often requires checking the user manual, inspecting connections, or using a diagnostic tool for more complex problems.
 Installing a DAB car radio in a car
Gathering the Necessary Tools and Equipment
Before starting the installation, gather the following tools and equipment:
- DAB Car Radio Unit: Choose a model compatible with your car’s make and model.
- DAB Antenna: A dedicated DAB antenna is crucial for optimal reception.
- Wiring Harness Adapter: This ensures compatibility between the new radio and your car’s wiring system.
- Dash Removal Tools: These tools help safely remove trim pieces and access the radio cavity.
- Screwdrivers (Phillips and Flathead): Essential for various screws and fasteners you’ll encounter.
- Wire Strippers and Crimpers: Necessary for making clean wire connections.
- Electrical Tape: Used for insulating and securing wire connections.
Pro Tip: “Always consult your car’s manual or seek advice from a certified technician if you’re unsure about any compatibility issues,” advises Mark Williams, an experienced automotive electrician and author of “The Complete Guide to Car Audio Installation.”
Step-by-Step Installation Guide
Follow these detailed instructions for a successful DAB car radio installation:
-
Disconnect the Negative Battery Terminal: This crucial safety step prevents electrical shorts during the installation.
-
Remove the Factory Radio: Carefully pry open the trim panels around your existing radio using the dash removal tools. Unscrew the factory radio and disconnect the wiring harness and antenna.
-
Install the DAB Antenna: Mount the DAB antenna according to the manufacturer’s instructions. Typically, this involves placing it on the windshield or roof for optimal reception.
-
Connect the Wiring Harness Adapter: Connect the wiring harness adapter to your new DAB car radio and your car’s existing wiring harness. Ensure each wire is securely connected and matches the corresponding color code.
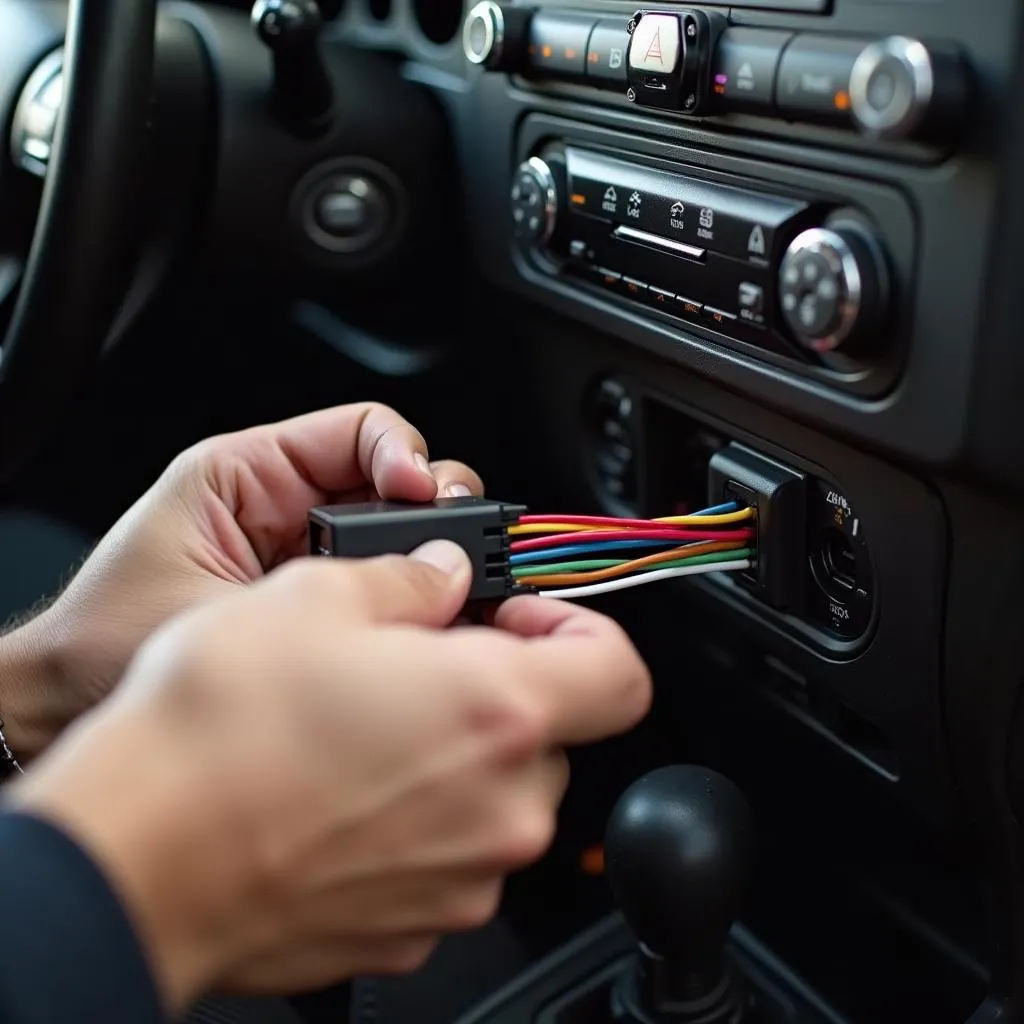 Connecting the wiring harness adapter to a car radio
-
Secure the DAB Car Radio: Carefully slide the DAB car radio into the dashboard cavity. Secure it in place using the provided mounting brackets or screws.
-
Reconnect the Battery: Reconnect the negative battery terminal and turn on your car’s ignition to test the new radio.
-
Fine-Tune Settings and Enjoy: Adjust the DAB car radio settings, such as time, date, and audio preferences. Scan for available stations and enjoy the enhanced listening experience.
Common FAQs About DAB Car Radio Installation
Q: Can I install a DAB car radio myself?
A: Yes, with the right tools, patience, and guidance, installing a DAB car radio is a manageable DIY project. However, if you’re uncomfortable working with car electronics, it’s best to seek professional installation.
Q: Do I need a special antenna for DAB radio?
A: Yes, a dedicated DAB antenna is essential for receiving digital radio signals. Using your existing FM antenna might result in poor reception or no signal at all.
Q: My car radio is not working after installation. What should I do?
A: Double-check all wire connections, ensure the antenna is properly connected and positioned, and check the fuse related to your car radio. If the issue persists, consider seeking assistance from a qualified car audio technician.
Need Expert Help? Contact Cardiagtech!
Upgrading to a DAB car radio significantly enhances your driving experience with superior sound and a wider selection of stations. By following these installation steps and seeking assistance when needed, you can enjoy the benefits of digital radio on your next road trip. For further guidance or support with your car’s electronic systems, don’t hesitate to contact CARDIAGTECH. We offer a range of diagnostic, programming, and remote installation services to keep your vehicle running smoothly.