Thinking about turning your car into a mobile ham shack? Installing a ham radio in your car can seem daunting, but with a little patience and the right guide, it’s a project most DIYers can tackle. Whether you’re an experienced operator or just getting started, having a reliable ham radio in your vehicle opens up a world of communication possibilities, from staying connected on road trips to participating in emergency communications.
Understanding Your Ham Radio Needs
Before diving into installation, it’s crucial to identify your needs and choose the right equipment. Consider these factors:
Types of Ham Radios
- Mobile Radios: Designed specifically for vehicle use, these radios offer compact size and resilience against vibrations.
- Base Station Radios: While larger, these offer higher power output and advanced features. They require more space and a stable mounting solution.
Power Output
Higher wattage translates to greater range, essential for off-road adventures or communicating in remote areas.
Features
Modern ham radios boast various features, including:
- Multiple Bands: Access different frequencies for diverse communication ranges.
- Digital Modes: Explore digital communication modes like DMR and D-STAR.
- GPS Integration: Combine radio communication with location data.
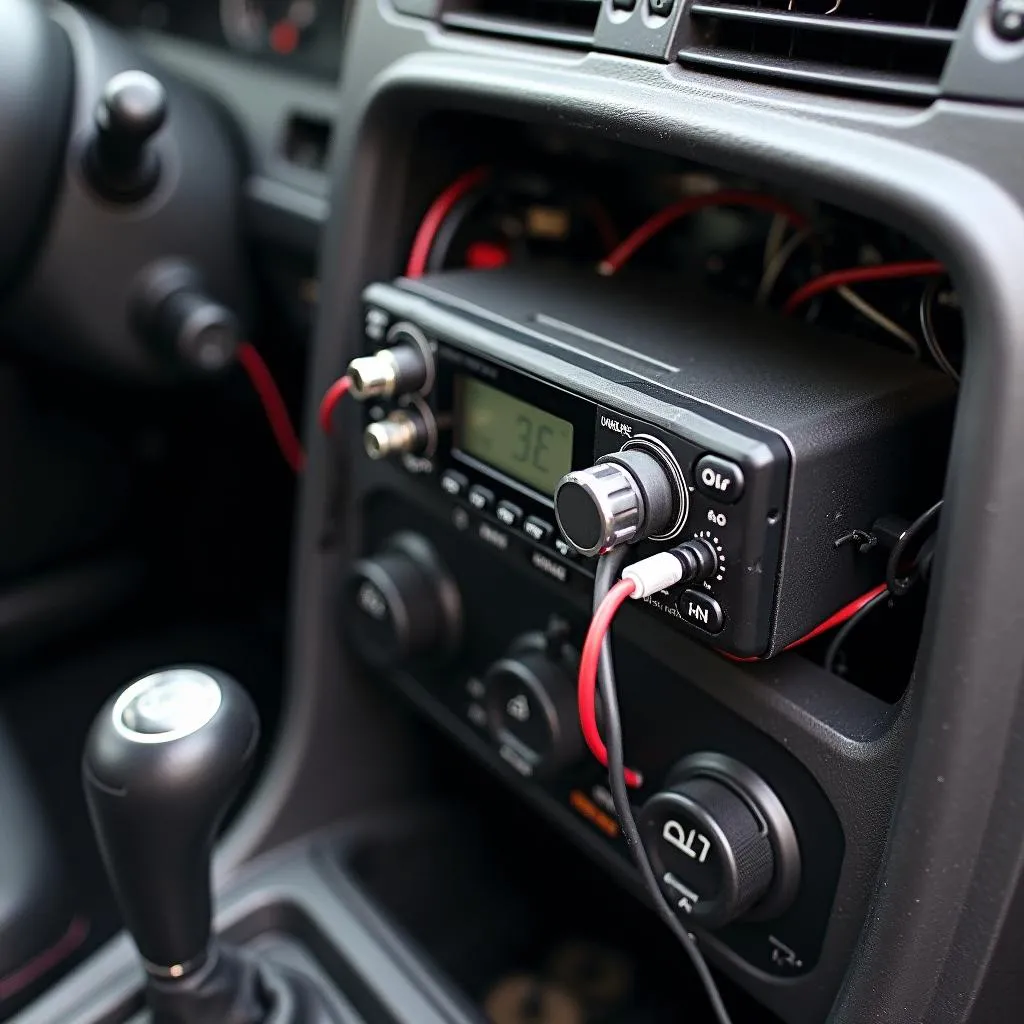 Car ham radio installation
Common Challenges During Installation
While straightforward, ham radio installation can present some challenges:
- Electrical System Integration: Properly connecting to your car’s electrical system is crucial for both radio performance and vehicle safety.
- Antenna Placement: The location and type of antenna significantly impact signal reception and transmission.
- Cable Routing: Neat and secure cable routing prevents interference and ensures a professional-looking installation.
- Grounding: A solid ground connection is essential for optimal radio performance and minimizing noise.
Troubleshooting Tips for Common Problems
Even with careful installation, issues can arise. Here’s how to troubleshoot common problems:
- No Power: Check fuse connections, power cables, and the radio’s internal fuse.
- Poor Audio: Ensure proper microphone and speaker connections, and adjust squelch settings.
- Low Signal Strength: Verify antenna connection, placement, and consider upgrading to a higher-gain antenna.
- Excessive Noise: Check for interference from other electronic devices in your car. Ensure proper grounding.
Essential Tools and Equipment
Before you start, gather the following:
- Ham Radio: Choose one that meets your needs and budget.
- Antenna: Select an antenna appropriate for your desired frequencies and mounting location.
- Antenna Mount: Opt for a sturdy mount compatible with your vehicle and antenna.
- Coaxial Cable: Use high-quality, low-loss coaxial cable for connecting the radio and antenna.
- Power Cable: Select a cable with an appropriate gauge to handle the radio’s current draw.
- Tools: Have on hand screwdrivers, wrenches, wire strippers, electrical tape, and a multimeter.
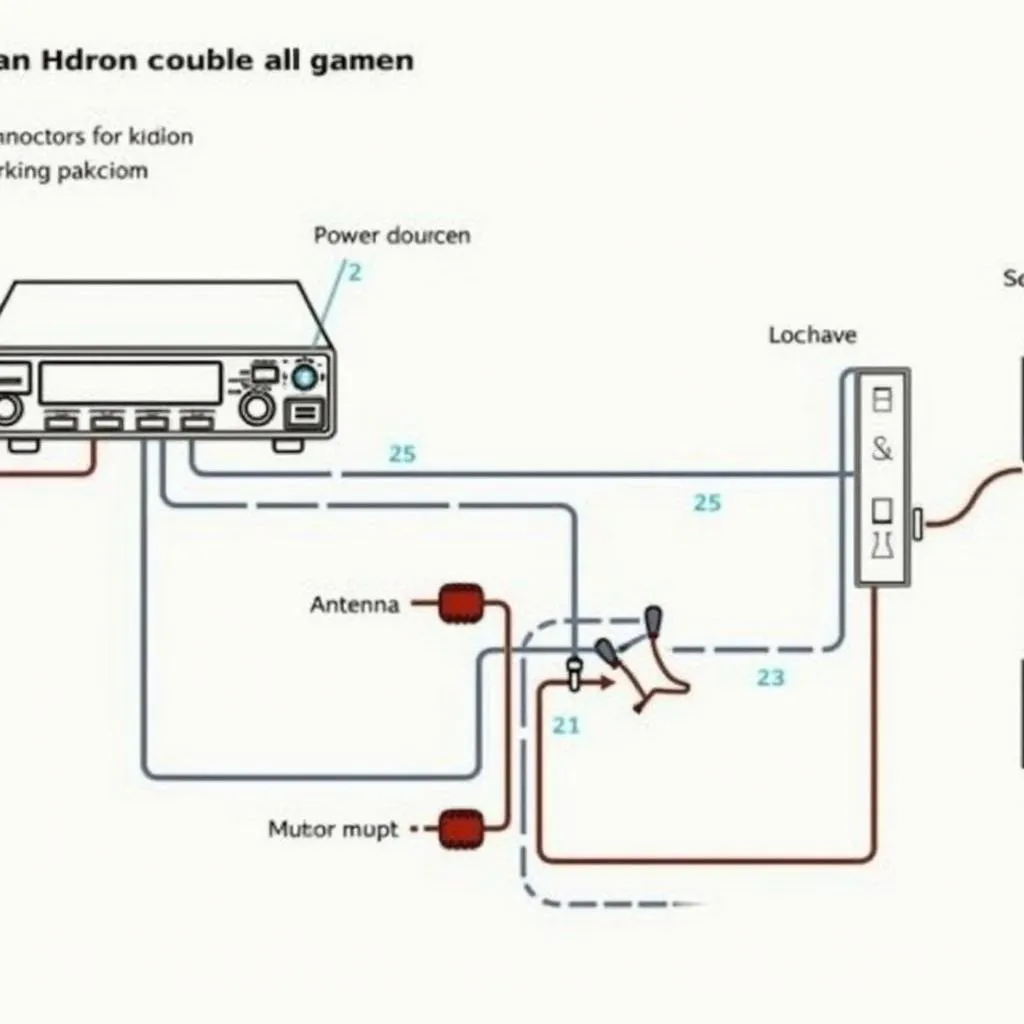 Car ham radio wiring diagram
Step-by-Step Installation Guide
Step 1: Disconnect the Battery
Always disconnect the negative battery terminal to prevent electrical mishaps.
Step 2: Choose a Mounting Location
Find a secure and accessible spot for the radio unit, considering visibility, ergonomics, and cable routing.
Step 3: Install the Antenna Mount
Follow the manufacturer’s instructions for your specific mount. Common locations include the roof, trunk lid, or fender.
Step 4: Route the Coaxial Cable
Run the cable from the antenna mount to the radio’s location, avoiding sharp bends and potential pinch points. Use cable ties to secure it neatly.
Step 5: Connect the Antenna and Radio
Attach the coaxial cable to the antenna and the radio’s antenna port, ensuring a secure and weatherproof connection.
Step 6: Connect the Power Cable
Connect the positive and negative power cables to the radio and the vehicle’s electrical system. Use an inline fuse near the battery connection for safety.
Step 7: Ground the Radio
Find a suitable grounding point in your vehicle’s chassis and connect the radio’s ground wire.
Step 8: Secure the Radio Unit
Mount the radio unit to the chosen location using the provided brackets or a custom mounting solution.
Step 9: Reconnect the Battery
Reconnect the negative battery terminal and power on the radio to test functionality.
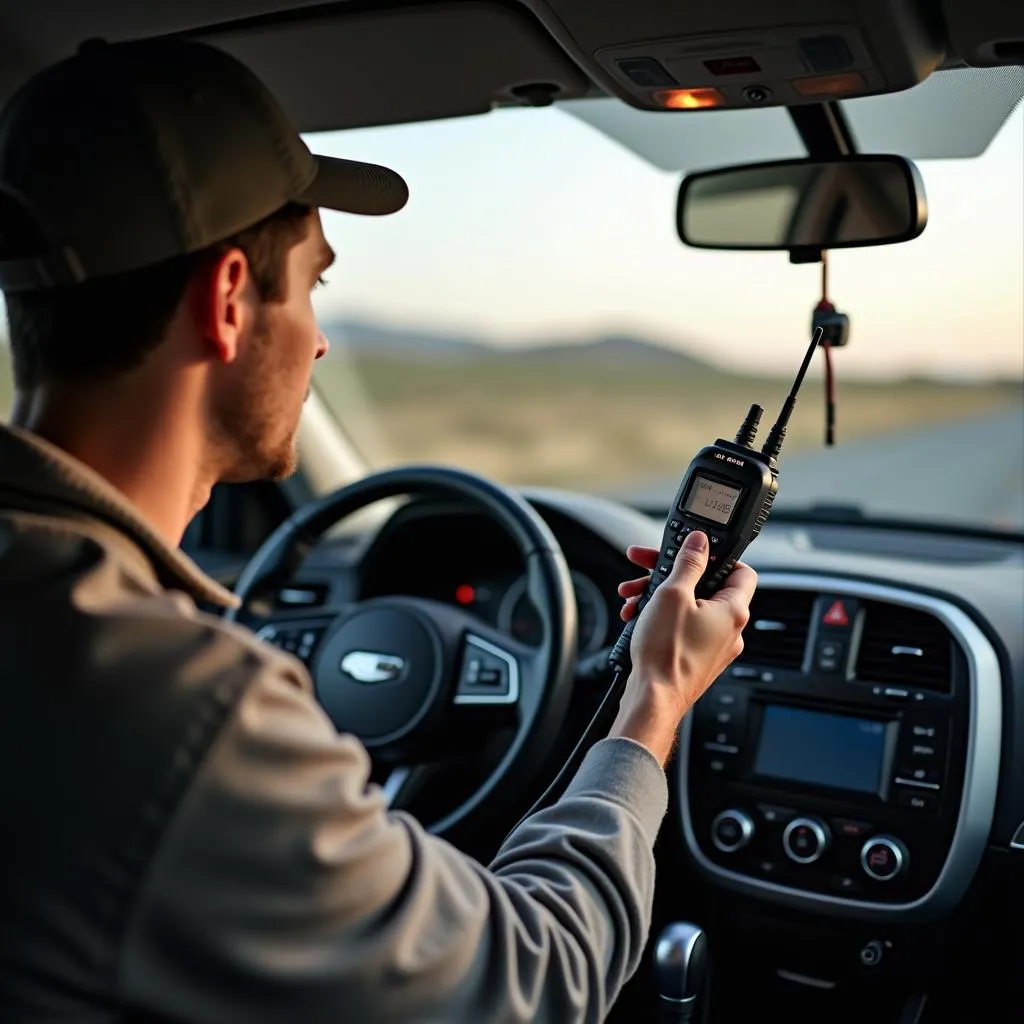 Testing a car ham radio
FAQs About Car Ham Radio Installation
Q: Do I need a license to operate a ham radio in my car?
A: Yes, operating a ham radio, including mobile operation, requires a valid amateur radio license issued by your country’s regulatory authority.
Q: What type of antenna is best for car use?
A: It depends on your needs. A magnetic mount antenna is convenient for temporary use, while a through-hole mount offers better performance. Consider factors like gain, frequency range, and your vehicle’s type.
Q: Can I install a ham radio in any car?
A: Yes, ham radios can be installed in most vehicles. However, some modern cars with complex electronics may require specialized installation techniques to avoid interference.
Q: How do I find a reputable installer in my area?
A: Contact your local amateur radio club or search online directories for certified ham radio installers.
Conclusion
Installing a ham radio in your car can be a rewarding experience, providing you with a reliable communication tool for various situations. With careful planning, the right equipment, and this guide, you’ll be on the airwaves in no time. For expert assistance with your car’s electrical systems or any automotive needs, don’t hesitate to connect with CARDIAGTECH. We offer a range of diagnostic and programming tools designed to make your automotive life easier.
