“Having to fiddle with your car stereo shouldn’t feel like defusing a bomb.” We’ve all been there – staring at a mess of wires behind your 1996 Toyota Corolla’s dashboard, wondering which one goes where. This guide will walk you through understanding your car stereo wiring diagram, troubleshooting common issues, and getting your music pumping again.
Understanding Your 1996 Toyota Corolla Car Stereo System
Before we dive into the wiring, it’s helpful to understand the basic components of your car stereo system:
- Head Unit: This is the brain of your system, housing the radio receiver, CD player, and often the amplifier.
- Speakers: These convert electrical signals into sound waves.
- Wiring Harness: This bundle of wires connects all the components, carrying power, ground, and audio signals.
- Antenna: This receives radio waves and sends them to the head unit.
Common Car Stereo Problems in a 1996 Toyota Corolla
A malfunctioning car stereo can be incredibly frustrating. Here are some common problems you might encounter:
- No Power: This could be a blown fuse, a bad wiring connection, or a faulty head unit.
- No Sound: Possible culprits include blown speakers, damaged wiring, incorrect wiring connections, or a problem with the head unit’s amplifier.
- Poor Reception: This usually points to an issue with the antenna or its connection.
- Intermittent Problems: These can be tricky to diagnose and are often caused by loose connections, faulty grounds, or even temperature-related issues with components.
Identifying the Root Cause
To fix your stereo, you need to pinpoint the source of the problem. Here’s where a systematic approach comes in:
- Check the Fuse: Locate the fuse box (usually under the dashboard or hood) and check the fuse related to your car stereo. If it’s blown, replace it with a new one of the same amperage.
- Inspect the Wiring: Examine the wiring harness behind the stereo for any loose, disconnected, or damaged wires. Pay close attention to the ground wire, which should be securely connected to a metal part of the car’s chassis.
- Test the Speakers: You can test the speakers using a multimeter or a simple 9-volt battery. Connect the positive and negative terminals of the battery to the corresponding terminals on the speaker. If you hear a pop or crackling sound, the speaker is working.
 1996 Toyota Corolla Car Stereo Wiring Diagram
Tools for the Job
Before you start tinkering with wires, gather the following:
- Wiring Diagram: Crucial for understanding the wire color codes and connections. You can often find these online or in your car’s repair manual.
- Multimeter: Used to test for voltage, continuity, and resistance in electrical circuits.
- Electrical Tape: For insulating wire connections.
- Wire Strippers/Cutters: For preparing wires for connections.
- Screwdrivers: For removing screws and panels.
- Panel Removal Tools: To avoid damaging your dashboard while accessing the stereo.
Troubleshooting with Software: The Future is Here
While the multimeter and wiring diagram are invaluable, modern technology offers even more powerful solutions. Diagnostic software, like those offered by Cardiagtech, can interface with your car’s computer system, providing real-time data and pinpointing faults with incredible accuracy. This can save you hours of frustration and guesswork.
Getting Your Hands Dirty: Installation and Repair
With a good understanding of the problem and the right tools, you can now tackle the repair or installation:
- Disconnect the Battery: This prevents accidental shorts and potential damage to your electrical system.
- Remove the Old Stereo: Carefully pry off the dashboard trim panels to access the stereo mounting screws.
- Identify the Wires: Use your wiring diagram to match the wires from the new stereo or harness to the corresponding wires from your car.
- Connect the Wires: Ensure all connections are secure and insulated with electrical tape.
- Test the System: Before reinstalling everything, reconnect the battery and test the new stereo for functionality.
- Reassemble the Dashboard: Once you’re satisfied with the installation, carefully reassemble the dashboard panels.
FAQs: Common Questions About 1996 Toyota Corolla Car Stereo Wiring
Q: Can I install an aftermarket stereo in my 1996 Corolla?
A: Absolutely! A variety of aftermarket stereos are available, often with modern features like Bluetooth, USB connectivity, and Apple CarPlay/Android Auto integration.
Q: Where can I find a reliable wiring diagram for my specific model?
A: Online forums dedicated to Toyota Corollas, repair manuals (Haynes or Chilton are good options), and even some aftermarket stereo manufacturer websites offer wiring diagrams.
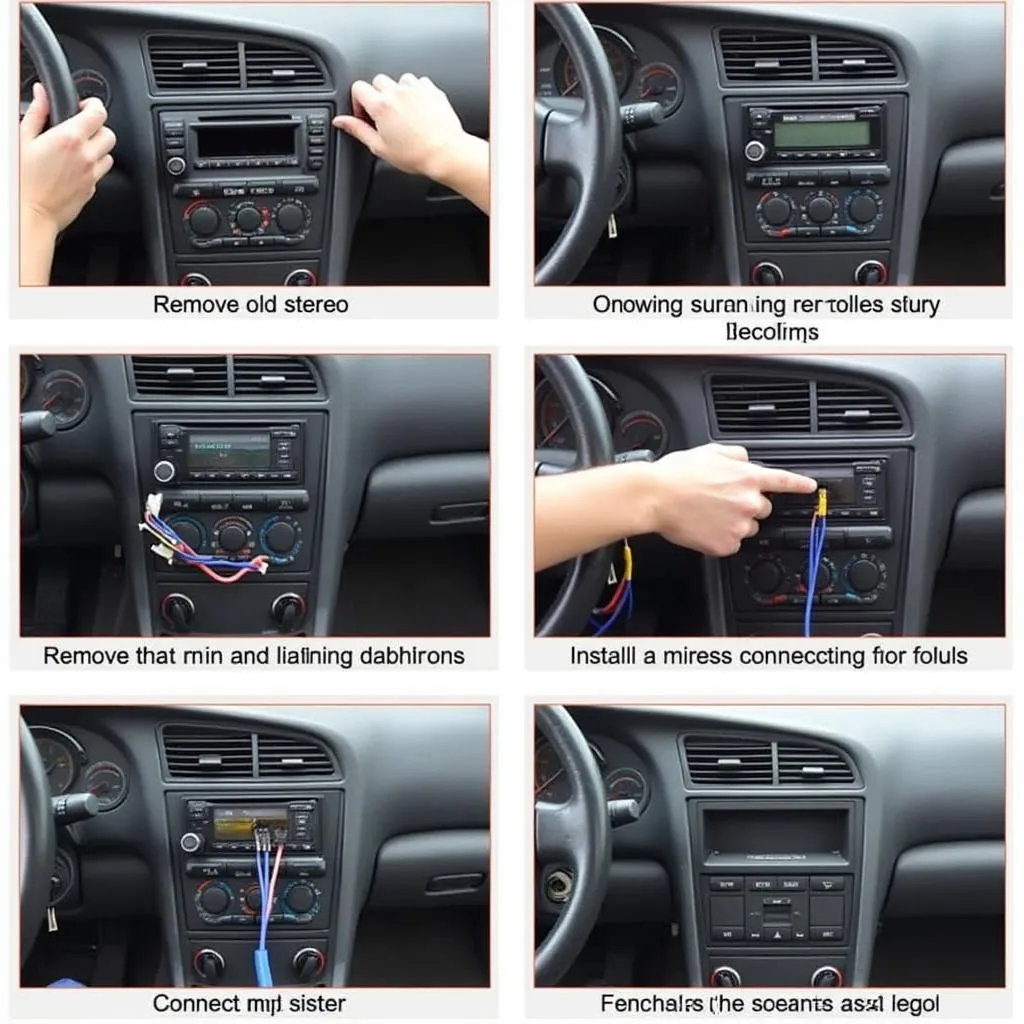 Car Stereo Installation Process in 1996 Toyota Corolla
Q: What if I’m not comfortable working with car electronics?
A: It’s perfectly fine if you’d rather leave it to the professionals. A qualified car audio technician or a mechanic specializing in car electronics can safely and correctly install your new stereo.
Get Back to Enjoying the Ride
Troubleshooting car stereo issues in your 1996 Toyota Corolla can be a manageable DIY project with the right information and a little patience. Remember, a clear wiring diagram is your best friend. And if you’re looking for a more technologically advanced solution to diagnose potential issues, consider exploring the diagnostic tools offered by CARDIAGTECH.