Upgrading your car’s audio system with a touch screen radio can completely revolutionize your driving experience. Not only do they look sleek and modern, but touch screen radios offer a suite of features that your old factory stereo could only dream of. Navigation, Bluetooth connectivity, smartphone integration – the possibilities are endless. While the thought of tackling this project yourself might seem daunting, it’s actually more achievable than you might think. Let’s break down the process step-by-step and get you on the road to enjoying your new sound system.
Understanding Your Car’s Audio System
Before diving into the installation, it’s important to familiarize yourself with your car’s existing audio setup.
Common Car Audio Problems
A lot can go wrong with car audio systems, especially in older vehicles. Some common issues include:
- Static or distorted sound: This could be due to loose wiring, a failing speaker, or problems with the head unit itself.
- No sound at all: This often points to a blown fuse, a wiring issue, or a problem with the amplifier.
- Intermittent sound: This can be one of the most frustrating issues, and it’s often caused by loose connections or a faulty head unit.
Why These Issues Occur
Car audio problems can stem from a variety of sources:
- Wiring Issues: Loose or corroded wires are common culprits, especially in older cars.
- Faulty Components: Like any electronic device, speakers, amplifiers, and head units can fail over time.
- Water Damage: Exposure to moisture can wreak havoc on your car’s audio system.
Diagnosing the Problem
Before you can install your new touch screen radio, you might need to figure out why your existing system isn’t working correctly (if at all).
Using Diagnostic Tools
Modern cars often have sophisticated onboard diagnostic systems. You can use a code reader, like those offered by Cardiagtech, to identify specific error codes related to your audio system.
Checking Connections
Even if you’re comfortable with a code reader, it’s wise to start with the simplest solution: checking the connections. Make sure all the wires connected to your existing head unit are secure and free of corrosion.
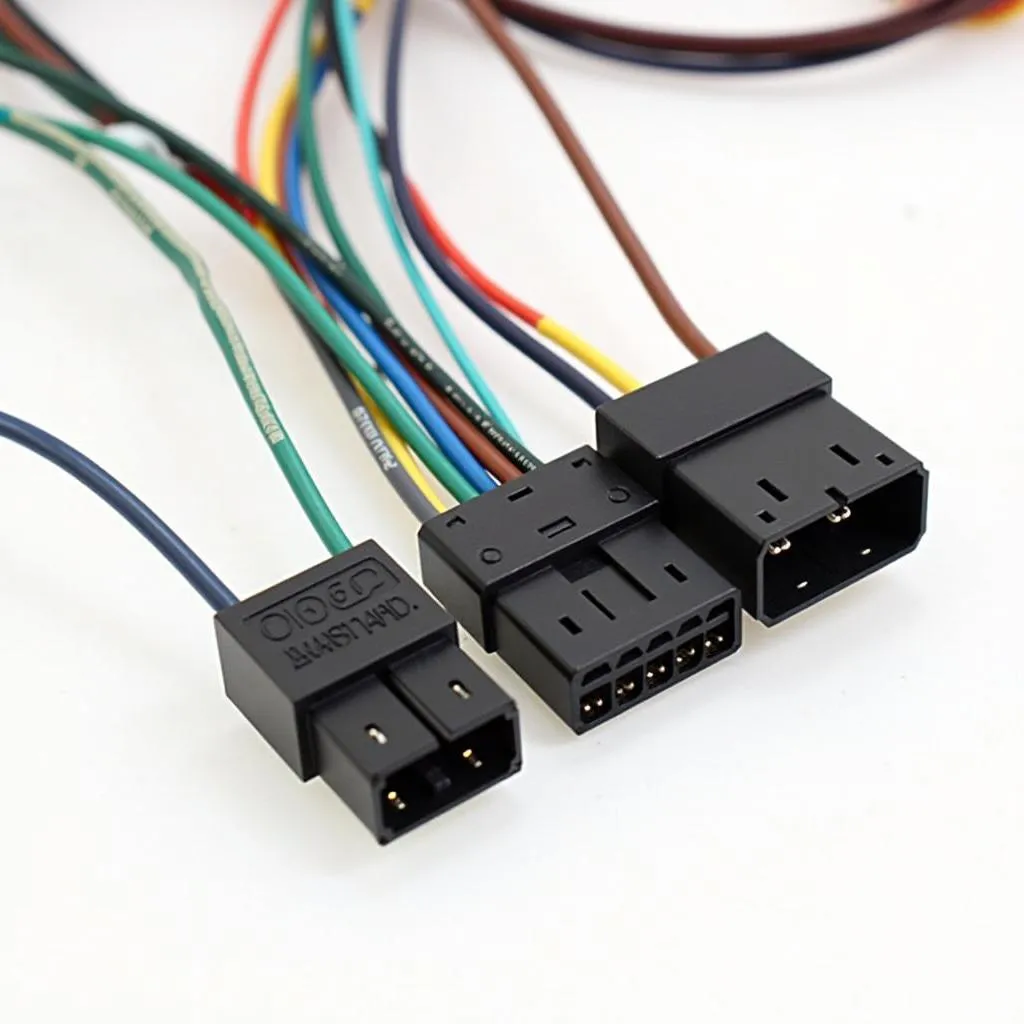 Car audio wiring harness
Gathering Your Tools and Equipment
Once you’ve assessed your existing system, it’s time to gather everything you need for the installation.
- Touch Screen Radio: This is the star of the show! Make sure you choose a model that’s compatible with your car’s make, model, and year.
- Dash Kit: This is a plastic piece that fits into your car’s dashboard opening, providing a seamless mount for the new radio.
- Wiring Harness: This connects your new radio to your car’s electrical system.
- Antenna Adapter: If your car has a factory amplified antenna, you’ll need an adapter to ensure proper reception.
- Tools: You’ll need basic tools like a screwdriver, wire strippers, electrical tape, and possibly a panel removal tool.
Installation Steps
Now, let’s get down to business and install that new touch screen radio.
- Disconnect the Battery: Safety first! Always disconnect your car’s negative battery cable before working on any electrical components.
- Remove the Old Radio: Use the panel removal tool (if needed) to carefully pry open the dashboard trim surrounding your old radio. Once loose, unscrew and remove the old radio, disconnecting the wiring harness and antenna.
- Prepare the New Radio: Connect the wiring harness adapter to the new radio’s wiring harness. Make sure all the wires are properly connected and secured.
- Install the Dash Kit: Insert the dash kit into the dashboard opening. This will create a secure and aesthetically pleasing mount for your new radio.
- Connect the New Radio: Carefully slide the new radio into the dash kit until it clicks into place. Connect the antenna and the wiring harness to the new radio.
- Test the New System: Before putting everything back together, reconnect the negative battery cable and turn on the car to test the new radio. Make sure everything is working properly, including the sound, Bluetooth connectivity, and any other features.
- Reassemble the Dashboard: Once you’re satisfied with the installation, carefully reassemble the dashboard trim, ensuring all clips and screws are securely fastened.
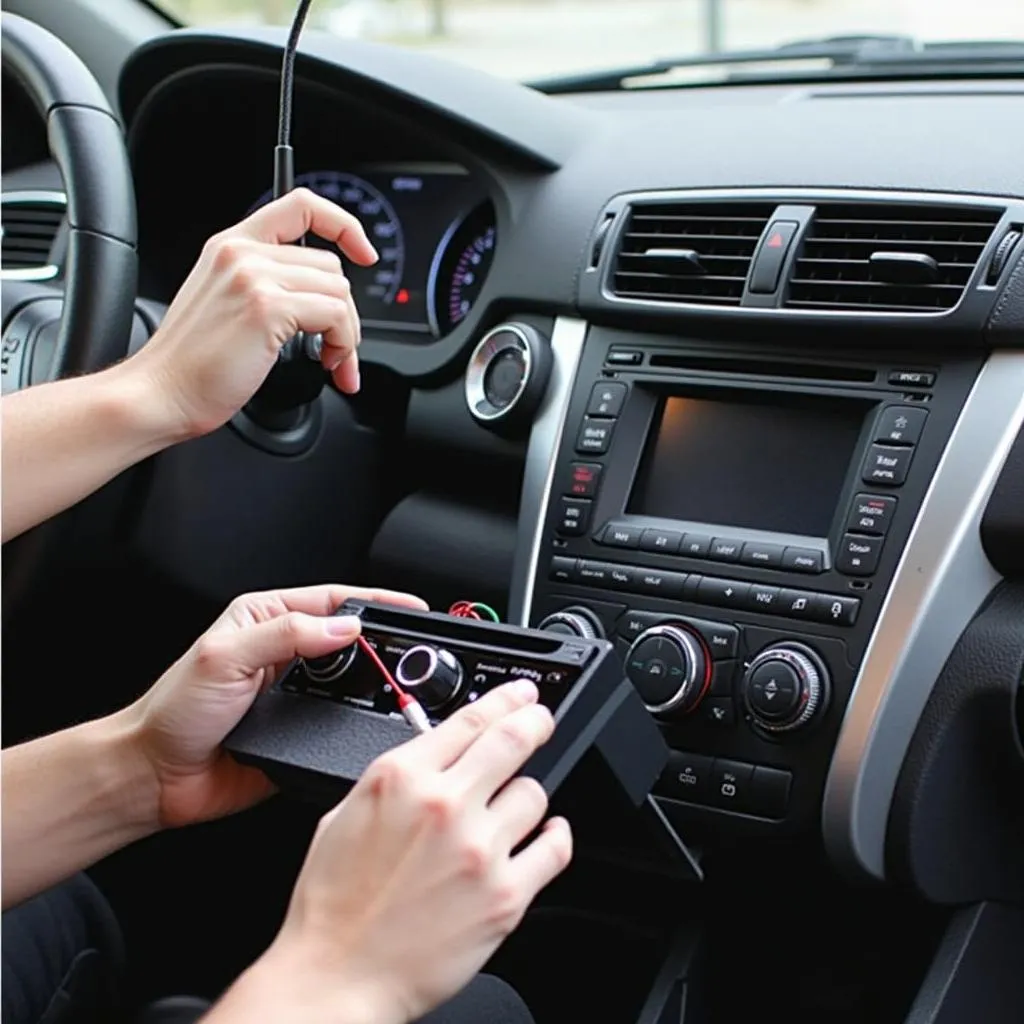 Installing a touch screen car radio
FAQs about Car Touch Screen Radio Installation
Q: Can I install a touch screen radio myself, or do I need a professional?
A: Many people successfully install their own touch screen radios. However, if you’re not comfortable working with car electronics, it’s always best to consult a professional.
Q: What should I do if my new radio doesn’t power on?
A: Double-check all the connections, especially the power and ground wires. Ensure the fuse connected to the radio’s power circuit is not blown.
Q: Can I still use my steering wheel controls with an aftermarket radio?
A: Yes, but you’ll likely need a steering wheel control adapter to make them compatible with your new radio.
Cardiagtech for Your Automotive Needs
Speaking of professional help, Cardiagtech offers a range of products and services that can assist with your car audio and diagnostic needs. From advanced code readers to expert advice, Cardiagtech can help you troubleshoot issues and keep your car running smoothly.
Conclusion
Installing a touch screen radio in your car can significantly upgrade your driving experience. While the process involves a few steps, with the right tools, a bit of patience, and this guide, you can accomplish this project and enjoy your favorite tunes and modern features on the road. For those who prefer expert assistance, CARDIAGTECH and its network of certified professionals are always ready to help.