“The radio stopped working again?” Sound familiar? Dealing with a faulty car radio can be frustrating, especially if you’re unsure where to start. Whether it’s a jumbled mess of wires behind the dash or a persistent electrical gremlin, understanding your Philips Car Radio Wiring Diagram is key to getting your tunes pumping again.
Why a Wiring Diagram Matters
Your car radio isn’t just a standalone device; it’s intricately connected to your vehicle’s electrical system. The wiring diagram is essentially a roadmap, guiding you through the network of wires and connections that power and control your radio. Without it, troubleshooting becomes a game of chance, potentially leading to more damage and headaches.
Common Car Radio Issues
Before diving into the wiring, let’s look at some common culprits behind car radio woes:
- No Power: This is often traced back to a blown fuse, a disconnected power wire, or a problem with the ignition switch.
- Poor Reception: A weak antenna signal, damaged antenna cable, or even interference from other electronics can cause static and fuzzy reception.
- Sound Distortion: Distorted audio can signal issues with the speakers themselves, the wiring to the speakers, or even an internal fault within the radio unit.
- Bluetooth Connectivity Problems: Intermittent pairing, choppy audio, or complete inability to connect are common frustrations in our wireless world.
Identifying the Root Cause
Pinpointing the source of your car radio problem is the first step to a solution. Here’s where your detective skills come in:
1. Check the Basics
- Fuses: Locate the fuse box (usually under the dash or in the engine bay) and consult your owner’s manual for the specific radio fuse. A blown fuse will have a broken wire inside.
- Wiring Harness: Carefully examine the wiring harness at the back of the radio for loose connections, damaged wires, or corrosion.
- Antenna: Ensure the antenna is securely attached to the radio and visually inspect the cable for any breaks or damage.
2. Software or Hardware?
Sometimes, the issue isn’t with the physical components but with the radio’s software. Outdated firmware or corrupted data can lead to various problems.
“Modern vehicles rely heavily on software, and car radios are no exception,” says automotive electronics expert, Dr. Emily Carter, author of “Automotive Electronics Demystified.” “A simple software update can often resolve seemingly complex issues.”
If basic checks don’t reveal the problem, it might be time to consult a professional mechanic or a specialized service like Cardiagtech, which offers remote diagnostics and software solutions for a range of car electronic issues.
 Philips car radio wiring harness close-up
Philips Car Radio Wiring Diagram Decoded
Navigating a wiring diagram might seem daunting, but once you understand the basics, it becomes a valuable tool. Here’s a simplified breakdown:
- Power Wires: Typically, a red wire represents the main power supply (connected to the battery), a yellow wire provides constant power for memory functions, and a black wire serves as the ground connection.
- Speaker Wires: These wires come in pairs, with each pair designated for a specific speaker (front left, front right, rear left, rear right). Color coding varies, but the diagram will indicate the purpose of each wire.
- Antenna Wire: Usually a single, thicker wire, often blue or white, connects the radio to the antenna.
- Other Connections: Depending on your radio’s features, you might find wires for amplifiers, steering wheel controls, or auxiliary input.
Essential Tools for the Job
Before you start fiddling with wires, gather these tools:
- Wiring Diagram: This is your most crucial tool! You can often find it in your owner’s manual or by searching online using your specific car make, model, and radio model number.
- Multimeter: A multimeter helps test for continuity, voltage, and resistance, aiding in identifying faulty wires or connections.
- Wire Strippers and Crimpers: These are essential for repairing or replacing damaged wires and connectors.
- Electrical Tape: Use electrical tape to insulate and protect exposed wires.
Troubleshooting with Your Diagram
With your diagram and tools ready, you can begin troubleshooting:
- Identify the Problem: Use the common issues listed earlier and your observations to narrow down the potential cause.
- Consult the Diagram: Locate the corresponding wires and connections on the diagram related to the suspected problem area.
- Test for Power: Use your multimeter to verify that power is reaching the radio and other relevant components.
- Check for Continuity: Test the continuity of wires to ensure there are no breaks or loose connections.
- Inspect the Ground: A poor ground connection can cause a variety of problems. Ensure the ground wire is securely attached to a clean, metal surface on the car’s chassis.
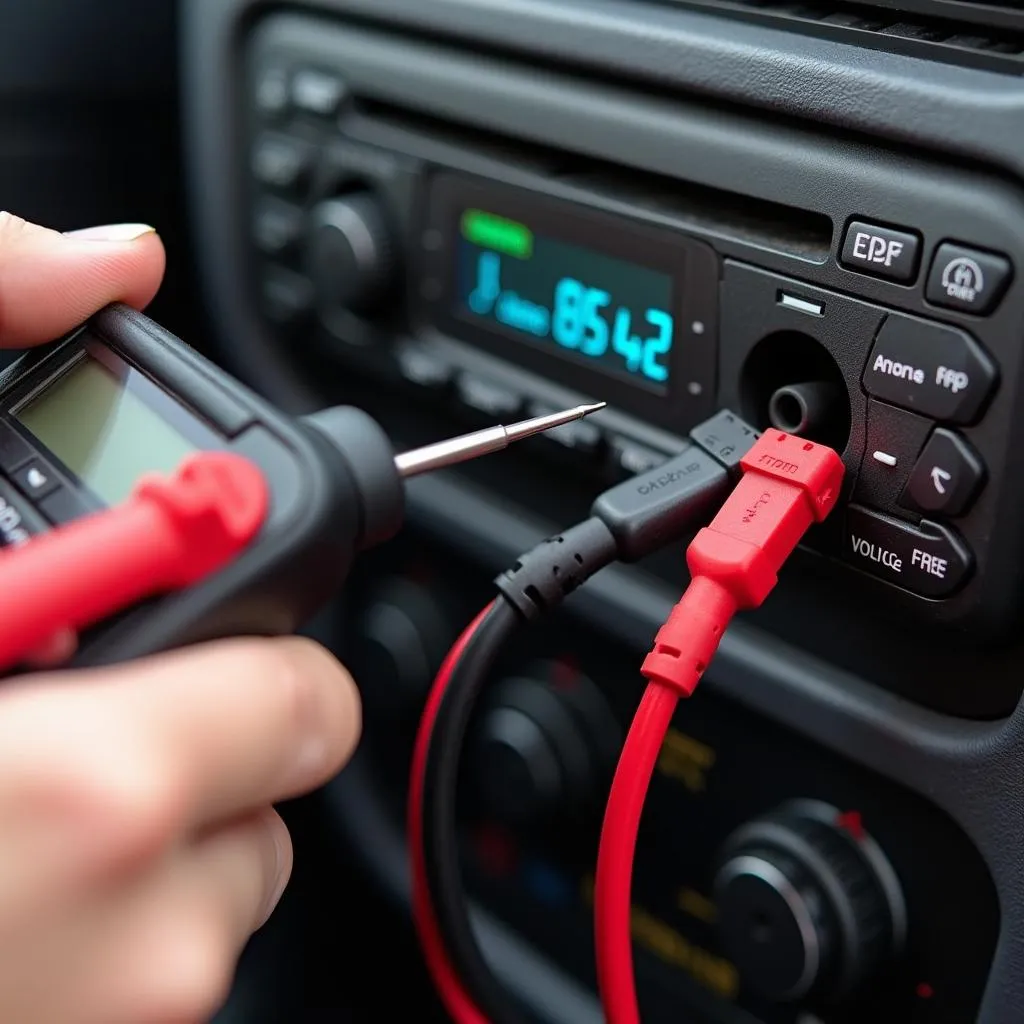 Testing a car radio circuit with a multimeter
When to Call a Professional
While DIY fixes are satisfying, some situations warrant professional help:
- You’re uncomfortable working with car electronics.
- The wiring diagram seems overly complex.
- You suspect the problem lies within the radio unit itself.
- Your troubleshooting efforts haven’t yielded any results.
FAQs about Car Radio Wiring Diagrams
Q: Can I use any wiring diagram for my Philips car radio?
A: No, you need the diagram specific to your car’s make, model, and year, as well as the model of your Philips radio.
Q: Where can I find a reliable wiring diagram?
A: Your car’s owner’s manual is a good starting point. You can also find diagrams online through reputable sources or by contacting Philips directly.
Q: What if I can’t read a wiring diagram?
A: Don’t worry! Many resources online break down the elements of a wiring diagram. Alternatively, seeking help from a car audio professional is always a wise choice.
Get Connected with Confidence
Troubleshooting car audio problems doesn’t have to be a frustrating experience. With the right knowledge and tools, you can often get your Philips car radio up and running again. Remember, your wiring diagram is your best friend throughout the process.
If you’re still facing challenges or prefer expert assistance, don’t hesitate to reach out to Cardiagtech. Our team specializes in remote diagnostics, programming, and software solutions for a wide range of car electronic issues. Contact us at +1 (641) 206-8880, email us at [email protected], or visit our office at 276 Reock St, City of Orange, NJ 07050, United States.
Let CARDIAGTECH help you get back to enjoying your favorite tunes on the road!