The allure of a modern GM radio in your classic ride is undeniable. Crisp sound, Bluetooth connectivity, maybe even Apple CarPlay – who wouldn’t want that? But before you grab your wire strippers, be warned: it’s not just a simple swap. The wiring harnesses often differ significantly, meaning you’ll need a bit of electrical know-how to get the job done right.
Understanding the Challenge: Why Wiring Adapters Aren’t Always Enough
You might be tempted to snag a universal wiring adapter and call it a day. However, these adapters often cater to basic functions like power, speakers, and ground. Newer GM radios, especially those with advanced features, utilize data signals that older cars simply weren’t designed for.
Common Issues When Wiring a Newer GM Radio in an Older Car
- No Power: This is the most basic, and often points to an incorrectly wired power or ground connection.
- Radio Turns On, No Sound: This usually indicates an issue with the speaker wiring or the amplifier turn-on signal.
- Steering Wheel Controls Don’t Work: Older cars likely don’t have the necessary wiring or modules to communicate with the newer radio’s steering wheel control interface.
- Loss of Features: Advanced features like Bluetooth, OnStar, or even chimes might not function if the data wires aren’t properly connected.
Diagnosing the Problem: More Than Just Crossing Wires
1. Check for Power and Ground:
- Use a multimeter to verify that you have a solid 12V power supply to the radio’s main power wire.
- Ensure the ground wire is securely connected to a clean, unpainted metal surface on the vehicle’s chassis.
2. Identify Missing Signals:
- Consult the wiring diagrams for both your older car and the newer GM radio. Pay close attention to data wires (often labeled CANbus or Class 2).
3. Consider Professional Diagnosis:
- For complex electrical issues, professional diagnostic tools like those offered by Cardiagtech can pinpoint faulty wiring or module communication errors. These tools can save you countless hours of troubleshooting.
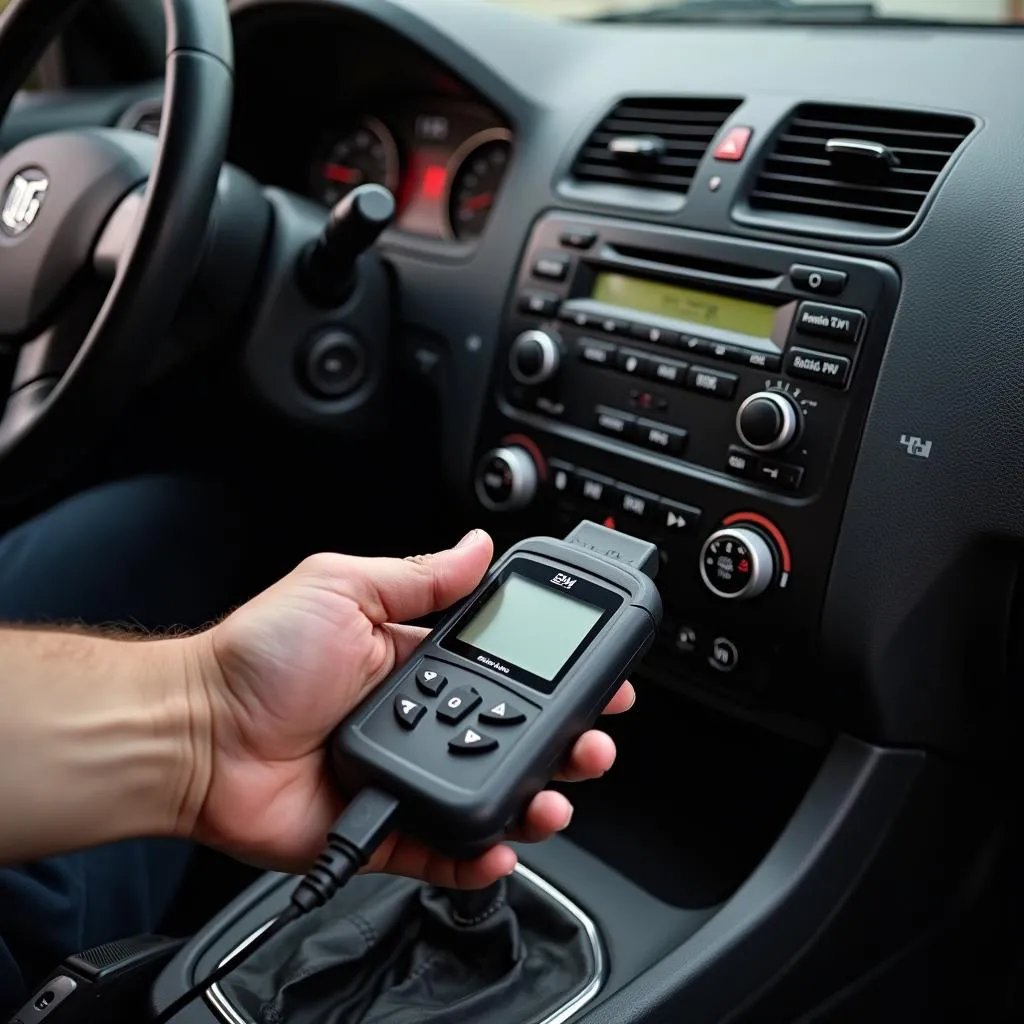 Car Diagnostic Tool Checking Wiring Issues
Gearing Up for the Installation: Essential Tools and Resources
- Wiring Diagrams: Absolutely crucial! Obtain diagrams for both your older car and the newer GM radio.
- Multimeter: Test for power, continuity, and resistance in your wiring.
- Wire Strippers, Crimpers, and Connectors: For making clean and secure connections.
- Soldering Iron and Solder (Optional): Provides the most reliable and permanent connections.
- Heat Shrink Tubing: Protects your connections from the elements and prevents shorts.
Step-by-Step Guide: Making the Connections
Important: This is a general guide. Always refer to the wiring diagrams specific to your vehicles.
- Disconnect the Battery: Safety first!
- Remove the Old Radio: Carefully unplug the wiring harness and antenna.
- Identify Power, Ground, and Speaker Wires: Use your wiring diagrams to match the wires on the new radio’s harness to the corresponding wires in your car.
- Connect Basic Functions: Begin by connecting the power, ground, and speaker wires.
- Address Data Wires: If your new radio requires data connections, carefully identify and connect them according to the diagrams. This might involve tapping into existing wires or running new ones to specific modules.
- Antenna Adapter: A GM antenna adapter may be necessary to connect your factory antenna to the new radio.
- Test the Radio: Before fully reassembling the dash, reconnect the battery and test all radio functions.
- Secure Wiring and Reassemble: Once everything checks out, neatly bundle and secure all wiring, and reinstall the radio and dash components.
FAQs: Addressing Common Concerns
Can I retain steering wheel controls? You might need an aftermarket adapter specifically designed for your car and the new radio.
What if my car doesn’t have a dedicated amplifier turn-on wire? You can often use an accessory power source that turns on with the ignition.
Do I need to reprogram the new radio to my car? Some newer GM radios might require programming to function properly with your specific vehicle’s systems.
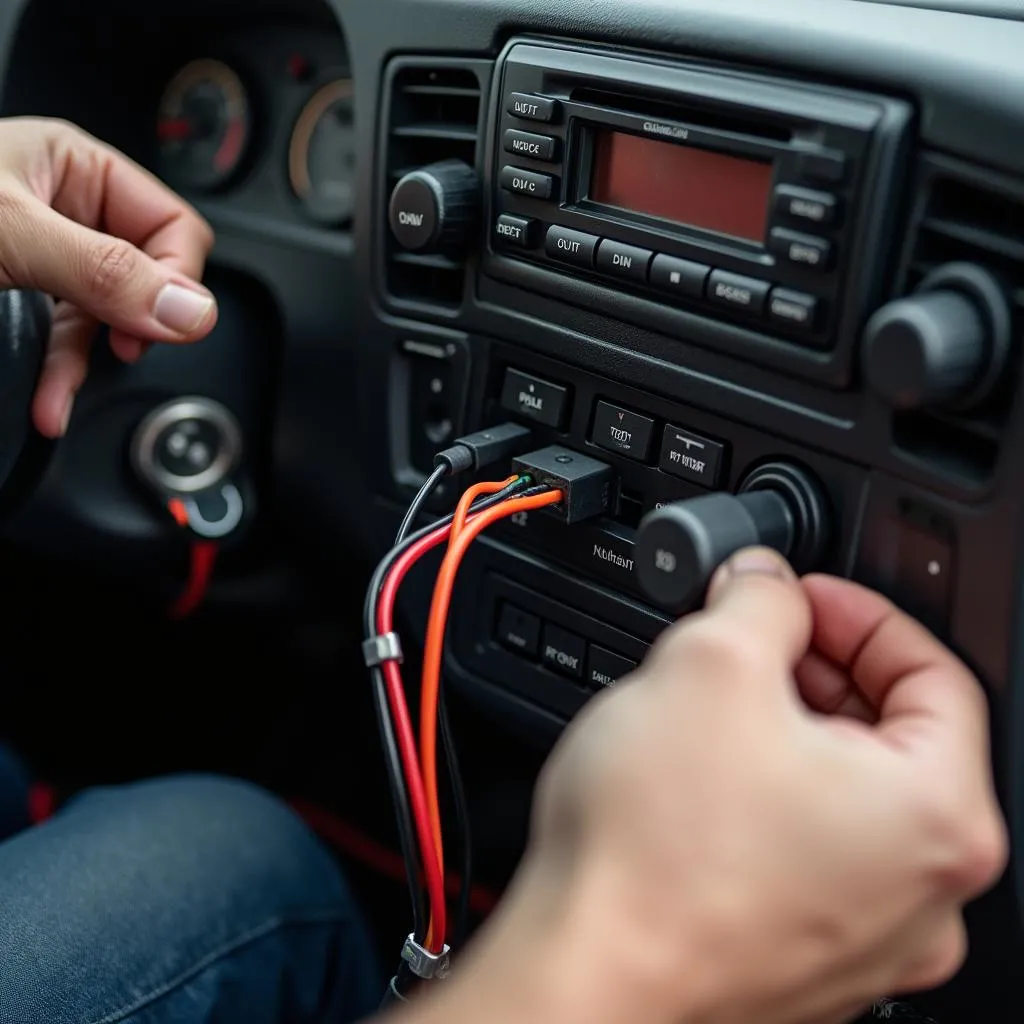 Mechanic Installing New GM Radio in Older Car
Cardiagtech: Your Partner in Automotive Diagnostics and Repair
Upgrading your car’s audio system can greatly enhance your driving experience. However, wiring a newer GM radio in an older car can be a complex undertaking. If you’re uncomfortable with electrical work or encounter difficulties, don’t hesitate to reach out to the experts at Cardiagtech.
Contact us today for professional assistance with your car audio installation and diagnostics:
Phone: +1 (641) 206-8880
Email: CARDIAGTECH[email protected]
Office: 276 Reock St, City of Orange, NJ 07050, United States
We offer a range of diagnostic and programming services to help get your car’s audio system sounding its best! For more information on how we can help you upgrade your car’s audio system, check out our articles on Bluetooth car radio options and adding Bluetooth to older car radios.