A glowing brake warning light on your dashboard can be a cause for concern. While it’s crucial to never ignore this signal, understanding its root causes and potential solutions can save you time, money, and unnecessary stress. This guide explores the common reasons behind a lit brake warning light and provides a step-by-step approach to help you address the issue effectively.
Deciphering the Brake Warning Light
The brake warning light, often symbolized by an exclamation mark within a circle or the word “BRAKE,” serves as your car’s primary communication channel for brake system issues. When illuminated, it signifies one or more of the following:
-
Low Brake Fluid: This is the most frequent culprit. A leak in the brake lines, worn brake pads, or a failing brake master cylinder can deplete brake fluid levels, triggering the warning light.
-
Engaged Parking Brake: It may sound obvious, but a partially engaged parking brake can be easily overlooked. Always double-check your parking brake release before assuming a more severe problem.
-
Faulty Brake Light Switch: The brake light switch, activated when you press the brake pedal, can malfunction, leading to the warning light illuminating even if your brake system functions correctly.
-
ABS Issue: Modern vehicles equipped with Anti-lock Braking Systems (ABS) have a dedicated warning light. However, in some cases, a general brake warning light might illuminate to signal an ABS malfunction.
 Checking brake fluid level
Troubleshooting the Brake Warning Light: A Step-by-Step Guide
Before attempting any repairs, it’s essential to ensure your safety and proceed with caution. If you’re uncomfortable working on your vehicle, consult a qualified mechanic for diagnosis and repair.
Step 1: Check Your Parking Brake
Begin with the simplest solution. Ensure your parking brake is fully disengaged. If the light remains on, move to the next step.
Step 2: Inspect Brake Fluid Level
Locate the brake fluid reservoir under your hood. It’s typically a translucent plastic container with “DOT 3” or “DOT 4” markings.
- If the fluid level is low: Add the recommended brake fluid type to the “MAX” line.
- If the fluid level is adequate: Proceed to the next step.
Step 3: Examine Brake Lines and Hoses
Visually inspect the brake lines and hoses running from the master cylinder to each wheel for any signs of leaks, cracks, or damage.
- If you detect a leak: Do not drive your vehicle. Contact a qualified mechanic immediately for repair.
- If no leaks are visible: Proceed to the next step.
 Inspecting Brake Lines for Leaks
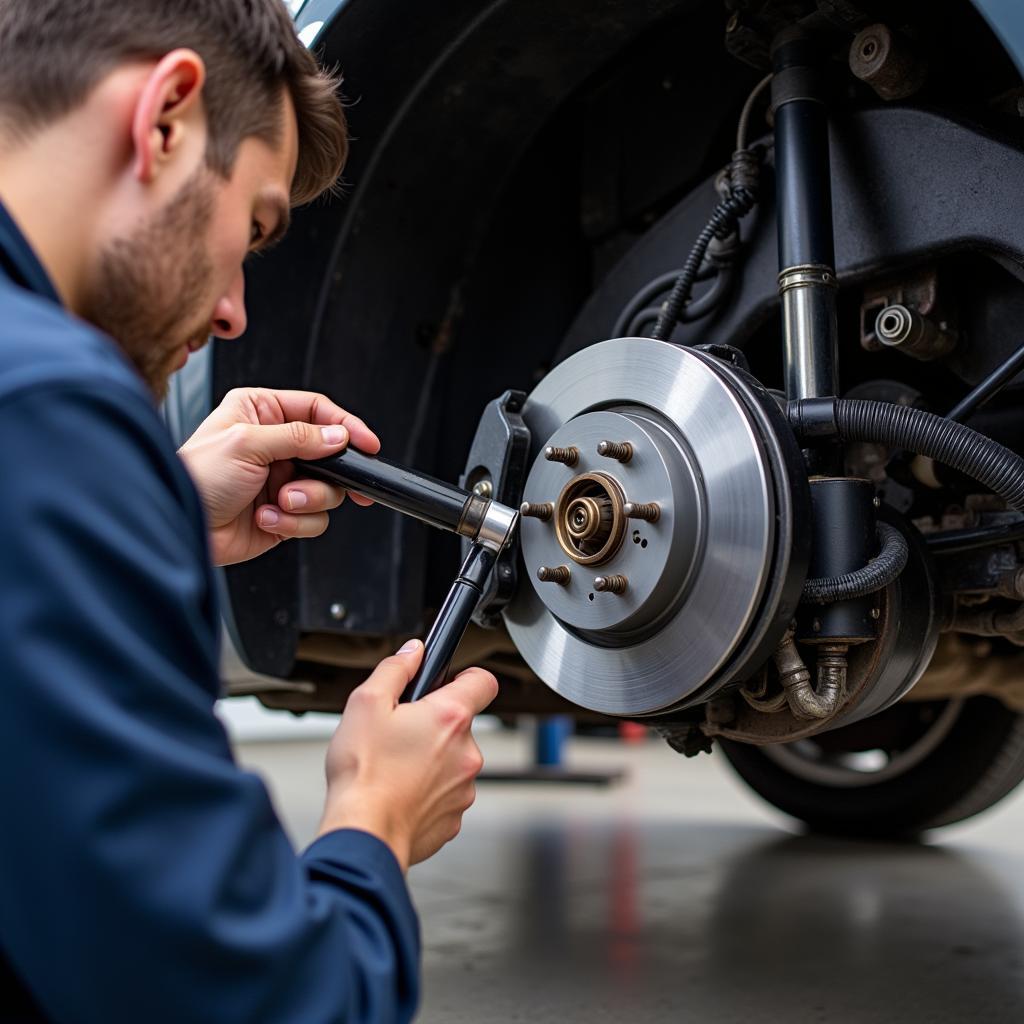
Step 4: Evaluate Brake Pad Wear
Worn brake pads contribute to low brake fluid levels. While visually inspecting the pads requires removing a wheel, you can sometimes gauge their condition through the wheel spokes. If your brake pads are excessively worn, they require immediate replacement.
Step 5: Seek Professional Diagnostics
If the previous steps haven’t pinpointed the issue, it’s time to seek professional help. Advanced diagnostics, often requiring specialized tools and software, can identify faults in the ABS system, brake light switch, or other electrical components.
“A brake warning light should never be ignored,” emphasizes automotive electronics expert, David Miller, “Early detection and addressing the root cause can prevent more costly repairs and ensure your safety on the road.”
Remote Diagnostics and Software Solutions
In some instances, remote diagnostics and software solutions can provide insights into the brake warning light issue. By connecting your vehicle to a diagnostic tool, qualified technicians can remotely access your car’s computer system, read error codes, and analyze data to pinpoint the problem’s source. This approach can be particularly helpful for complex electrical or sensor-related faults within the brake system.
2004 buick rendezvous brake fluid warning light wont turn off
mercedes sprinter brake pad warning light reset
Turning Off the Brake Warning Light:
Once you’ve addressed the underlying problem causing the brake warning light to illuminate, the light should turn off automatically. However, in some cases, a manual reset might be necessary. This usually involves using an OBD-II scanner to clear the error codes or performing a specific reset procedure outlined in your vehicle’s repair manual.
honda brake warning light car wont start
seat leon mk2 dash warning lights
Brake Warning Light: FAQs
Q: Can I drive with the brake warning light on?
A: It’s strongly discouraged. Driving with a lit brake warning light jeopardizes your safety and can lead to brake failure.
Q: How much does it cost to fix a brake warning light issue?
A: The cost varies depending on the underlying problem. Simple fixes like adding brake fluid might cost a few dollars, while more complex repairs could range from hundreds to thousands.
Q: How often should I check my brake fluid?
A: It’s recommended to check your brake fluid level at least once a month and more frequently if you notice any changes in brake pedal feel or performance.
Q: Can I add any brake fluid to my car?
A: No. Use only the brake fluid type specified in your owner’s manual (DOT 3 or DOT 4).
2008 chrysler town and country brake warning light on
Prioritizing Safety: Your Brake System Matters
Remember, a properly functioning brake system is paramount for your safety and the safety of others on the road. While this guide provides a starting point for understanding and potentially resolving a brake warning light issue, never hesitate to seek professional assistance. Regular maintenance, timely repairs, and addressing warning lights promptly will ensure your brakes remain in optimal condition, keeping you safe on every journey.