Restoring an antique car to its former glory is a rewarding endeavor. However, vintage vehicles often lack modern safety features, including a dedicated parking brake warning light. This guide explores the ins and outs of parking brake warning light kits for antique cars, helping you choose, install, and troubleshoot this valuable safety upgrade.
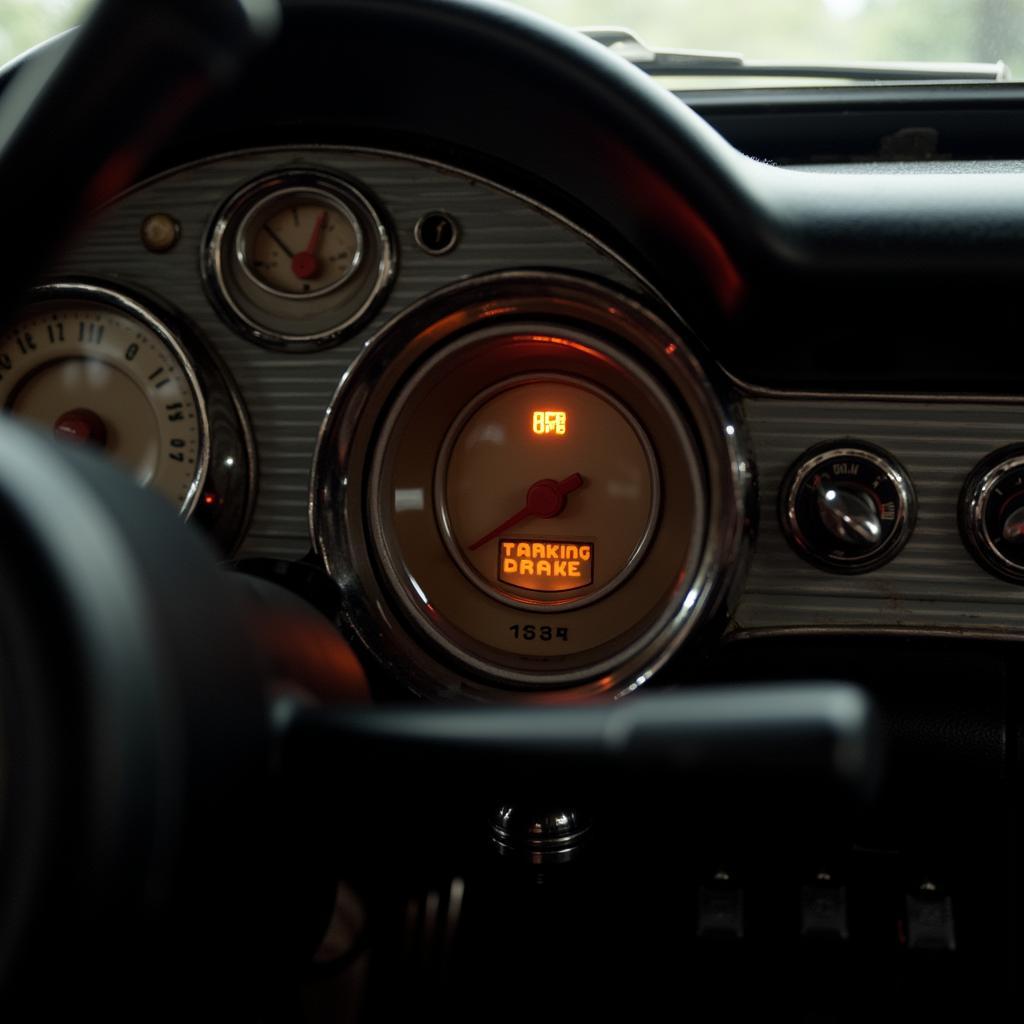 Parking Brake Warning Light on Dashboard
Understanding the Importance of a Parking Brake Warning Light
While seemingly insignificant, a parking brake warning light serves a crucial safety function. It provides a visual reminder that your parking brake is engaged, preventing accidental driving with the brake on, which can lead to damage and potential hazards.
For vintage car enthusiasts, integrating this modern safety feature can significantly enhance your classic car driving experience.
Choosing the Right Parking Brake Warning Light Kit
Selecting the appropriate kit is crucial for a seamless installation process. Here’s what to consider:
- Voltage Compatibility: Ensure the kit aligns with your antique car’s electrical system (typically 6V, 12V, or 24V).
- Type of Switch: Kits usually come with a normally open (NO) or normally closed (NC) switch. Choose the one that aligns with your car’s wiring system.
- Light Style: From classic incandescent bulbs to modern LEDs, select a light that complements your dashboard’s aesthetics.
- Installation Complexity: Some kits offer simple plug-and-play mechanisms, while others require more intricate wiring. Assess your comfort level with automotive electrical systems.
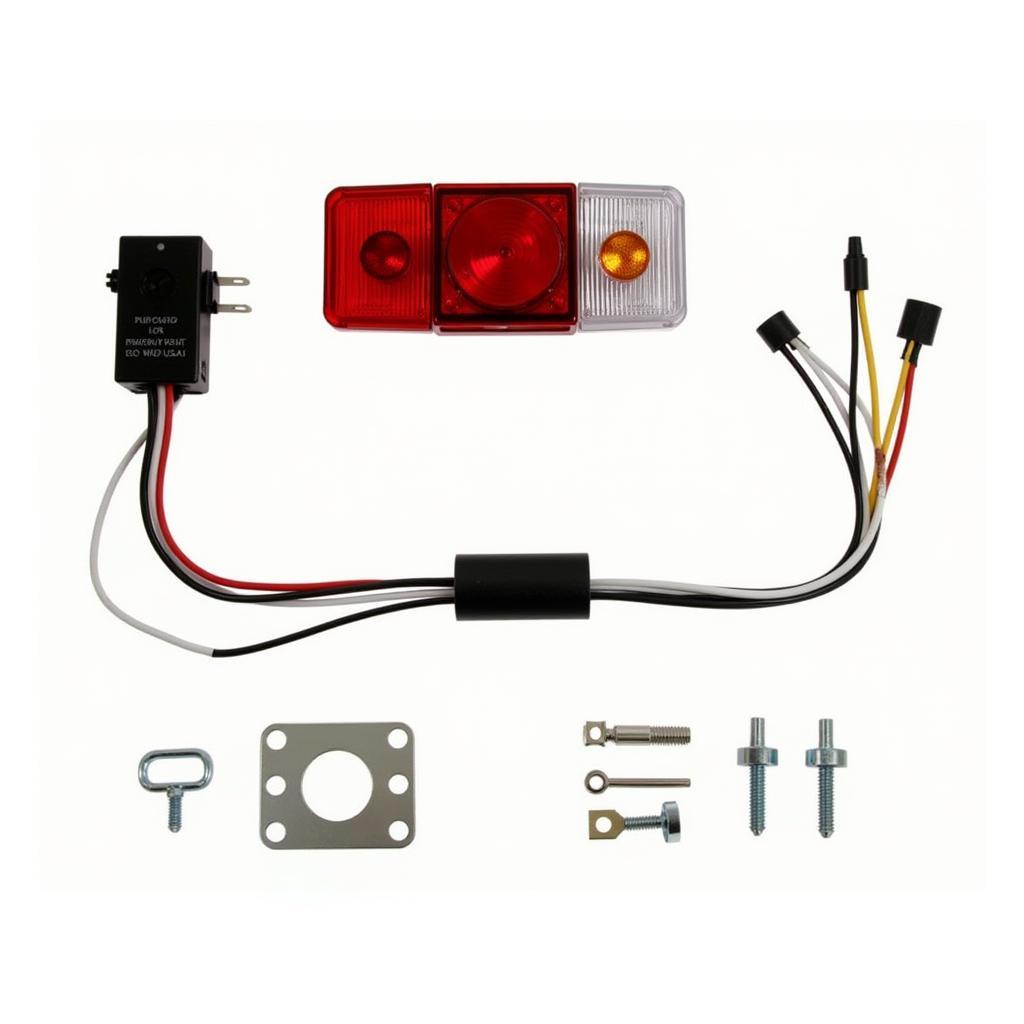 Universal Parking Brake Warning Light Kit
Installing Your Parking Brake Warning Light Kit
While the specifics vary depending on the kit and car model, the general installation process remains relatively consistent:
- Disconnect the Battery: Always prioritize safety by disconnecting the negative battery terminal to prevent electrical mishaps.
- Mount the Warning Light: Find a suitable location on your dashboard for the warning light, ensuring it’s visible and accessible.
- Install the Switch: The switch typically mounts near the parking brake lever, activating when the brake is engaged.
- Connect the Wiring: Follow the kit’s wiring diagram meticulously, connecting the switch, light, and power source.
- Test the System: Reconnect the battery and test the warning light by engaging and disengaging the parking brake.
“Always refer to your specific kit’s installation manual, as instructions can vary. If you’re uncomfortable with electrical work, consult a qualified mechanic.” – John Miller, Certified Automotive Electrician.
Troubleshooting Common Issues
Encountering issues after installation? Here are some common problems and their solutions:
- Light Doesn’t Illuminate: Check the bulb, wiring connections, and fuse related to the parking brake circuit.
- Light Stays On Constantly: Verify the switch’s functionality and adjust its positioning if necessary.
- Dim Light: Ensure the power and ground connections are secure and clean.
Conclusion
Adding a parking brake warning light to your antique car is a practical and achievable upgrade that enhances safety and peace of mind. By following this guide, you can confidently choose and install the right kit for your vintage vehicle, ensuring a smoother and safer driving experience.
Remember, a well-maintained antique car is a joy to drive, and prioritizing safety features like a parking brake warning light ensures you can enjoy your classic for years to come.