The brake pad warning light on your E46 BMW is an essential safety feature designed to alert you of potential braking issues. When illuminated, it typically indicates that your brake pads have worn down to a point where they require replacement. Ignoring this warning can lead to reduced braking performance and potential safety hazards.
This comprehensive guide will delve into the common causes of the E46 brake pad warning light, how to diagnose the problem, and the steps involved in replacing your brake pads.
Understanding Your E46 Brake Pad Warning System
The brake pad warning light system on your E46 operates on a simple yet effective principle. A sensor, known as a brake pad wear sensor, is embedded within the brake pad material. As the brake pad wears down with use, this sensor eventually comes into contact with the brake rotor. This contact completes an electrical circuit, triggering the warning light on your dashboard.
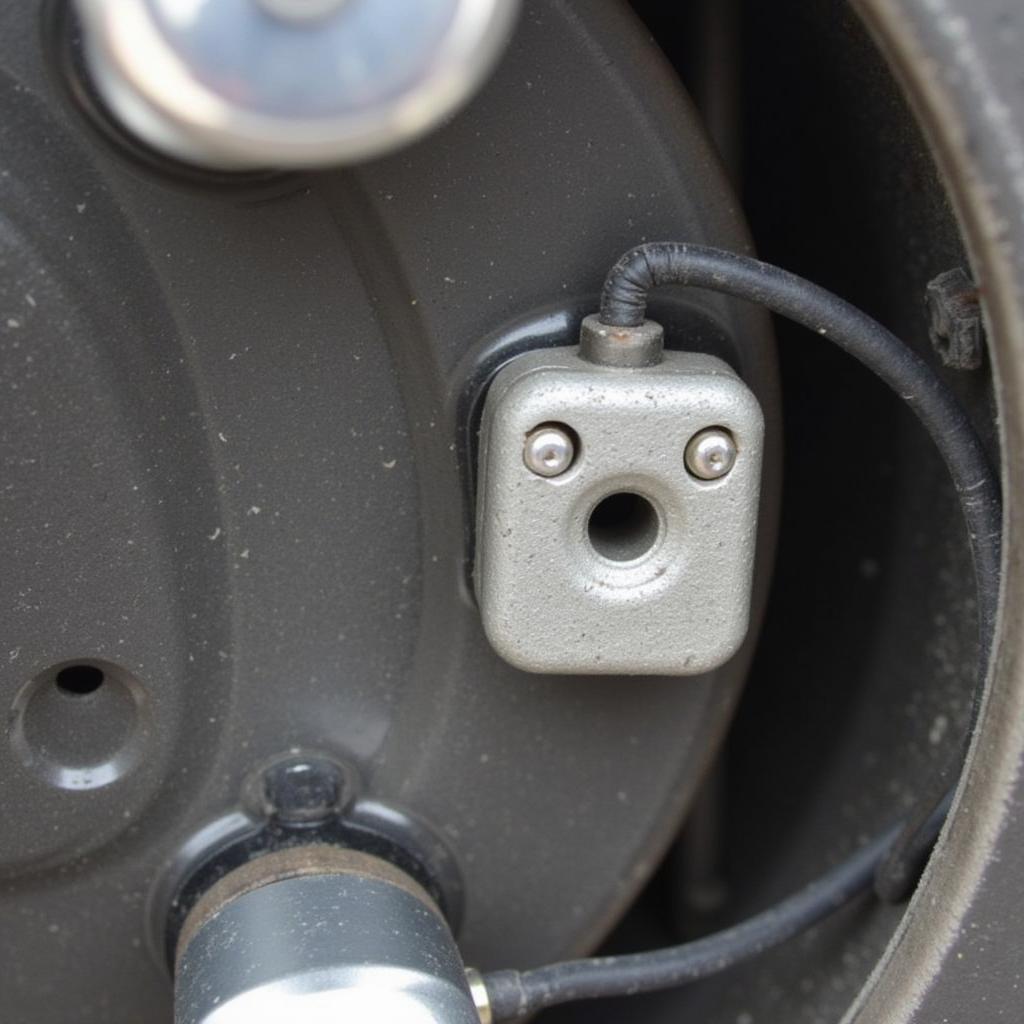 E46 Brake Pad Wear Sensor
Common Causes of an Illuminated Brake Pad Warning Light
While worn brake pads are the most common culprit behind an illuminated warning light, there are a few other possibilities:
- Worn brake pad wear sensor: The sensor itself can become damaged or worn out over time, triggering a false warning.
- Damaged wiring: The wiring harness connecting the sensor to the vehicle’s electrical system can become frayed, corroded, or disconnected, disrupting the signal.
- Faulty brake pad wear sensor circuit: In rare cases, the issue may lie within the electrical circuit itself, requiring specialized diagnostic equipment to identify.
Diagnosing the Problem
Before assuming you need new brake pads, it’s essential to confirm the root cause of the illuminated warning light:
- Check Your Brake Pads: Visually inspect your brake pads through the wheel spokes. If the pad material is less than 1/4 inch thick, they likely need replacing.
- Inspect the Brake Pad Wear Sensor: Examine the sensor for any signs of damage, such as fraying, cuts, or disconnections.
- Consult a Mechanic: If you’re unsure or uncomfortable inspecting these components yourself, it’s always best to seek the expertise of a qualified mechanic. They can accurately diagnose the problem and recommend the appropriate course of action.
Replacing Your E46 Brake Pads
Replacing your E46 brake pads is a relatively straightforward task that can be completed with basic tools and some mechanical aptitude. However, it’s always recommended to consult your vehicle’s service manual for specific instructions and torque specifications.
Here’s a general overview of the process:
- Gather Your Tools and Materials: You’ll need new brake pads (compatible with your E46 model), a C-clamp, a wrench set, a tire iron, and a jack.
- Loosen the Lug Nuts: Use the tire iron to slightly loosen the lug nuts on the wheel where you’ll be replacing the brake pads.
- Lift the Vehicle: Safely lift the vehicle using the jack and secure it with jack stands.
- Remove the Wheel: With the vehicle lifted, remove the lug nuts completely and take off the wheel.
- Compress the Brake Caliper Piston: Use the C-clamp to carefully compress the brake caliper piston back into its housing.
- Remove the Old Brake Pads: Once the caliper piston is compressed, you can remove the old brake pads from the caliper bracket.
- Install the New Brake Pads: Secure the new brake pads in the caliper bracket, ensuring they are properly seated.
- Reassemble the Caliper: Reinstall the caliper and tighten all bolts to the manufacturer’s specified torque.
- Reinstall the Wheel: Place the wheel back onto the hub, tighten the lug nuts by hand, and then lower the vehicle to the ground before fully tightening them with the tire iron.
- Test Your Brakes: Before driving, pump the brake pedal several times to restore pressure and ensure the brakes are functioning correctly.
Conclusion
Addressing an illuminated E46 brake pad warning light is crucial for maintaining your vehicle’s safety and performance. Regular brake inspections, timely brake pad replacements, and prompt attention to any warning lights will help ensure optimal braking performance and keep you safe on the road.
Remember, if you’re ever unsure about any aspect of brake maintenance, don’t hesitate to consult a qualified mechanic.
FAQs
Q1: How long can I drive with the brake pad warning light on?
While it’s not advisable to drive with the warning light illuminated, you may have a short window, potentially a few hundred miles, depending on your driving style and conditions. However, it’s crucial to address the issue promptly to avoid further damage and potential safety hazards.
Q2: Can I replace just one brake pad, or do I need to replace both?
It’s generally recommended to replace brake pads in pairs, even if only one side shows significant wear. This ensures even braking performance and prevents uneven wear on the rotors.
Q3: Do I need to bleed my brakes after replacing the pads?
Bleeding your brakes after a pad replacement is not always necessary unless you’ve opened the brake lines during the process. However, if you notice a spongy or unresponsive brake pedal afterward, bleeding may be required.
Q4: What’s the difference between the brake pad warning light and the brake system warning light?
The brake pad warning light specifically indicates worn brake pads. In contrast, the brake system warning light, often accompanied by an exclamation mark, indicates a more serious issue with the braking system, such as low brake fluid or a problem with the ABS system.
Q5: Can aftermarket brake pads trigger the warning light?
Some aftermarket brake pads may not be compatible with the factory wear sensors, potentially causing the warning light to remain illuminated even with new pads installed. Opting for reputable brands or consulting with a knowledgeable mechanic can help avoid this issue.