The GM brake warning light connector plays a crucial role in your vehicle’s safety system. When illuminated, it signals a potential problem with your braking system that requires immediate attention. Ignoring this warning light could lead to reduced braking performance and increase the risk of an accident.
This comprehensive guide will explore the common causes of a GM brake warning light connector issue and provide you with practical solutions to troubleshoot and fix the problem. We’ll also delve into preventative measures to keep your braking system in optimal condition.
What Triggers the GM Brake Warning Light Connector?
The brake warning light connector can illuminate for various reasons. Here are some of the most common culprits:
- Low Brake Fluid Level: Your brake system relies on hydraulic pressure to function properly. If the brake fluid level drops too low, often due to a leak, it can trigger the warning light.
- Worn Brake Pads: Brake pads wear down over time with regular use. When they reach a certain thickness, the brake warning light connector activates to alert you about the need for replacement.
- Faulty Brake Light Switch: This switch is responsible for activating your brake lights when you press the brake pedal. A malfunctioning switch can disrupt the brake light circuit, leading to the warning light illuminating.
- ABS System Malfunction: Modern GM vehicles are equipped with Anti-lock Braking Systems (ABS). If the ABS control module detects an issue, it can illuminate the brake warning light connector.
- Electrical Issues: Problems within the electrical system, like a short circuit or loose connection in the brake warning light circuit, can also trigger the light.
Troubleshooting a GM Brake Warning Light Connector Issue
 Inspecting the GM Brake Warning Light Connector
Before you proceed, remember to consult your vehicle’s owner’s manual for specific instructions and safety precautions.
1. Check Your Brake Fluid Level:
This is the first and easiest step. Locate the brake fluid reservoir under the hood (usually a translucent container with a cap labeled “brake fluid”). Ensure the fluid level is between the minimum and maximum marks. If it’s low, carefully top it off with the recommended brake fluid type for your GM model.
2. Inspect Your Brake Pads:
Examine your brake pads through the spaces between the wheel spokes. Look for significant wear or if the pad’s thickness is below the manufacturer’s recommended limit. If you notice excessive wear, it’s time to replace your brake pads.
3. Check the Brake Light Switch:
The brake light switch is usually located under the dashboard near the brake pedal arm. You can test it by depressing the pedal and observing if the brake lights illuminate. If they don’t, the switch might need replacement.
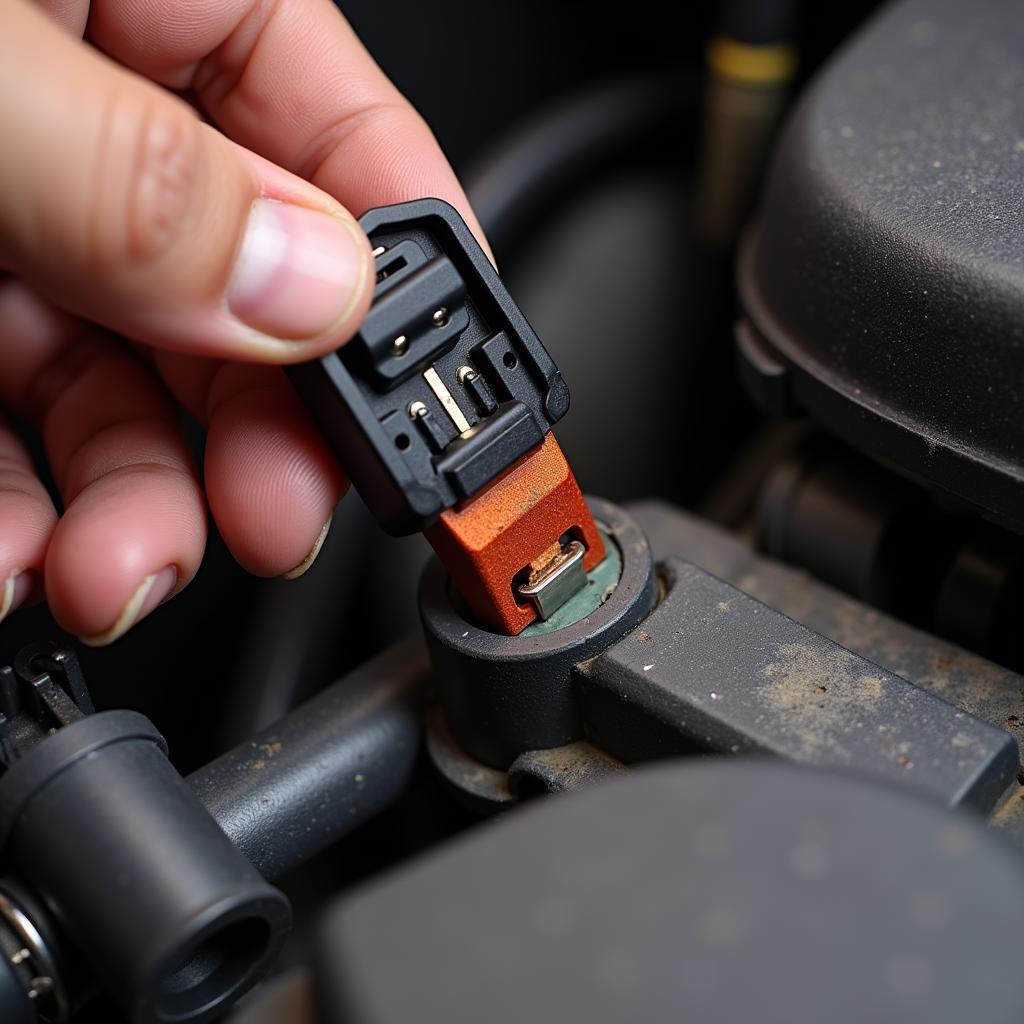
4. Examine the Brake Warning Light Connector:
Locate the connector itself. Carefully inspect it for any signs of damage, corrosion, or loose connections. Clean any dirt or debris and ensure a secure connection. If you notice any significant damage, the connector might need to be replaced.
5. Scan for Diagnostic Trouble Codes (DTCs):
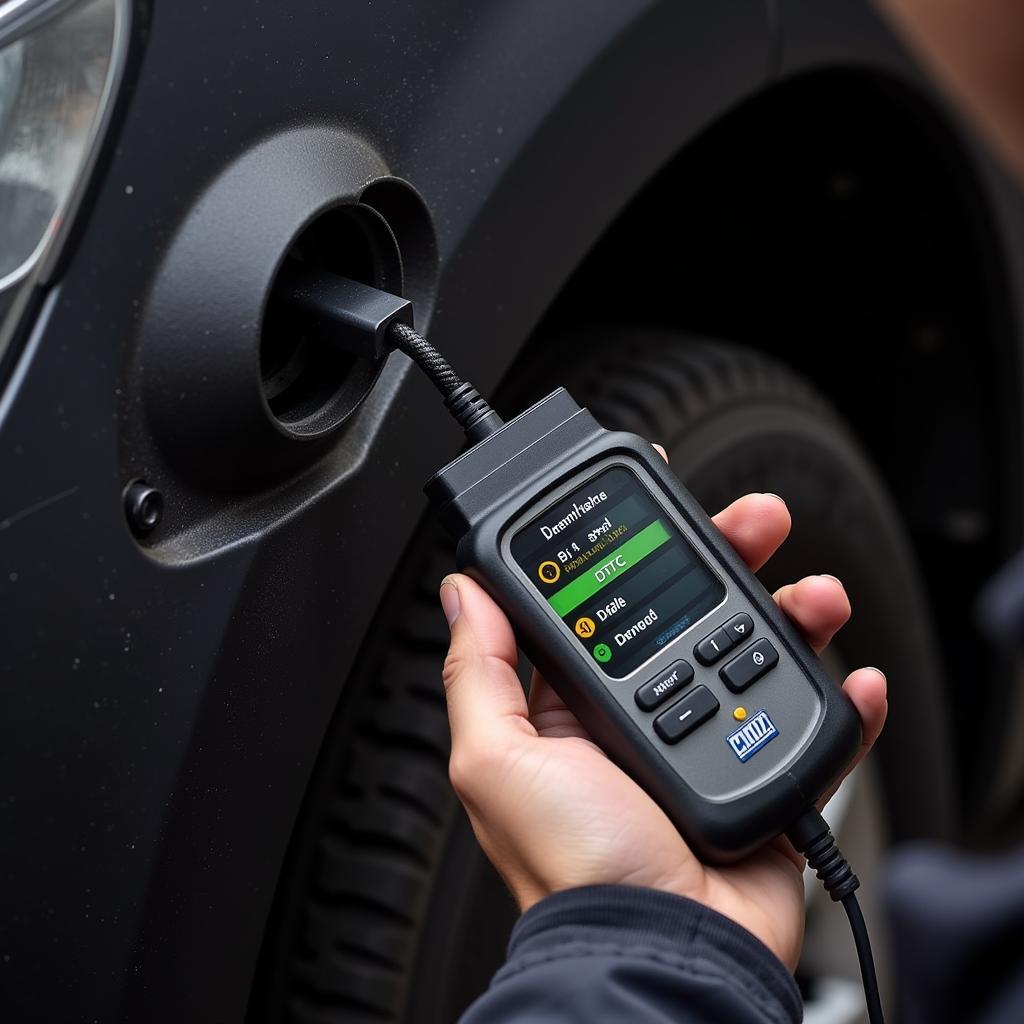 Diagnosing the GM Brake Warning Light Connector Issue Using an OBD-II Scanner
If the previous steps haven’t pinpointed the issue, consider using an OBD-II scanner to retrieve any stored diagnostic trouble codes. These codes provide specific insights into the potential cause of the warning light, making troubleshooting more efficient.
When to Seek Professional Help
While these troubleshooting steps can help address common causes, some issues might require the expertise of a qualified mechanic. If:
- You’re uncomfortable performing these checks yourself.
- The brake warning light persists after trying these solutions.
- You suspect a more complex issue with your braking system, such as an ABS malfunction.
It’s always best to err on the side of caution and seek professional help.
Preventative Measures to Keep Your Brakes in Check
- Regular Brake Inspections: Schedule routine brake inspections, ideally every 12,000 miles or as recommended in your owner’s manual.
- Timely Fluid Changes: Brake fluid absorbs moisture over time, reducing its effectiveness. Follow the manufacturer’s recommendations for brake fluid flush and replacement intervals.
- Quality Brake Pads: Opt for high-quality brake pads from reputable manufacturers. Quality pads tend to last longer and offer better braking performance.
- Address Warning Signs Promptly: Never ignore any warning signs related to your brakes, such as unusual noises, vibrations, or a spongy brake pedal. Early detection and addressment can prevent more significant issues down the line.
Conclusion
2014 gmc sierra service trailer brake warning is crucial for your safety on the road. By understanding the common causes, following the troubleshooting tips, and implementing preventative measures outlined in this guide, you can ensure a responsive and reliable braking system in your GM vehicle. However, if you encounter persistent issues or are uncertain about any aspect of brake repair, always consult with a qualified mechanic for a thorough diagnosis and professional repair.
