A “brake light out” warning on your 1992 Honda Accord LX dashboard means one or more of your brake lights aren’t working. This is a serious safety issue, as it alerts other drivers that you’re braking. Ignoring this warning puts you and others at risk. This article explores common causes of this warning light and provides practical solutions to get your brake lights working correctly again.
Common Causes of a Brake Light Out Warning
Several culprits can trigger a brake light out warning on your 1992 Honda Accord LX. Here are the most frequent ones:
1. Burnt Out Bulb(s)
Like all incandescent bulbs, brake light bulbs have a limited lifespan. Over time, the filament inside the bulb can burn out, causing the light to stop working.
2. Blown Fuse
Your Honda Accord LX uses fuses to protect its electrical circuits from overloads. A blown fuse in the brake light circuit will interrupt the flow of electricity, rendering your brake lights useless.
3. Faulty Brake Light Switch
The brake light switch is a small sensor located behind your brake pedal. It activates when you press the brake pedal, sending a signal to turn on your brake lights. If the switch malfunctions, it won’t send this signal, and your brake lights won’t illuminate.
4. Wiring Issues
Worn, corroded, or damaged wiring in the brake light circuit can interrupt the flow of electricity, preventing your brake lights from working.
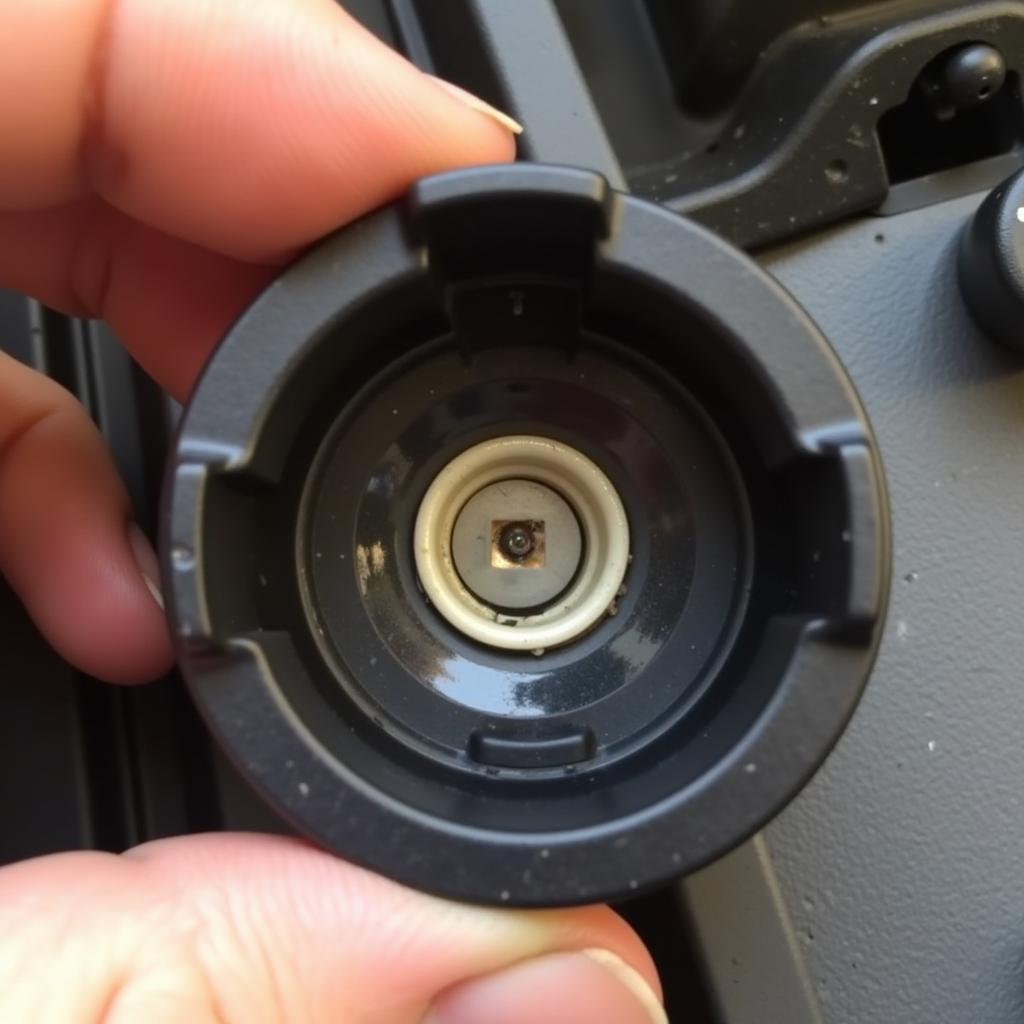 Replacing a Brake Light Bulb
Troubleshooting and Fixing the Issue
Now, let’s dive into how to diagnose and fix the brake light out warning on your 1992 Honda Accord LX:
1. Check the Bulbs
- Visual Inspection: Park your car in a safe, well-lit area and inspect all three brake lights (two on the rear and one on the center console). Look for any signs of damage or burning on the bulb.
- Bulb Replacement: If a bulb looks burnt out, replace it with a new one of the correct type. Refer to your owner’s manual for the correct bulb specifications.
2. Inspect the Fuses
- Locate the Fuse Box: Consult your owner’s manual to find the fuse box location (usually under the dashboard or hood).
- Identify the Brake Light Fuse: Use the fuse box diagram to find the fuse dedicated to your brake lights.
- Check the Fuse: Carefully remove the fuse and visually inspect it. A blown fuse will have a broken wire or a blackened appearance.
- Replace if Necessary: If the fuse is blown, replace it with a new one of the same amperage rating.
3. Test the Brake Light Switch
- Locate the Switch: The brake light switch is typically situated above the brake pedal arm.
- Test for Continuity: Use a multimeter to check for continuity across the switch terminals when the pedal is pressed and released. No continuity indicates a faulty switch.
- Replace the Switch: If the brake light switch is faulty, replace it with a new one.
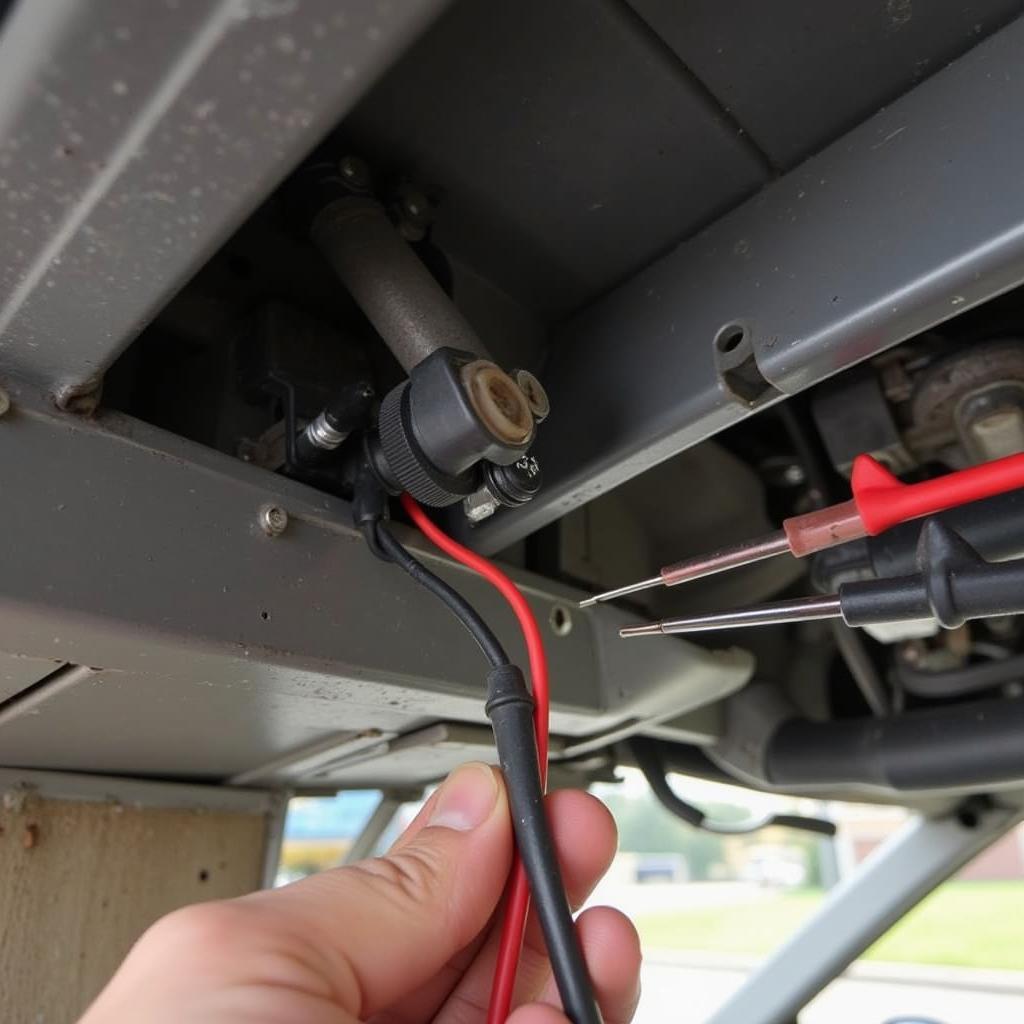 Testing the Brake Light Switch
4. Examine the Wiring
- Visual Inspection: Carefully inspect the wiring harness leading to the brake lights for any signs of damage, fraying, corrosion, or loose connections.
- Repair or Replace: If you find any wiring issues, repair them or replace the damaged section of the harness.
When to Seek Professional Help
While these steps can help you troubleshoot and fix common brake light problems, certain situations call for professional help:
- You’re uncomfortable working with electrical components.
- You’ve tried the above steps and the problem persists.
- The wiring harness is severely damaged.
In these cases, it’s best to consult a qualified mechanic specializing in Honda vehicles.
“Remember, your safety and the safety of others on the road is paramount,” advises John Smith, a veteran Honda mechanic at Smith’s Auto Repair. “Never ignore a brake light out warning, and always prioritize fixing it as soon as possible.”
Conclusion
Addressing a brake light out warning on your 1992 Honda Accord LX is crucial for your safety and that of other drivers. By understanding the common causes and following the troubleshooting steps outlined in this article, you can often fix the issue yourself. However, if you’re uncomfortable working on your car or the problem persists, don’t hesitate to seek help from a qualified mechanic. Keeping your car well-maintained ensures optimal performance and, most importantly, keeps you safe on the road.