If you own a 2015 Mini Cooper, you may have encountered the dreaded brake pad warning light on your dashboard. This light is a crucial safety feature, indicating that your brake pads are wearing thin and need attention. However, even after replacing the brake pads, the warning light might stay on. This guide will walk you through the process of resetting the brake pad warning light on your 2015 Mini Cooper.
While this guide provides general information, it’s crucial to remember that specific procedures can vary slightly depending on your Mini Cooper’s model and trim level. Always refer to your owner’s manual for the most accurate information regarding your vehicle.
Understanding the Brake Pad Warning Light
The brake pad warning light is part of your Mini Cooper’s brake pad wear sensors system. This system monitors the thickness of your brake pads and alerts you when they reach a critical wear level. Ignoring this warning can lead to further damage and compromised braking performance, putting you and others at risk.
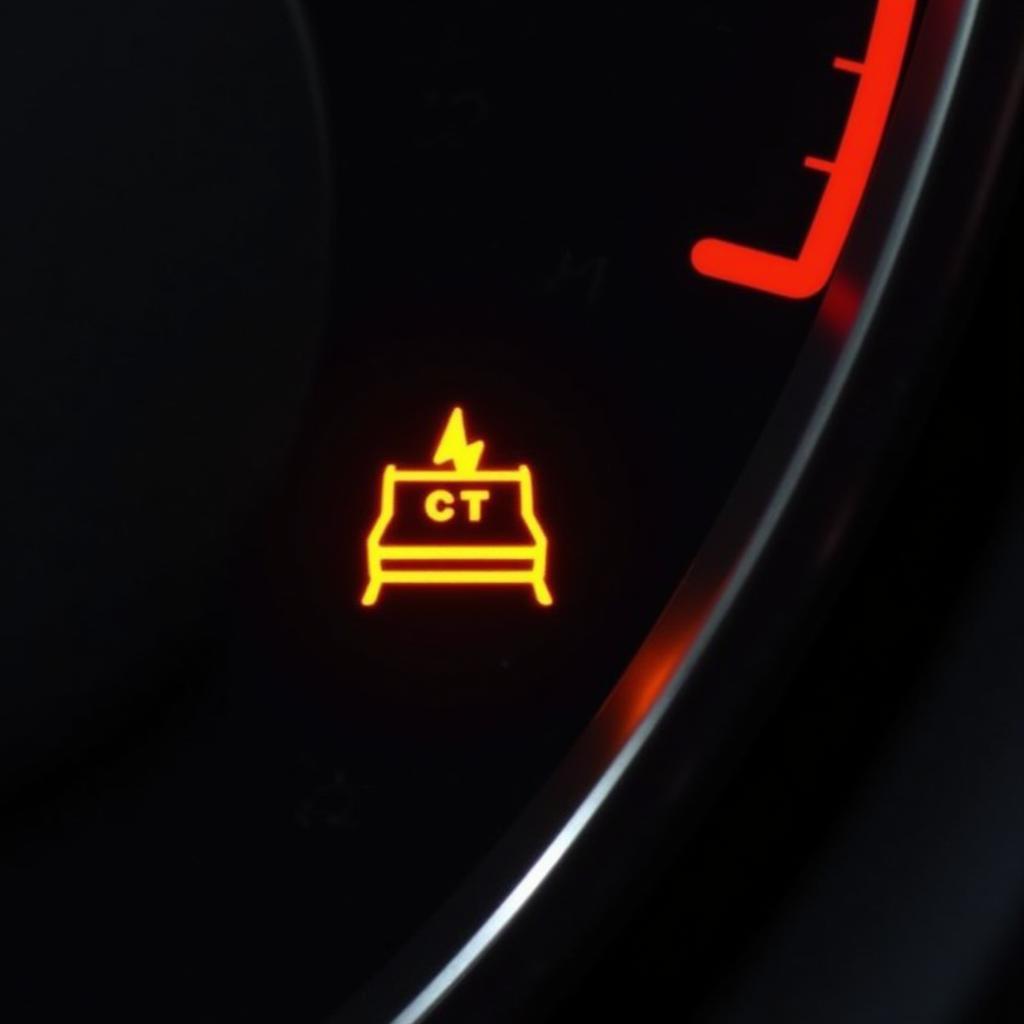 2015 Mini Cooper Brake Pad Warning Light
Why Reset the Warning Light?
After replacing the brake pads, the warning light needs to be reset to acknowledge the new pads and clear the warning message from your dashboard. Resetting the light ensures the system continues to monitor your brake pads effectively and alerts you of any future wear.
Two Methods to Reset the Brake Pad Warning Light
There are two main methods to reset the brake pad warning light on a 2015 Mini Cooper:
1. Resetting Through the Instrument Cluster
This method utilizes your Mini Cooper’s onboard computer to reset the warning light:
- Turn on the ignition: Insert the key into the ignition and turn it to position one, without starting the engine.
- Access the service menu: Navigate to the service menu using the buttons on your steering wheel or dashboard. The exact buttons and menu structure may vary slightly depending on your specific model, so refer to your owner’s manual if needed.
- Select the brake pad reset option: Scroll through the service menu until you find the option for “brake pad reset” or a similar wording.
- Follow the on-screen prompts: Once you’ve selected the reset option, the instrument cluster will guide you through a short sequence of steps. This may involve pressing and holding a button or confirming the reset.
- Verify the reset: After completing the steps, the warning light should disappear from your dashboard. Start your engine to confirm the reset was successful.
2. Resetting Using a Diagnostic Tool
For this method, you’ll need an OBD2 scanner, a handheld device that connects to your car’s computer system:
- Locate the OBD2 port: This port is typically found under the dashboard on the driver’s side.
- Connect the OBD2 scanner: Plug the scanner into the OBD2 port.
- Turn on the ignition: Turn the key to position two, again without starting the engine.
- Access the brake system: Using the scanner’s interface, navigate to the brake system or service menu.
- Select the brake pad reset function: Choose the option to reset the brake pad warning light.
- Follow the on-screen instructions: The scanner will guide you through the reset process, which might involve confirming the reset or following a short sequence.
- Disconnect the scanner: Once the reset is complete, disconnect the OBD2 scanner from your Mini Cooper.
- Verify the reset: Check your dashboard to ensure the warning light has been successfully reset.
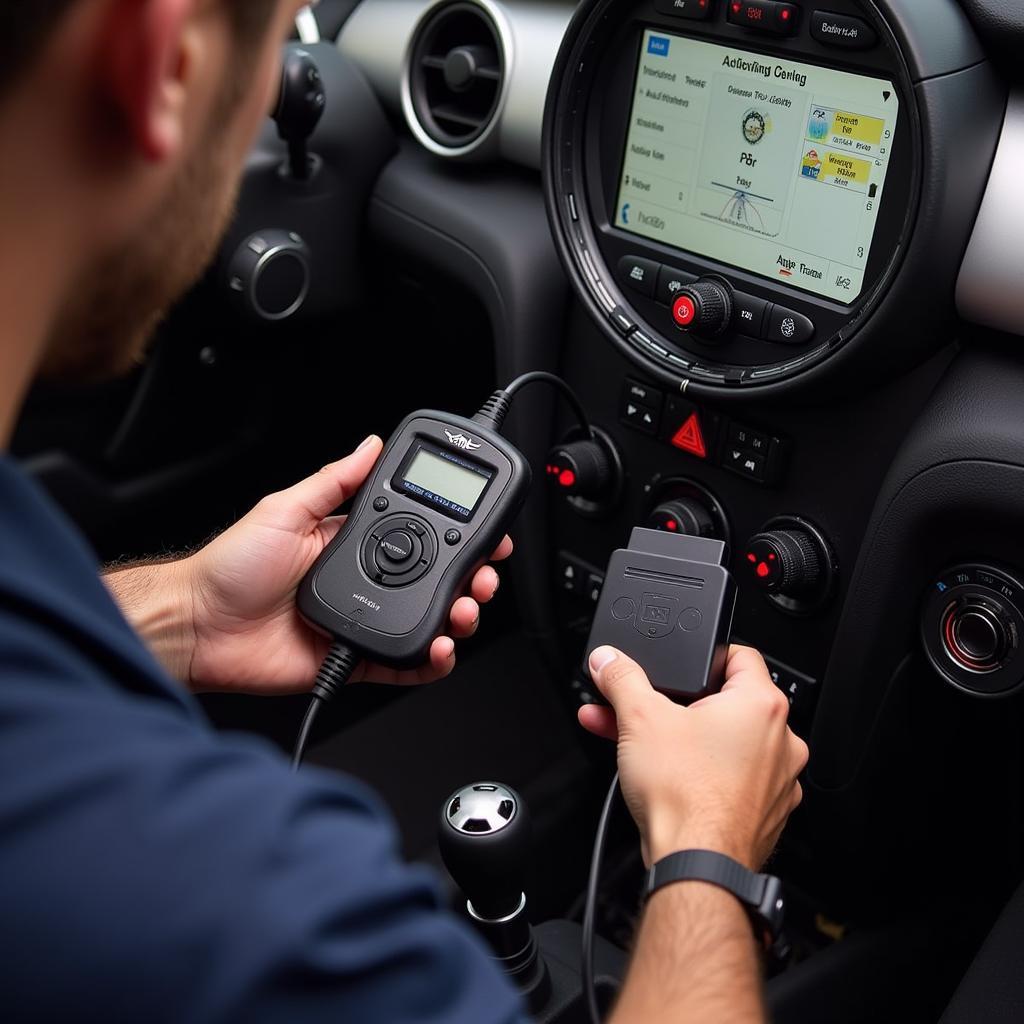 Using an OBD2 Scanner to Reset the Warning Light
What if the Light Stays On?
If the brake pad warning light remains illuminated after trying these reset methods, there might be other issues to consider:
- Faulty brake pad wear sensor: The sensor itself could be damaged or malfunctioning.
- Wiring issue: There might be a problem with the wiring connecting the sensor to the vehicle’s electrical system.
- Issue with the instrument cluster: In rare cases, a fault within the instrument cluster itself could be causing the light to stay on.
“It’s important not to ignore a persistent brake pad warning light,” says master mechanic John Smith. “If the light doesn’t reset after replacing the brake pads or trying these methods, it’s best to consult with a qualified mechanic to diagnose and address the underlying issue.”
Maintaining Your Mini Cooper’s Brakes
Regular brake maintenance is crucial for your safety and the longevity of your vehicle.
- Regular inspections: Have your brakes inspected by a qualified mechanic at least once a year or as recommended in your owner’s manual.
- Timely brake pad replacements: Replace your brake pads as soon as they reach their wear limit to avoid further damage to the braking system.
- Quality parts: Always use high-quality brake pads and rotors to ensure optimal braking performance and longevity.
By understanding your Mini Cooper’s brake system and performing regular maintenance, you can keep your car running smoothly and ensure your safety on the road.