Imagine this: You’re cruising down the road, enjoying the ride, when suddenly, you see a red light flashing on your motorcycle’s dashboard – the dreaded brake warning light. Your heart might skip a beat as you wonder, “What does it mean?” and more importantly, “Is it safe to keep riding?”.
Don’t panic! In this comprehensive guide, we’ll delve into the intricacies of the motorcycle brake warning light, helping you understand its various causes, how to diagnose the problem, and the essential steps to take for a solution.
Understanding Your Motorcycle’s Brake Warning System
Your motorcycle’s brake warning light is an integral part of its safety system, designed to alert you of potential issues within the braking system. When illuminated, it signals that something isn’t quite right and requires your immediate attention.
Common Causes of a Motorcycle Brake Warning Light
Several factors can trigger the illumination of your motorcycle’s brake warning light. Here are some of the most common culprits:
- Low Brake Fluid Level: This is often the primary reason for the warning light. Brake fluid, responsible for transmitting force from the brake lever to the brake calipers, can decrease over time due to wear and tear or a leak in the system.
- Worn Brake Pads: Your motorcycle’s brake pads are designed to wear down gradually with use. When they become too thin, the brake warning light will engage, indicating the need for replacement.
- Faulty Brake Light Switch: The brake light switch activates the brake lights when you engage the brake lever. A malfunctioning switch can disrupt the circuit, triggering the warning light.
- Air in the Brake Lines: Air bubbles can develop within the brake lines, compromising the hydraulic pressure required for optimal braking performance.
- Master Cylinder Issues: The master cylinder plays a vital role in distributing brake fluid pressure. Problems within the master cylinder, such as a leaking seal, can hinder proper braking and activate the warning light.
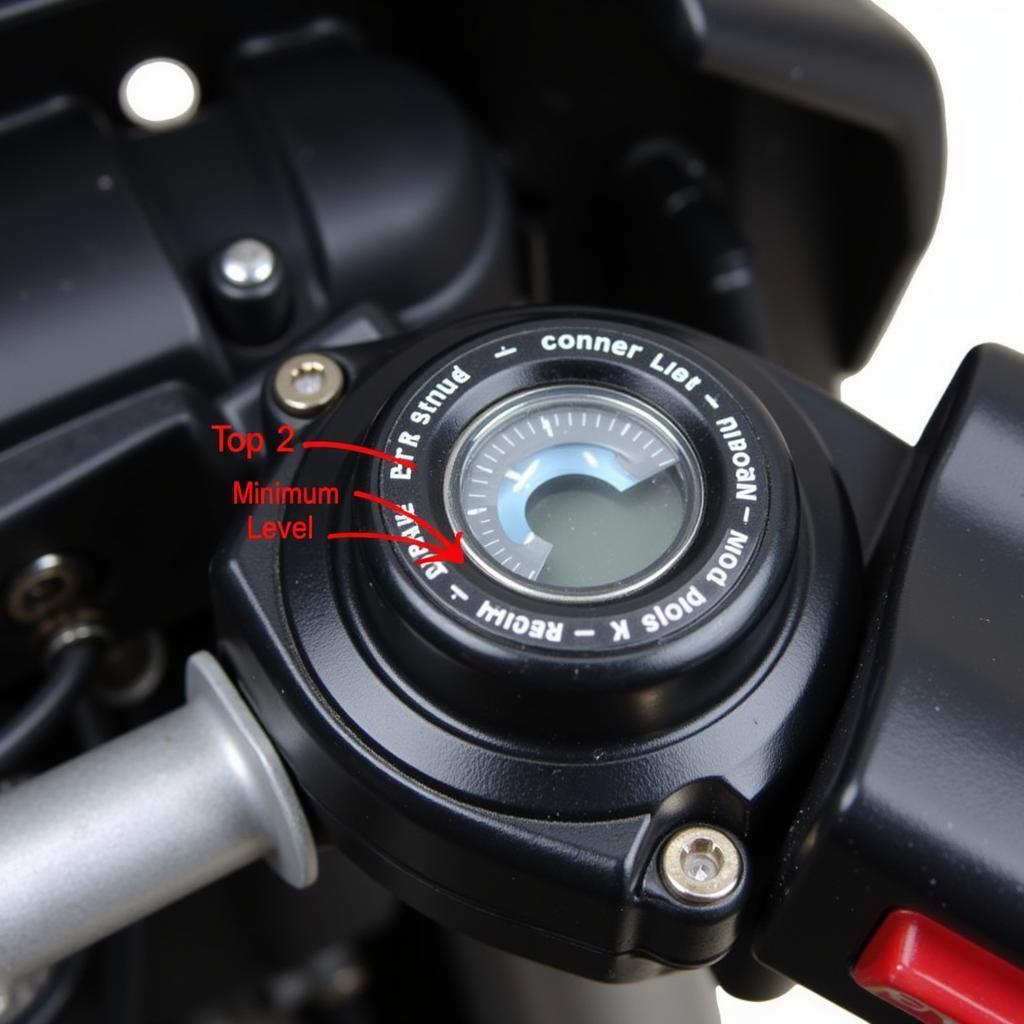 Motorcycle Brake Fluid Reservoir
Diagnosing the Problem: A Step-by-Step Guide
Before you jump to conclusions, it’s essential to diagnose the root cause of the illuminated brake warning light. Follow these steps:
-
Check the Brake Fluid Level: Locate the brake fluid reservoir, typically situated on the handlebar. Inspect the fluid level, ensuring it falls within the minimum and maximum marks. If the level is low, adding brake fluid might temporarily resolve the issue, but it’s crucial to investigate the reason behind the low level, such as a potential leak.
-
Inspect the Brake Pads: Carefully examine your brake pads for wear and tear. If you notice the friction material is significantly worn down or close to the metal backing plate, it’s time for a replacement.
-
Test the Brake Light Switch: Engage your brake lever and check if the brake lights illuminate. If not, the brake light switch may be faulty and require replacement.
-
Inspect for Brake Fluid Leaks: Thoroughly check all brake components, including the brake lines, calipers, and master cylinder, for any signs of fluid leaks.
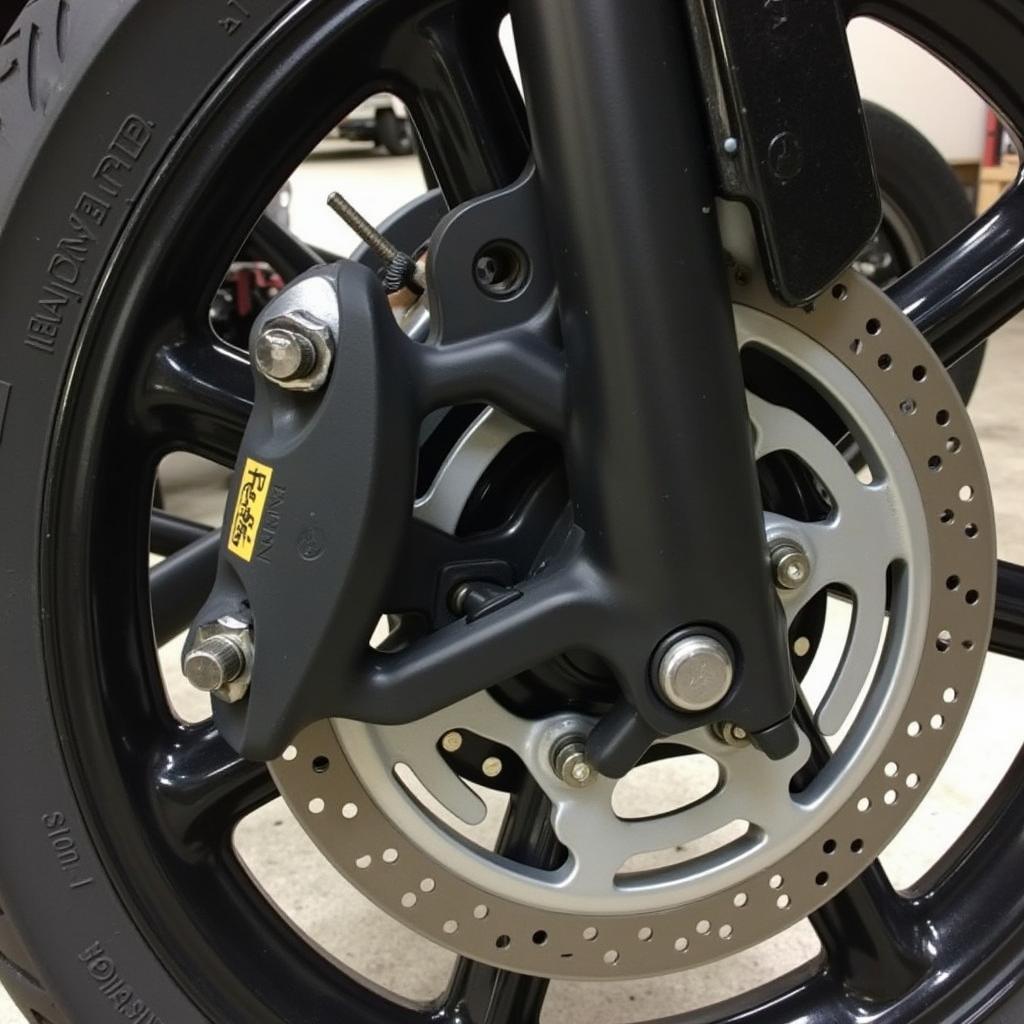 Motorcycle Brake Pad Inspection
Addressing the Issue
Once you’ve identified the underlying cause, it’s time to take action.
- Adding Brake Fluid: If the brake fluid level is low, carefully top it up with the recommended brake fluid type for your motorcycle model. Remember to clean the reservoir cap before opening it to prevent contaminants from entering the system.
- Bleeding the Brakes: If you suspect air in the brake lines, bleeding the brakes is essential to remove any trapped air bubbles. This process involves flushing the brake lines with fresh brake fluid.
- Replacing Brake Pads: Worn brake pads should be replaced promptly to ensure optimal braking performance and safety. Consult your motorcycle’s service manual or seek professional assistance for the correct brake pad type and installation procedure.
- Repairing or Replacing Components: If you detect a faulty brake light switch, a leaking master cylinder, or any other damaged component, it’s best to consult a qualified motorcycle mechanic for repair or replacement.
 Motorcycle Brake Fluid Bleeding
The Importance of Professional Service
While some motorcycle maintenance tasks can be handled by experienced riders, dealing with brake system issues often requires specialized knowledge and tools. If you’re uncomfortable performing any of the diagnostic or repair procedures, it’s always best to err on the side of caution and seek assistance from a qualified motorcycle mechanic.
Motorcycle Brake Warning Light FAQs
Can I ride my motorcycle with the brake warning light on?
While technically possible to ride a short distance with the brake warning light illuminated, it’s strongly advised against it. Continuing to ride with a compromised braking system puts you and others at risk.
How much does it cost to fix a motorcycle brake warning light issue?
The cost of repair can vary significantly depending on the underlying cause. A simple brake fluid top-up might cost a few dollars, while a complete brake system overhaul could cost several hundred dollars.
How often should I check my motorcycle’s brake fluid?
It’s good practice to inspect your motorcycle’s brake fluid level at least once a month and before any long rides.
Staying Safe on the Road
Remember, a properly functioning brake system is paramount for your safety and the safety of others on the road. By understanding the causes of a motorcycle brake warning light, performing regular checks, and addressing issues promptly, you can ensure a safe and enjoyable riding experience.