A glowing brake warning light on your classic 1969 Pontiac Firebird’s dashboard is a clear signal that something isn’t quite right with your braking system. While it might seem like a daunting issue, especially for vintage car enthusiasts, this guide is designed to empower you with the knowledge and steps to diagnose and potentially resolve the problem.
Understanding Your Firebird’s Hydraulic Brake System
Before diving into troubleshooting, it’s helpful to grasp the basics of your Firebird’s hydraulic braking system. When you press the brake pedal, it activates a master cylinder that pressurizes brake fluid. This pressurized fluid travels through brake lines to each wheel, activating the brake calipers or wheel cylinders, ultimately stopping the car.
Common Causes of a 69 Firebird Brake Warning Light
The brake warning light in your 1969 Firebird is designed to illuminate for several reasons:
1. Low Brake Fluid Level
This is often the most common culprit. As brake pads wear down, the brake fluid level in the master cylinder naturally drops.
How to check:
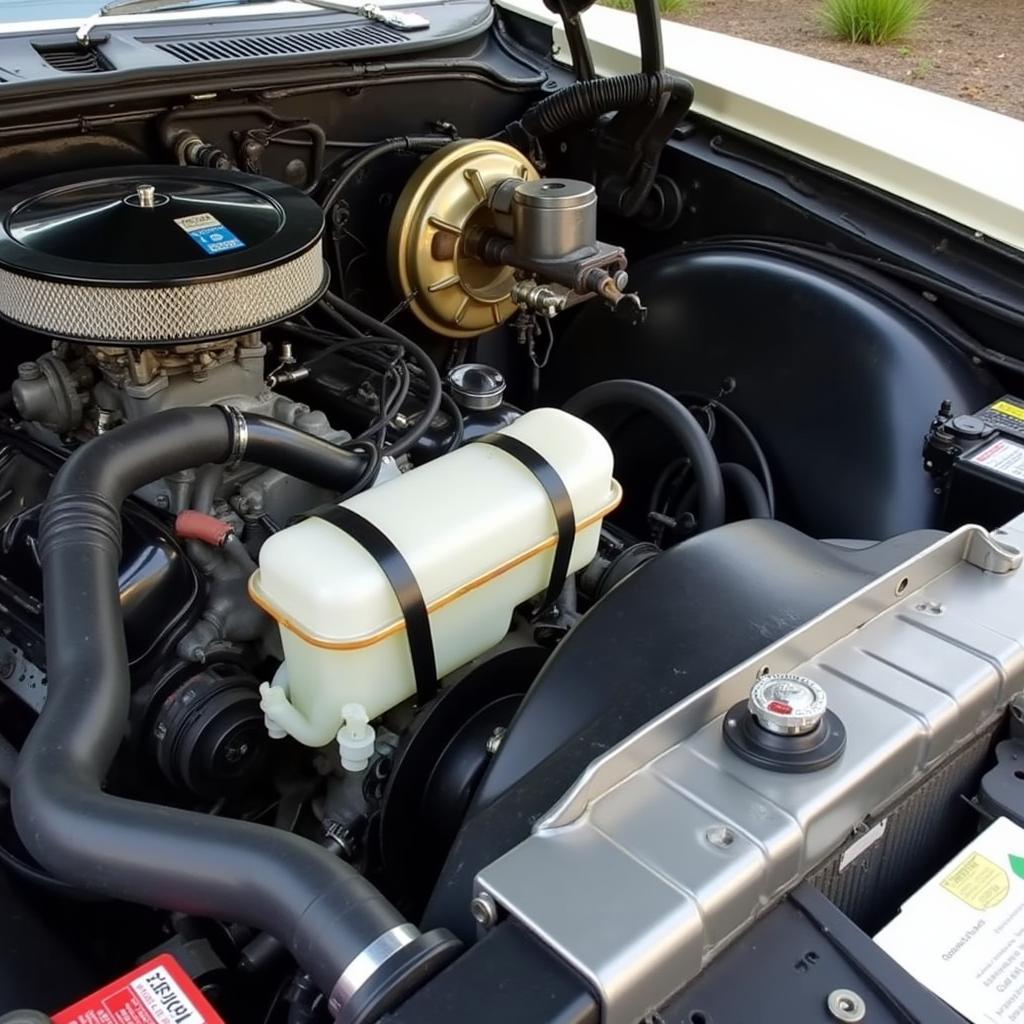
- Locate the master cylinder, usually situated at the back of the engine compartment on the driver’s side.
- Check the fluid level. Ideally, it should be between the “Min” and “Max” markings on the reservoir.
Solution:
If the fluid is low, carefully top it off with the correct type of brake fluid as specified in your owner’s manual. If the level is significantly low, inspect for leaks in the system.
2. Worn Brake Pads
Over time, brake pads wear down and need replacement.
How to check:
- Look through the spaces between the wheel spokes to visually inspect the brake pad thickness.
- Alternatively, you can remove a wheel for a more thorough inspection.
Solution:
If the brake pads appear thin (approximately 1/4 inch or less), it’s time for a replacement.
3. Brake Fluid Leak
A leak in the brake system can lead to a loss of pressure and trigger the warning light.
How to check:
- Carefully inspect all brake lines, hoses, and connections for signs of leakage. Pay close attention to areas around the master cylinder, wheel cylinders, and calipers.
- Look for wet spots, drips, or puddles of brake fluid.
Solution:
A brake fluid leak demands immediate attention. If you locate a leak, it’s crucial to have the affected component repaired or replaced by a qualified mechanic.
4. Faulty Brake Light Switch
The brake light switch, typically located above the brake pedal, is responsible for activating the brake lights when you press the pedal. If this switch malfunctions, it can also trigger the brake warning light.
How to check:
- Have someone observe the brake lights while you press the pedal. If the lights don’t illuminate, the switch might be faulty.
- You can also test the switch with a multimeter to check for continuity.
Solution:
Replacing a faulty brake light switch is usually a straightforward process. You can find detailed instructions in your Firebird’s service manual or consult a mechanic.
5. Issues with the Parking Brake
If the parking brake isn’t fully released, it can activate the warning light.
How to check:
- Ensure the parking brake lever is fully disengaged.
- Inspect the parking brake cable for any signs of binding or damage.
Solution:
Adjust or repair the parking brake as needed. If the cable is damaged, it will need replacement.
 Brake Fluid Reservoir in a 1969 Pontiac Firebird Engine Bay
When to Seek Professional Help
While this guide covers common causes, remember that brake systems are complex. If you’re uncomfortable working on your car or can’t pinpoint the issue, don’t hesitate to seek assistance from a qualified mechanic specializing in classic cars.
Expert Insight:
“I can’t stress enough the importance of a properly functioning brake system,” says John Miller, a seasoned classic car mechanic with over 30 years of experience. “Brakes are critical for safety, and even seemingly minor issues should be addressed promptly to avoid potentially dangerous situations on the road.”
Conclusion
Addressing a brake warning light in your 1969 Firebird doesn’t have to be overwhelming. By understanding the potential causes and following the troubleshooting steps outlined here, you can take the first step towards a safer and more enjoyable driving experience.

