Understanding the intricacies of an aftermarket car radio wiring harness is crucial for a successful car audio upgrade. Whether you’re a seasoned car audio enthusiast or a novice just starting out, choosing and installing the correct wiring harness can save you time, frustration, and potential damage to your vehicle’s electrical system.
Choosing the Right Aftermarket Car Radio Wiring Harness
Selecting the correct wiring harness is the first and most important step. Using the wrong harness can lead to blown fuses, malfunctioning accessories, or even damage to the radio itself. The right harness ensures compatibility between your new radio and your car’s existing wiring. Several factors determine the appropriate harness, including the make, model, and year of your vehicle, as well as the brand and model of your aftermarket radio. Always consult a compatibility chart provided by the harness manufacturer or a reputable car audio retailer.
Identifying Your Car’s Wiring System
Before purchasing a wiring harness, you need to identify your car’s specific wiring system. Some vehicles utilize a standard wiring configuration, while others have proprietary systems. This information can typically be found in your car’s owner’s manual or online resources dedicated to car audio installation. Knowing your car’s wiring system beforehand will significantly simplify the harness selection process.
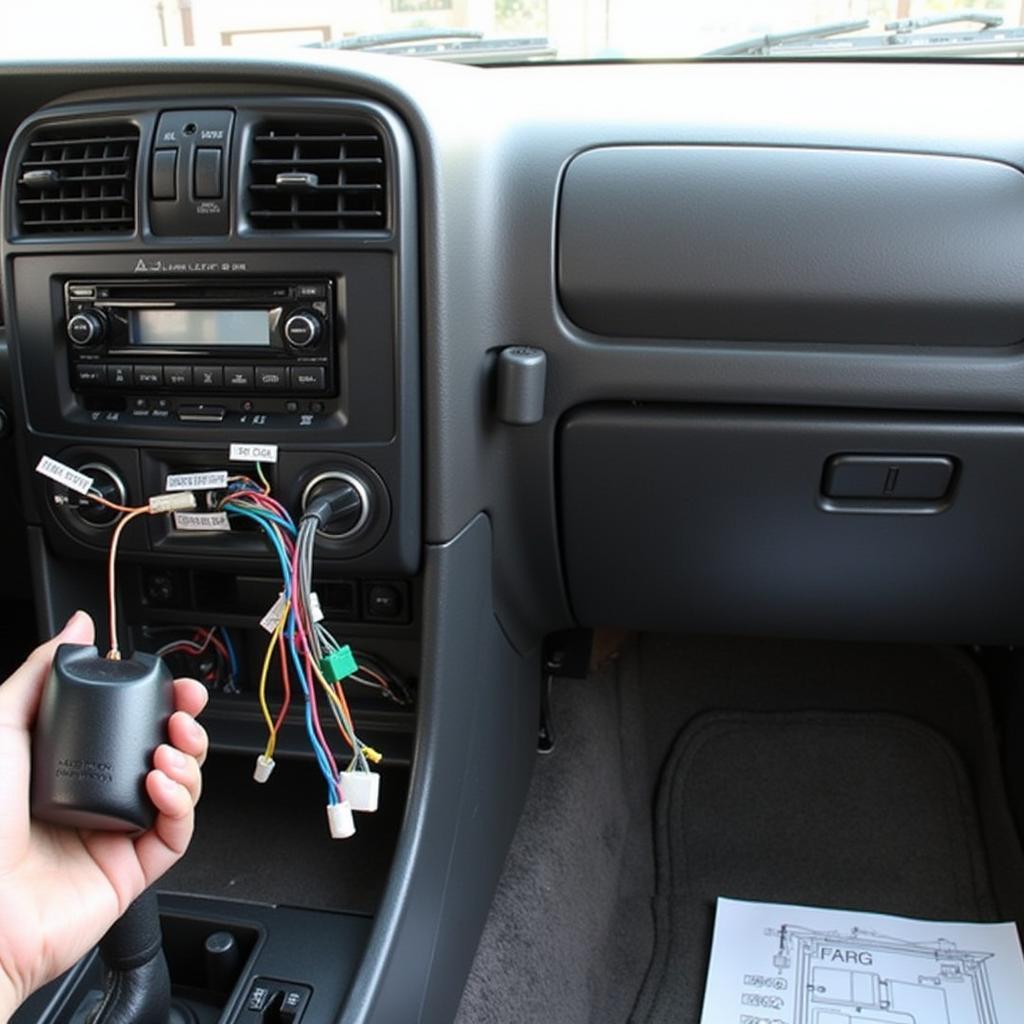
 Identifying Car Radio Wiring Harness
Understanding Wiring Harness Color Codes
Understanding the color codes of your car’s wiring and the wiring harness is essential. While there are some common color codes, variations exist between manufacturers and models. A wiring diagram will be your best friend during the installation process, allowing you to match wires correctly and avoid potential issues. Never assume wire colors without consulting the diagram!
Installing Your Aftermarket Car Radio Wiring Harness
Once you’ve selected the appropriate wiring harness, the installation process is relatively straightforward. However, attention to detail is crucial. A mismatched wire can cause malfunctions or damage. Always disconnect the negative terminal of your car battery before starting any wiring work to prevent electrical shocks or short circuits.
Connecting the Wiring Harness to the Radio
Connect the corresponding wires from the wiring harness to the corresponding wires on your aftermarket car radio. The wiring harness will typically have labeled wires, making it easy to match them to the radio’s wiring diagram. Use crimp connectors or solder for secure and reliable connections, ensuring that all connections are insulated properly to prevent short circuits.
Integrating the Wiring Harness with the Car’s Wiring
After connecting the wiring harness to the radio, the next step is to integrate it with the car’s wiring system. This usually involves plugging the wiring harness into the car’s existing wiring connector. Ensure a snug and secure fit. Double-check all connections before reconnecting the car battery’s negative terminal.
Testing Your New Car Radio
Once everything is connected, reconnect the negative battery terminal and test the functionality of your new car radio. Verify that all features work correctly, including the speakers, power antenna, and steering wheel controls (if applicable). If any issues arise, double-check the wiring connections and consult the troubleshooting section of your radio’s manual.
Troubleshooting Common Aftermarket Car Radio Wiring Harness Issues
Even with careful planning and execution, issues can sometimes arise. Common problems include blown fuses, no power to the radio, or malfunctioning accessories. A systematic approach to troubleshooting can quickly identify and resolve these issues. Always refer to the wiring diagrams for both your car and the aftermarket radio when troubleshooting.
“A common mistake people make is not properly securing the wiring connections. A loose connection can lead to intermittent issues that are difficult to diagnose,” says John Smith, a certified automotive electrician with over 20 years of experience.
Conclusion
Installing an aftermarket car radio with the correct wiring harness can greatly enhance your driving experience. By carefully selecting the appropriate harness, following the installation instructions, and paying attention to detail, you can enjoy your new car audio system without any headaches. Remember to always consult your car and radio’s wiring diagrams for a smooth and successful installation. Investing in a quality aftermarket car radio wiring harness is an investment in a seamless and enjoyable car audio upgrade.
“Taking the time to understand your car’s wiring system is crucial. It’s the foundation for a successful car audio installation,” advises John Smith.
FAQ
-
What is an aftermarket car radio wiring harness? An aftermarket car radio wiring harness is an adapter that connects your new car radio to your car’s existing wiring system.
-
Why do I need a wiring harness? A wiring harness prevents damage to your car’s electrical system and ensures compatibility between your new radio and your car.
-
How do I choose the right wiring harness? Consult a compatibility chart provided by the harness manufacturer or a reputable car audio retailer.
-
What if I connect the wrong wires? Connecting the wrong wires can cause blown fuses, malfunctioning accessories, or even damage to the radio.
-
Where can I find a wiring diagram for my car? Your car’s owner’s manual or online resources dedicated to car audio installation are good sources for wiring diagrams.
-
Can I install a wiring harness myself? Yes, with proper tools and careful attention to the instructions.
-
What should I do if my new radio doesn’t work after installation? Double-check the wiring connections and consult the troubleshooting section of your radio’s manual.


