“Having trouble with your car radio? Sounds like a wiring adaptor issue!” That’s a common phrase we hear in the auto electrical world. And while it might seem daunting at first, understanding Car Radio Wiring Adaptors is simpler than you think.
Understanding Car Radio Wiring Adaptors
Think of your car radio wiring adaptor as the interpreter between your car’s electrical system and your aftermarket radio. Different car manufacturers use different wiring configurations. A wiring adaptor bridges the gap, ensuring a safe and functional connection between your shiny new head unit and your car’s existing wiring harness.
Common Car Stereo Wiring Issues
Before we jump into adaptors, let’s diagnose some common car stereo problems:
- No Power: This is a classic, and often points to a blown fuse or a misconnection in the adaptor harness.
- Sound Issues: Distorted sound, static, or no sound at all can be a symptom of incorrectly wired speakers or even a faulty amplifier connection.
- Erratic Behavior: If your radio is switching itself off, changing stations randomly, or displaying error messages, it might be due to a wiring short or loose connection in the adaptor.
Identifying the Problem
Pinpointing the root of the problem is key. Here’s a systematic approach:
- Visual Inspection: Check all connections on the adaptor harness and behind the radio for anything loose, disconnected, or damaged.
- Fuse Check: Locate the fuse for your car stereo (usually in the fuse box under the dashboard or hood). A blown fuse needs to be replaced with one of the same amperage.
- Software Diagnostics (if applicable): For modern cars with complex infotainment systems, a professional-grade diagnostic tool like those offered by Cardiagtech can pinpoint software-related issues.
Tools for the Job
Ready to tackle the installation? Here’s what you’ll need:
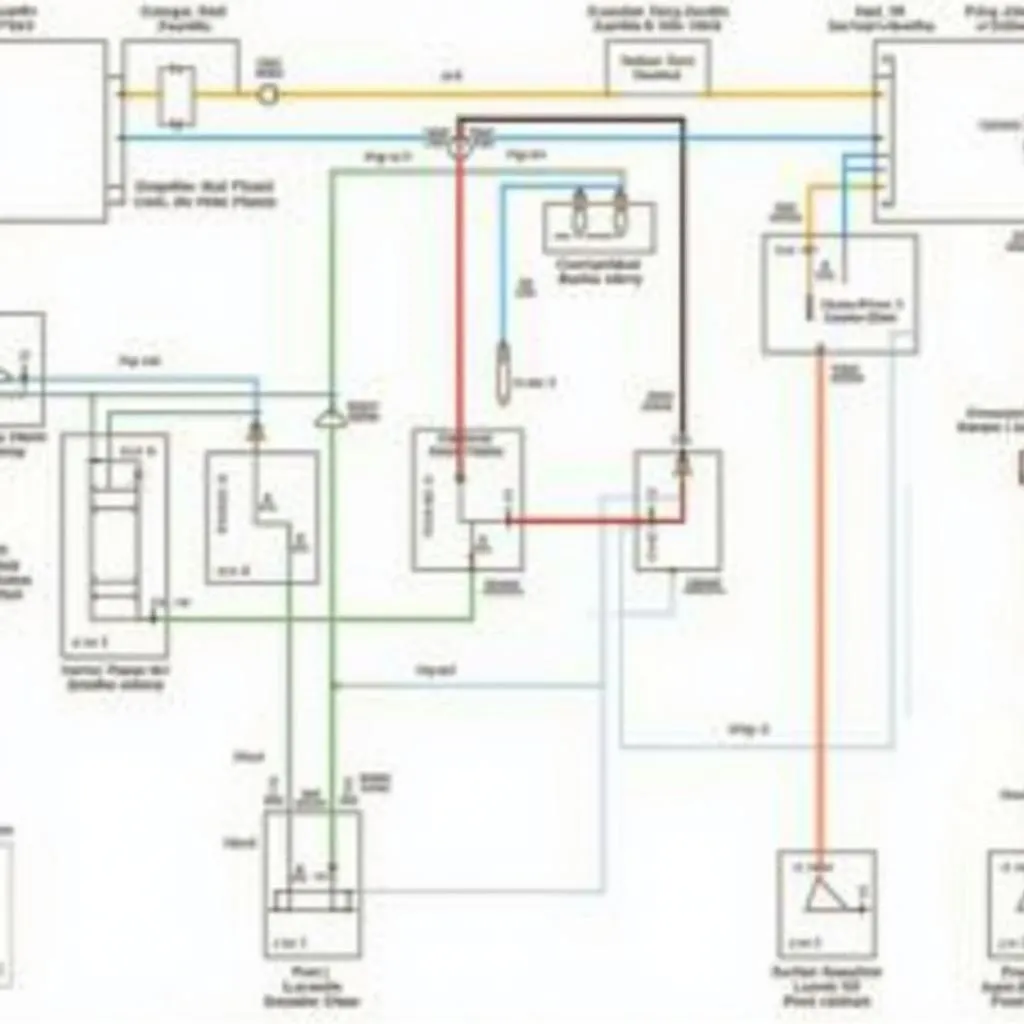
- Wiring Diagram: Crucial for identifying the correct wires and their functions. You can often find these online or in your car’s service manual.
- Car Radio Wiring Adaptor: Choose the correct adaptor for your car’s make, model, and year.
- Basic Tools: Wire strippers, crimpers, electrical tape, and a multimeter come in handy.
Installation Steps
- Disconnect the Battery: Always disconnect the negative battery terminal before working on any electrical system in your car.
- Remove Old Radio: Carefully remove the trim panels, unscrew the old radio, and disconnect the wiring harness.
- Connect the Adaptor: Following the wiring diagram, connect the wires from your new radio to the corresponding wires on the adaptor harness.
- Connect to the Car: Plug the adaptor harness into your car’s wiring harness, securing all connections.
- Test & Reassemble: Before putting everything back together, reconnect the battery and test the new radio thoroughly.
FAQs
Can I install a car radio wiring adaptor myself?
Absolutely! With a little patience and the right tools, it’s a manageable DIY project for most car enthusiasts.
What if my car has steering wheel controls?
You’ll need a specialized adaptor that retains those controls. A good resource for finding compatible adaptors is [link to relevant Cardiagtech product page].
My radio still doesn’t work!
Double-check all your connections, ensure the fuse is good, and make sure you have the correct adaptor. If the problem persists, consult a qualified auto electrician. Companies like Cardiagtech offer remote diagnostics and programming services that can be incredibly helpful.
Get Connected with Cardiagtech
Need help with your car audio installation or troubleshooting electrical gremlins? CARDIAGTECH provides top-tier diagnostic tools and software solutions for professional and DIY mechanics alike. Visit our website or contact us today!