Switching from your old Warner electric brakes to new drums can feel like a daunting task, but it doesn’t have to be. This guide will walk you through the process step-by-step, providing you with all the information and confidence needed to tackle this upgrade. Whether you’re experiencing issues with your existing Warner setup or just looking for improved performance, converting to new brake drums can be a worthwhile investment for your trailer.
Understanding the Benefits of New Brake Drums
Before diving into the conversion process, let’s explore why this upgrade might be beneficial for you:
- Enhanced Braking Performance: New brake drums often come with smoother surfaces and more precise manufacturing tolerances, leading to better contact with your brake shoes and ultimately, more effective braking.
- Improved Safety: Worn-out drums can lead to uneven wear on your brake shoes, reducing braking efficiency and potentially creating a safety hazard. New drums provide a fresh start for your braking system.
- Increased Longevity: Investing in quality brake drums can save you money in the long run. Durable materials and improved designs mean fewer replacements and less downtime for your trailer.
- Compatibility & Availability: While Warner brake systems have been popular, converting to a more common drum size can make finding replacement parts and compatible components easier in the future.
Assessing Your Current Setup
The first step is to determine the specifics of your current Warner brake system:
- Identify the Drum Diameter: This measurement is crucial for finding compatible replacements. You can typically find the diameter stamped on the edge of the drum itself. Common sizes include 10 inches, 12 inches, and 14 inches.
- Note the Bolt Pattern: Measure the distance between the centers of two adjacent wheel studs to determine the bolt pattern. This will ensure the new drums fit correctly on your axle.
- Inspect the Backing Plate: Ensure your existing backing plate, which houses the brake shoes and other components, is in good condition and compatible with the new drums.
Choosing the Right Replacement Drums
With your Warner brake system information in hand, you can start shopping for suitable replacement drums. Here are some factors to consider:
- Drum Material: Cast iron drums are a cost-effective option known for their durability. However, for improved heat dissipation and lighter weight, consider drums made from aluminum alloys.
- Bearings & Seals: Determine if the new drums come with pre-installed bearings and seals. This can save you time and effort during installation.
- Quality & Warranty: Opt for reputable brands known for their quality construction and reliable performance. Check the warranty offered to ensure you’re covered in case of any manufacturing defects.
Gathering the Necessary Tools
Before you begin the conversion process, make sure you have the following tools readily available:
- Lug Wrench or Breaker Bar
- Socket Set (including sizes for lug nuts, brake drum retaining hardware, and backing plate bolts)
- Hammer
- Screwdriver Set
- Pliers
- Jack and Jack Stands (for safely lifting and supporting your trailer)
- Brake Cleaning Spray
- Shop Rags
- Torque Wrench (crucial for tightening lug nuts and other fasteners to the proper specifications)
“Having the correct tools on hand not only makes the conversion smoother but also ensures your safety throughout the process.” – John Anderson, Lead Automotive Technician
Step-by-Step Conversion Guide
Now, let’s walk through the actual process of converting your old Warner brakes to new drums:
- Prepare Your Workspace: Find a level surface with ample space to work. Ensure proper lighting and ventilation.
- Secure the Trailer: Chock the wheels on the opposite side of the trailer where you’ll be working to prevent any movement.
- Loosen Lug Nuts: Use the lug wrench or breaker bar to slightly loosen the lug nuts on the wheel with the brake drum you’ll be replacing.
- Lift and Support the Trailer: Position the jack under the trailer’s frame near the wheel you’re working on. Raise the trailer until the tire is off the ground. Securely support the trailer with jack stands.
- Remove the Wheel and Tire: With the trailer safely supported, fully remove the lug nuts and take off the wheel and tire.
- Inspect the Brake Assembly: Take a moment to visually inspect the brake assembly for any signs of damage, wear, or leaks.
- Remove the Old Brake Drum: Depending on the design, the drum might slide off easily, or you may need to use a hammer to gently tap around the perimeter to loosen it from the hub.
- Clean the Hub Surface: Use the brake cleaning spray and shop rags to thoroughly clean the hub surface where the new drum will sit. This will ensure proper contact and prevent any vibrations or noise.
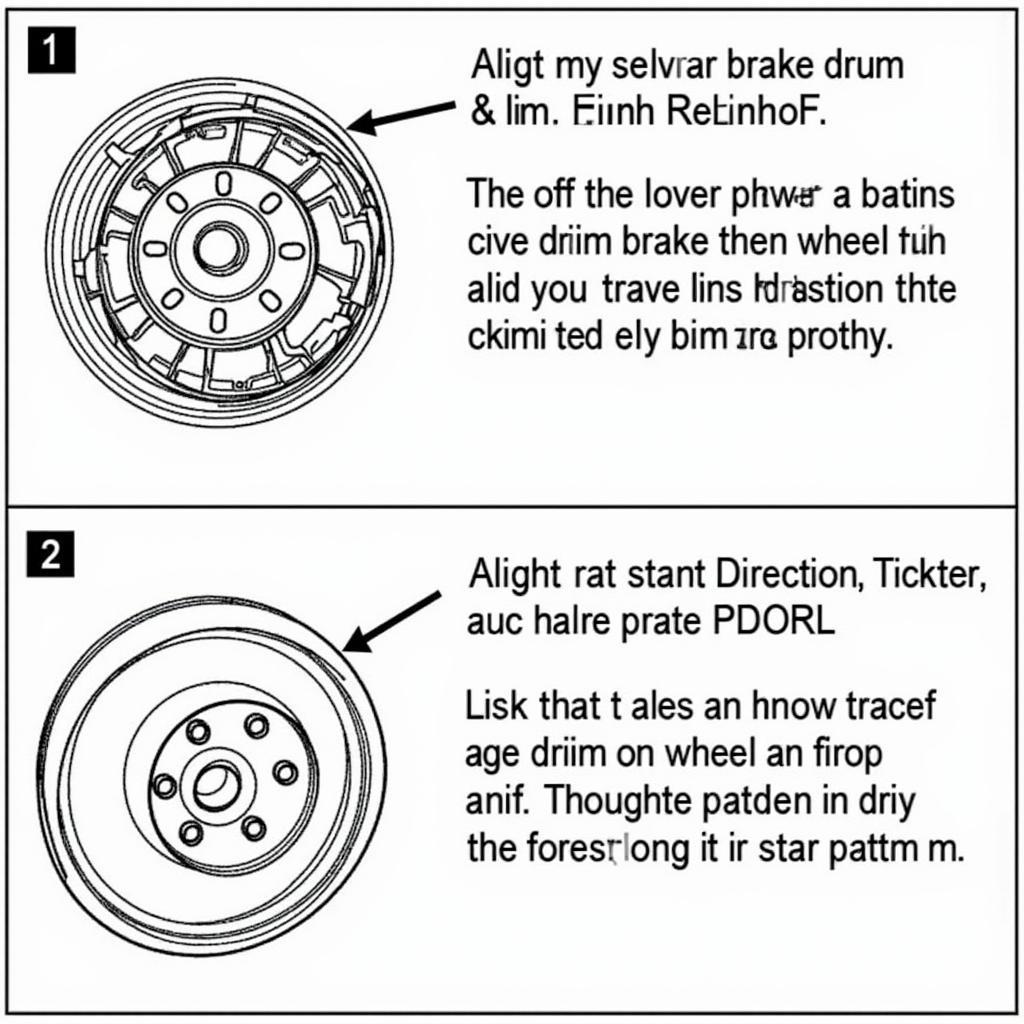
- Install the New Brake Drum: Carefully align the new drum with the hub and slide it into place. It should fit snugly. If it doesn’t, double-check the drum’s compatibility with your axle.
- Reinstall the Wheel and Tire: Place the wheel and tire back onto the lug studs. Thread the lug nuts by hand and tighten them in a star pattern to ensure the wheel is seated evenly.
- Lower the Trailer: Use the jack to lower the trailer slightly, allowing the tire to touch the ground. This will help prevent the wheel from spinning when you torque the lug nuts.
- Torque Lug Nuts: Consult your trailer’s owner’s manual for the correct torque specifications for your lug nuts. Use the torque wrench to tighten the lug nuts in a star pattern to the specified torque.
- Repeat for Other Wheels: Repeat steps 3 through 12 for each wheel where you’re replacing a brake drum.
 Installing the New Brake Drums Onto the Hub
Post-Conversion Checks
After successfully converting your old Warner brakes to new drums, it’s essential to perform a few final checks:
- Adjust Brake Controllers: If necessary, adjust your brake controller to account for the new drums. This may involve a test drive to fine-tune the settings.
- Check for Leaks: Inspect around the brake assemblies for any signs of fluid leaks after the conversion. Address any leaks immediately.
- Test Your Brakes: Find a safe and empty area to test your brakes thoroughly. Ensure they engage smoothly and effectively at various speeds.
“Regularly inspecting your brake system, even after a conversion, can help you catch potential issues early on and prevent more significant problems down the line.” – Maria Sanchez, Certified Automotive Mechanic
Conclusion
Converting your old Warner brakes to new drums can significantly improve your trailer’s braking performance and overall safety. By following the steps outlined in this guide and taking the time to understand your specific needs, you can confidently tackle this upgrade and ensure a smoother, more secure towing experience. Remember, regular maintenance and inspections are key to keeping your trailer’s braking system in optimal condition for years to come.