If you’re dealing with the B201300 and U101300 fault codes on your Volkswagen vehicle, it indicates an issue with the Level Control System (J197) after the replacement of its control unit. These errors typically arise when the system’s software, coding data, and as-built data don’t match the vehicle’s specifications. The primary solution is to perform parameterization (SVM) using ODIS S 11 software and the Autel JVCI device to standardize the data. In this guide, we’ll walk you through the process to fix the B201300 and U101300 VW fault codes and get your vehicle’s system working correctly again.
Understanding the B201300 & U101300 Fault Codes
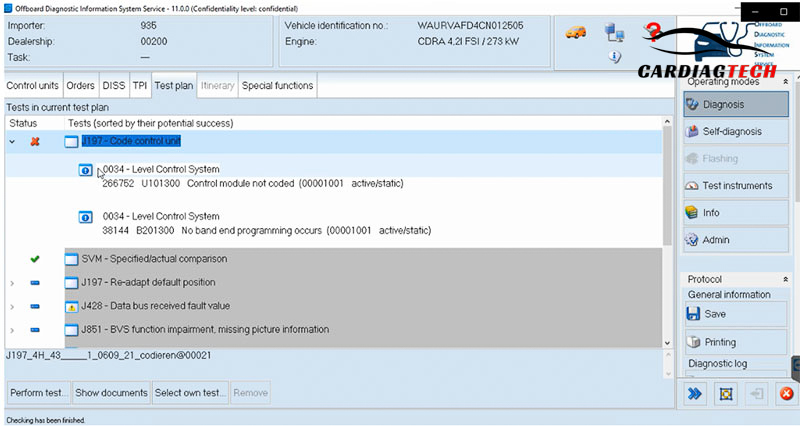
- B201300 (No Band End Programming Occurs): This error typically appears when the system fails to complete the band end programming, which is necessary for the proper operation of the Level Control System.
- U101300 (Control Module Not Coded): This error occurs when the control module hasn’t been properly coded after the replacement or adjustment of the system. The Level Control System module needs to be properly aligned with the vehicle’s data.
The root cause of these issues is typically related to misaligned coding and software during the replacement of the Level Control System (J197) control unit. This can happen when the coding data doesn’t match the vehicle’s specifications, requiring a reset and standardization process via ODIS S 11.
Required Tools
Before starting, ensure you have the following tools and software:
- ODIS S 11 software installed on your laptop/PC
- Autel JVCI device for vehicle communication
- A stable internet connection for login online to access VAG’s server
- ODIS S compatible cables to connect to the vehicle
=> Buy these items now:
Step-by-Step Guide to Fix B201300 & U101300 Fault Codes
Step 1: Connect the Vehicle and Launch ODIS S
- Connect Your Autel JVCI to the Vehicle: Begin by plugging the Autel JVCI device into the vehicle’s OBD-II port. Then, connect the JVCI to your laptop or PC running ODIS S 11.
- Launch ODIS S: Open the ODIS S 11 software on your computer. Make sure it’s running the correct version and is compatible with your vehicle’s make and model.
- Scan for Fault Codes: Perform a quick scan of the vehicle to check for any existing fault codes. Look for B201300 and U101300 in the diagnostic report.
Step 2: Access the Parameterization (SVM) Function
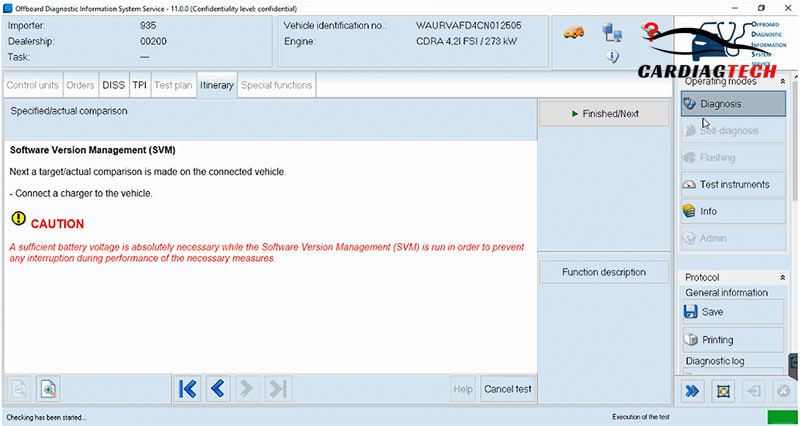
- Locate the SVM Function: In the ODIS S software, navigate to the SVM (Parameterization) function. This function allows you to send the vehicle’s control data to the server for standardization.
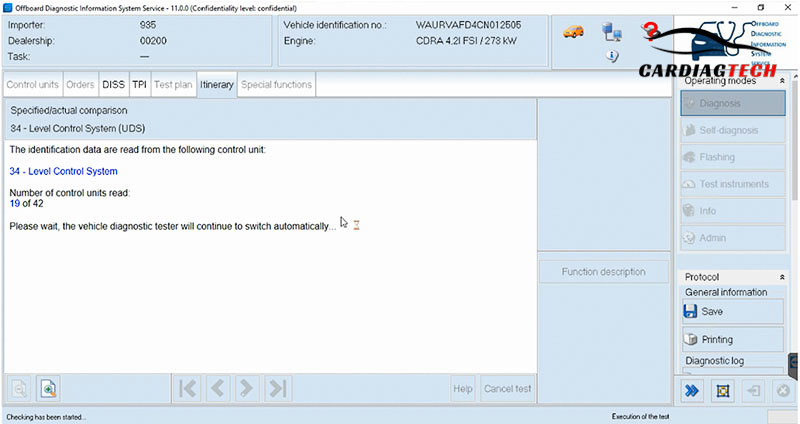
- Select the Level Control System: Choose the Level Control System (J197) from the list of control modules. This is the system that is causing the errors.
- Confirm the Vehicle Information: The software will ask for the vehicle’s specific information (VIN, model, etc.). Make sure all data is accurate to avoid incorrect coding.
Step 3: Perform Login Online to VAG Server
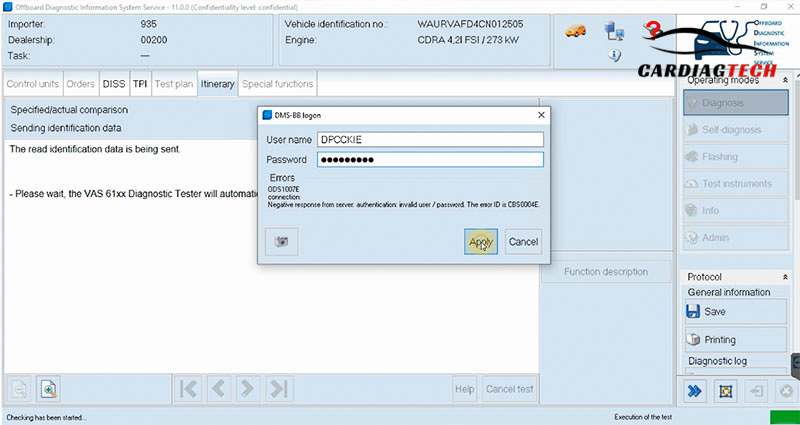
- Login to VAG Server: The login online feature of ODIS S 11 will send the data from the vehicle to the VAG (Volkswagen Audi Group) server. The server will verify the vehicle’s data and provide the correct coding information.
- Wait for Server Response: After logging in, the server will return the original coding based on the vehicle’s specifications. This data will align the system’s software with the vehicle’s needs.
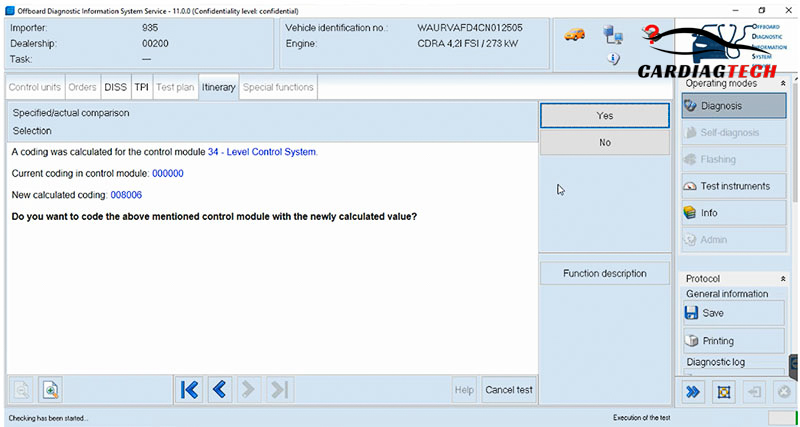
Step 4: Start the Parameterization (SVM) Process
- Start SVM: Once the vehicle data is confirmed and the server returns the original code, proceed with the parameterization process. This will involve updating the Level Control System’s coding to match the factory settings.
- Follow the Prompts in ODIS S: Follow the on-screen instructions to ensure that the software updates the coding data properly. The system will apply the correct values to the control module.
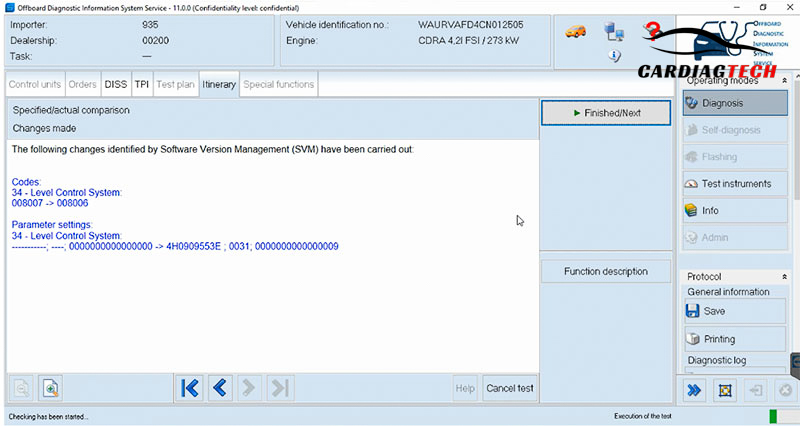
Step 5: Update the Control Module Data
- Data Update: The software will now update the data on the control module. This will allow the Level Control System to function correctly with the vehicle’s specifications.
- Monitor the Progress: Ensure the update is complete and that there are no errors during the process. This step is crucial to eliminate the B201300 and U101300 codes.
Step 6: Clear Fault Codes and Finalize the Process
- Clear Fault Codes: Once the parameterization (SVM) process is complete and the system is updated, go ahead and clear the fault codes using ODIS S. This will reset the system and remove the B201300 and U101300 codes from the vehicle’s diagnostic history.
- Perform a System Scan Again: After clearing the codes, perform a quick scan again to ensure there are no remaining issues.
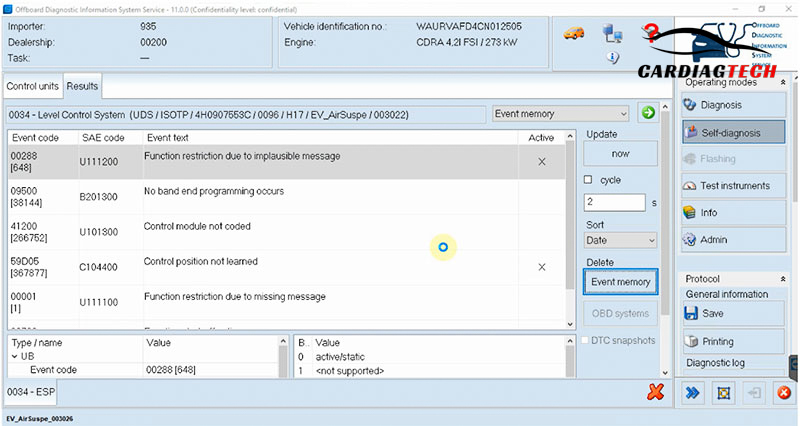
Step 7: Test the Vehicle
- Test the Level Control System: After the update and coding are complete, test the Level Control System by checking the vehicle’s ride height and suspension functionality.
- Check for Any Errors: If the vehicle operates correctly and no further error codes appear, the issue has been resolved.
Conclusion
Fixing the B201300 and U101300 fault codes on your Volkswagen vehicle is an essential process to ensure the proper functioning of the Level Control System. By following the steps outlined in this guide and using ODIS S 11 and Autel JVCI, you can easily reprogram and calibrate the system, eliminating these fault codes and ensuring your vehicle operates smoothly.
If you encounter any issues or have difficulty following the procedure, don’t hesitate to reach out for support.
For Immediate Support
If you experience any problems while working with these fault codes or need additional help, please contact us via WhatsApp at +1 (641) 206-8880 for immediate assistance. Alternatively, you can reach us via email at [email protected].


![How to Fix U0302 Error on VW Jetta 2015 [Software Incompatibility with Transmission Control Module Warning]](https://cardiagtech.com/wp-content/uploads/2024/12/how-to-fix-u0302-error-on-vw-jetta-2015.jpg)