Upgrading your car stereo system can dramatically enhance your driving experience. A new car radio can offer features like Bluetooth connectivity, smartphone integration, and advanced audio quality. While professional installation is an option, installing a car radio yourself can be a rewarding DIY project.
Understanding Car Radio Installation
Before diving in, it’s crucial to understand the basics of car audio systems. A car radio installation typically involves connecting the new unit to your car’s electrical system, speakers, and potentially other components like steering wheel controls and antennas.
Common Car Radio Problems
Several issues can arise with car radios, ranging from simple to complex:
- Power Issues: The radio won’t turn on, or it intermittently cuts out. This could signify a problem with the car’s electrical system, a blown fuse, or a faulty wiring harness.
- Sound Issues: Distorted audio, no sound from specific speakers, or static can indicate blown speakers, loose wiring, or issues with the amplifier or head unit itself.
- Connectivity Problems: Issues connecting via Bluetooth, auxiliary inputs, or USB can point towards problems with the head unit, outdated software, or compatibility issues.
Diagnosing the Problem
Before installing a new car radio, it’s crucial to determine if the issue lies with the radio itself or another component. Start with these checks:
- Check the Fuse Box: Locate your car’s fuse box (refer to your owner’s manual) and identify the fuse related to your car stereo. A blown fuse will have a broken wire inside.
- Inspect Wiring and Connections: Carefully examine the wiring harness at the back of the radio for any loose or damaged wires.
- Test the Speakers: If possible, test the speakers individually to see if they are functioning correctly.
Tools and Equipment Needed
Having the right tools is essential for a successful installation. You will likely need:
- Dash Kit: Designed for your specific car model, this kit ensures a seamless fit for your new radio.
- Wiring Harness Adapter: This connects your car’s wiring system to the new radio without cutting factory wires.
- Antenna Adapter: Needed if your new radio uses a different antenna connection than your factory unit.
- Screwdrivers: A variety of Phillips and flat-head screwdrivers are essential.
- Panel Removal Tools: These tools help pry open dash panels without causing damage.
- Electrical Tape: Used to secure and insulate wiring connections.
- Wire Strippers/Cutters: For making clean cuts and stripping insulation from wires.
 Tools for Car Radio Installation
Car Radio Installation Steps
Once you have your tools ready, follow these general steps to install your car radio:
- Disconnect the Battery: Disconnect the negative terminal of your car battery to prevent electrical shorts during the installation.
- Remove the Old Radio: Using the appropriate panel removal tools, carefully pry open the dash panels to access the old radio. Disconnect the wiring harness and antenna, then unscrew and remove the radio.
- Prepare the New Radio: Connect the wiring harness adapter and antenna adapter to the new radio, ensuring all connections are secure.
- Install the Dash Kit: If required, install the dash kit into your car’s dashboard opening.
- Connect the New Radio: Carefully slide the new radio into the dash opening until it clicks into place. Connect the wiring harness and antenna.
- Test the Radio: Before reassembling the dash, reconnect the negative battery terminal and test the radio’s functionality.
- Reassemble the Dash: Once you’ve confirmed the radio works correctly, carefully reassemble the dash panels, ensuring all screws and clips are secure.
FAQs about Car Radio Installation
Q: Can I install a car radio myself, or should I hire a professional?
A: Installing a car radio can be a DIY project, especially with plug-and-play wiring harnesses. However, if you’re uncomfortable working with car electronics, professional installation is recommended.
Q: What are the benefits of using a wiring harness adapter?
A: A wiring harness adapter simplifies the installation process and avoids cutting into your car’s factory wiring. This preserves your car’s warranty and makes it easier to reinstall the original radio if needed.
Q: What if my new radio doesn’t fit my dashboard opening?
A: A dash kit specific to your car model will ensure a perfect fit.
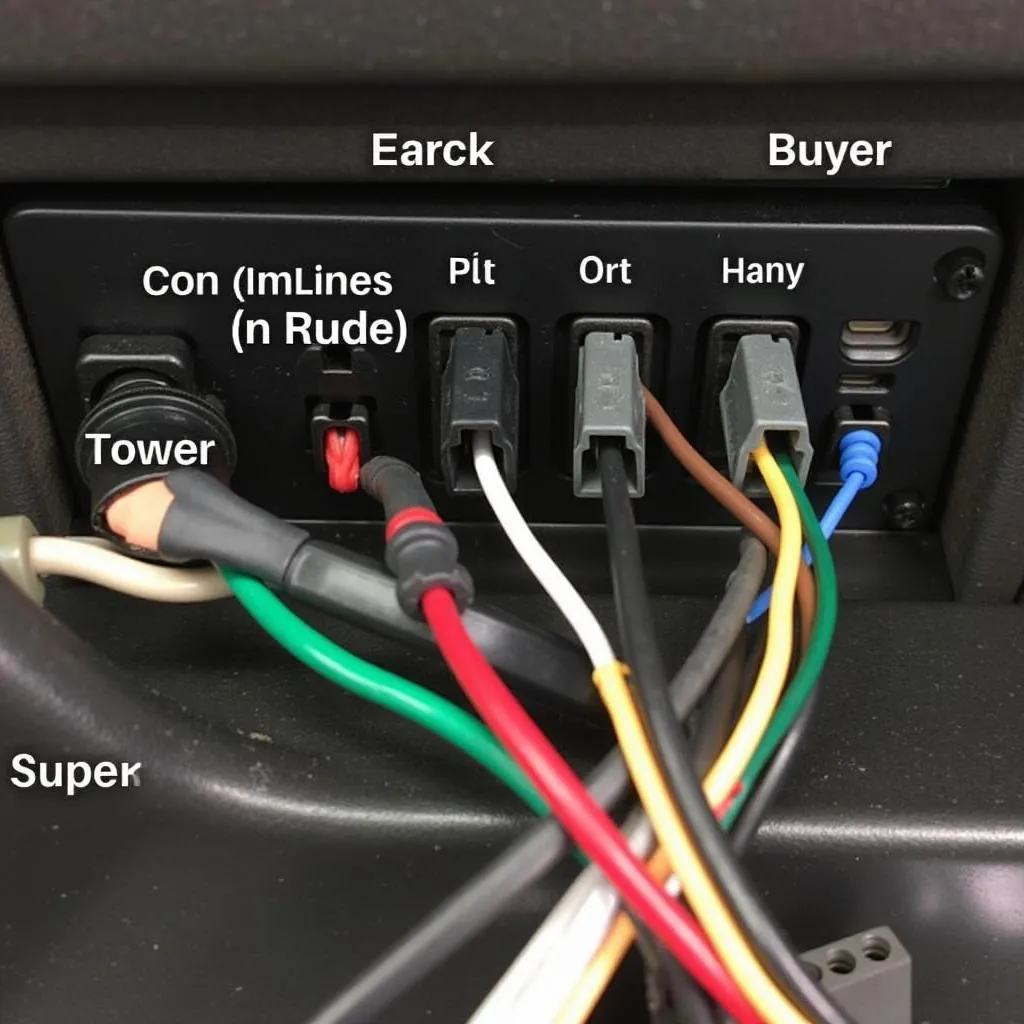 Car Radio Wiring Harness
Q: My new radio has Bluetooth, but my car doesn’t. What do I do?
A: Many aftermarket radios come equipped with built-in Bluetooth, allowing for hands-free calling and music streaming.
Q: How do I find a car radio that is compatible with my car’s steering wheel controls?
A: Check for radios that explicitly mention compatibility with your car make, model, and year. Some radios might require an additional adapter for steering wheel control compatibility.
Cardiagtech Can Help
Navigating the world of car electronics can be complex. For expert guidance and support, Cardiagtech offers a range of services including remote diagnostics, software installation, and troubleshooting. Whether you’re experiencing issues with your current car radio or need assistance with a new installation, our team is here to help. Contact us today for a seamless and stress-free experience.
Conclusion
Installing a new car radio can significantly enhance your driving experience. By following these steps and using the right tools, you can confidently tackle this DIY project. Remember to consult your car’s manual and seek professional help if needed.
For all your car diagnostic and software needs, remember CARDIAGTECH! We’re here to get you back on the road with a smile.