The brake distribution warning switch on your classic 1974 Corvette plays a vital role in ensuring your safety on the road. This small but mighty component alerts you to potential imbalances in your braking system, allowing you to address issues before they escalate. If you suspect your warning switch is malfunctioning or needs replacement, this guide will walk you through the process.
Understanding the Brake Distribution Warning Switch
Before diving into the replacement process, it’s essential to understand the function of the brake distribution warning switch. In essence, this switch monitors the pressure differential between the front and rear hydraulic brake circuits.
- Balanced Braking: When you apply the brakes, the switch remains inactive if the pressure in both circuits is balanced.
- Imbalance Alert: However, if a pressure difference arises, indicating a potential issue with one of the circuits (like a leak or malfunctioning component), the switch activates. This activation triggers a warning light on your dashboard, signaling the need for immediate inspection and repair.
Common Symptoms of a Failing Brake Distribution Warning Switch
A failing brake distribution warning switch can manifest in several ways:
- Illuminated Warning Light: The most obvious sign is a constantly illuminated brake warning light on your dashboard, even when the parking brake is disengaged.
- Intermittent Warning Light: The warning light might flicker or illuminate intermittently, suggesting a loose connection or a switch nearing the end of its lifespan.
- No Warning Light Despite Braking Issues: Conversely, a completely failed switch might not activate the warning light at all, even if an actual brake imbalance exists.
Gathering the Necessary Tools and Parts
Before starting the replacement, gather the following:
- New Brake Distribution Warning Switch: Ensure you purchase a compatible replacement specifically designed for your 1974 Corvette.
- Wrench Set: You’ll need wrenches of the appropriate size to loosen and tighten the switch.
- Penetrating Oil: Applying penetrating oil to the old switch can help loosen it if it’s seized due to corrosion.
- Clean Rags: Keep rags handy to wipe away any brake fluid spills and clean the surrounding area.
Step-by-Step Guide to Replacing the Switch
1. Locate the Switch: The brake distribution warning switch is typically located on the brake master cylinder or along the brake lines.
2. Prepare the Area: Place a clean rag around the base of the switch to catch any potential brake fluid leaks.
3. Disconnect the Electrical Connector: Carefully unplug the electrical connector attached to the switch.
4. Loosen and Remove the Old Switch: Use a wrench to loosen the old switch. Once loose, carefully unscrew it by hand, allowing any residual brake fluid to drain onto the rag.
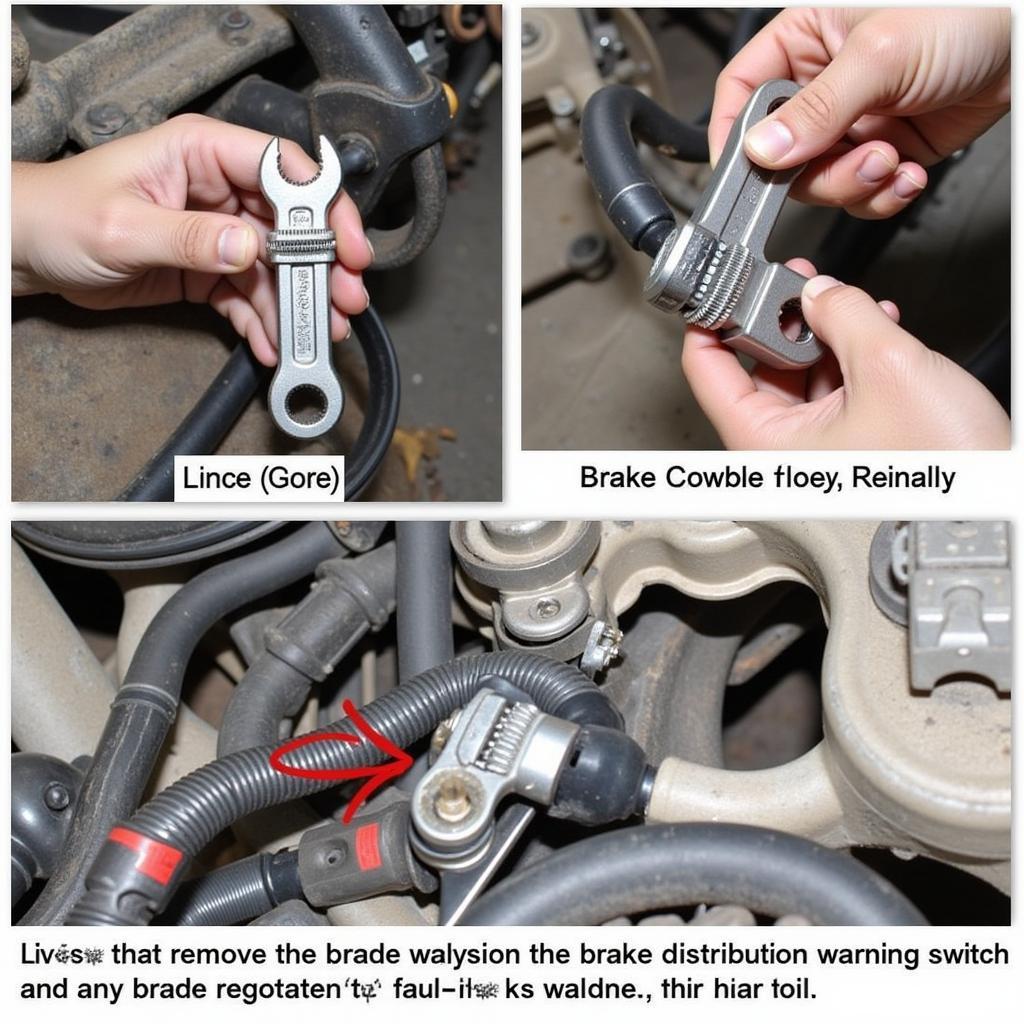 Removing the Old Brake Distribution Warning Switch
5. Install the New Switch: Apply a small amount of brake fluid to the threads of the new switch to lubricate it. Then, carefully thread the new switch into the port and tighten it securely with a wrench. Avoid over-tightening.
6. Reconnect the Electrical Connector: Plug the electrical connector back onto the new switch.
7. Check for Leaks: Visually inspect the area around the new switch for any signs of brake fluid leaks.
8. Bleed the Brakes (If Necessary): If you lost a significant amount of brake fluid during the replacement, you might need to bleed the brake system to remove any air bubbles.
9. Test the New Switch: Start your Corvette and check if the brake warning light on the dashboard is off. Depress the brake pedal to ensure the warning light illuminates when pressure is applied.
Why Accurate Diagnosis is Crucial
“Many times, car owners mistake other brake system issues for a faulty distribution warning switch,” says veteran Corvette mechanic, Richard Miller. “It’s essential to have the system properly diagnosed to avoid unnecessary replacements or overlooking more serious problems.”
Remote Diagnostics and Programming: A Modern Solution
In today’s technologically advanced world, remote diagnostics and programming offer a convenient and efficient way to address automotive issues, including brake system problems.
- Pinpointing the Issue: Specialized software allows technicians to remotely access your Corvette’s onboard computer, reading error codes and analyzing data to pinpoint the root cause of the problem.
- Efficient Repair: Remote diagnostics can quickly determine if the brake distribution warning switch is indeed faulty or if another component within the braking system requires attention. This saves you time and potentially costly guesswork.
- Expert Support: Connecting with experienced automotive technicians remotely allows you to receive expert guidance and support, ensuring the problem is diagnosed and resolved correctly.
Conclusion
Replacing the brake distribution warning switch on your 1974 Corvette is a relatively straightforward task that can be accomplished with basic tools and this guide. However, if you are uncomfortable working on your vehicle’s braking system, it’s always best to consult a qualified mechanic.
Remember, a properly functioning brake system is paramount to your safety and the safety of others on the road. Regular maintenance and prompt attention to any warning signs will keep your classic Corvette running smoothly and safely for years to come.