Is your 2001 Mercedes SLK 320’s headliner starting to resemble a droopy mustache? It’s a common issue with these sleek roadsters, but thankfully, a fixable one. This DIY guide will walk you through how to diagnose and repair your sagging headliner, restoring your SLK’s interior to its former glory.
What Causes a Sagging Headliner in a 2001 Mercedes SLK 320?
Over time, the adhesive foam that bonds the headliner fabric to the board can deteriorate. Factors like heat, humidity, and even gravity contribute to this breakdown.
 Sagging Car Headliner
Recognizing a Sagging Headliner
Besides the obvious drooping, you might notice:
- The fabric pulling away from the board at the edges.
- A sticky residue on your fingers if you touch the headliner.
- Increased road noise due to the headliner’s compromised insulation.
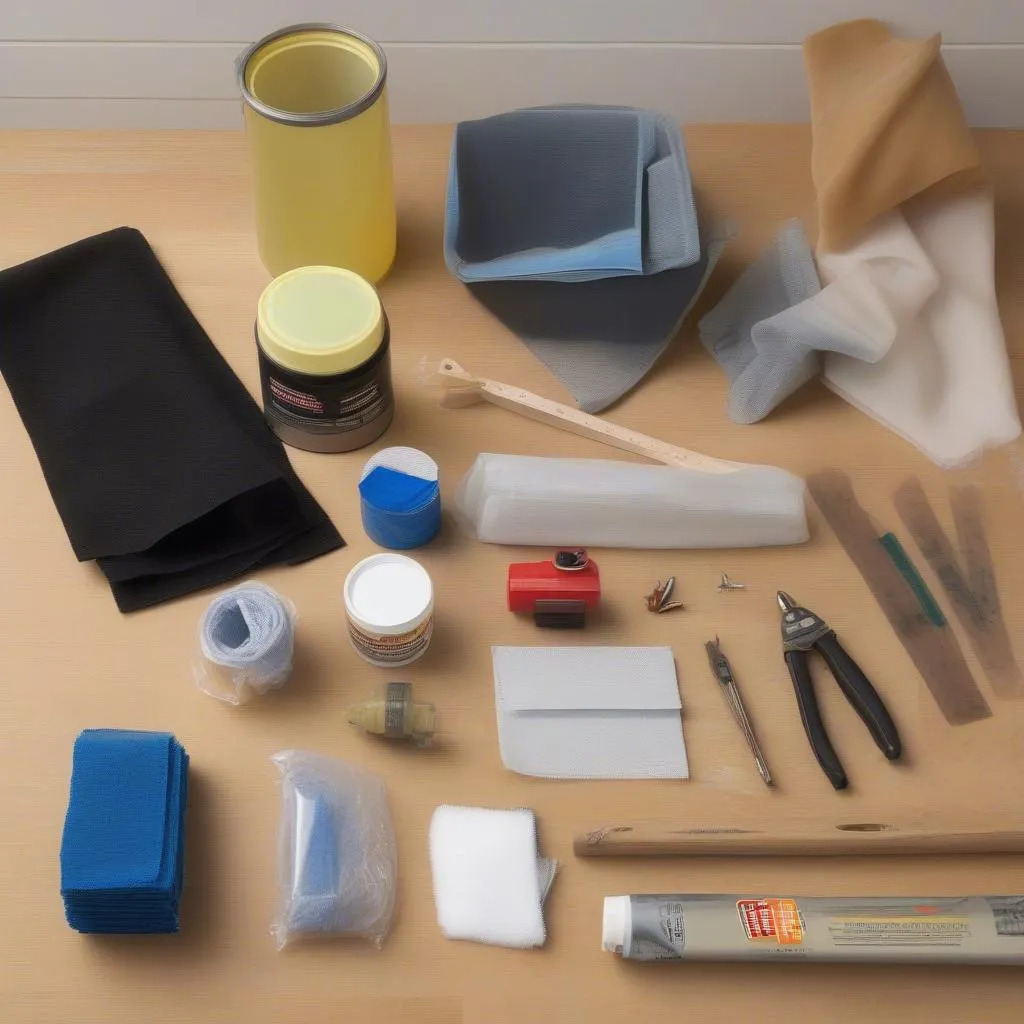 Car Headliner Repair Tools
Gathering Your Headliner Repair Supplies
For this project, you’ll need:
- High-temperature headliner adhesive (spray or brush-on).
- Upholstery cleaner.
- Microfiber cloths.
- Plastic scraper or putty knife.
- Painter’s tape.
- Scissors.
- Optional: A small roller for adhesive application.
How to Fix a Sagging Headliner
- Prepare Your Workspace: Park your SLK in a well-ventilated area.
- Protect Your Interior: Cover your seats and dashboard with a drop cloth or old sheets.
- Remove Obstacles: Depending on the severity of the sag, you might need to partially remove or loosen interior trim pieces that interfere with the headliner. Be gentle!
- Clean the Headliner Board: Use the upholstery cleaner and a microfiber cloth to clean the exposed board where the old adhesive is present. Let it dry completely.
- Apply the Adhesive: Following the manufacturer’s instructions, apply the headliner adhesive to both the board and the back of the fabric. If using spray adhesive, hold the can about 6-8 inches away.
- Press and Smooth: Carefully press the headliner fabric back onto the board, starting from the center and working your way outward. A small roller can help eliminate air bubbles.
- Secure with Tape: Use painter’s tape to hold the fabric in place while the adhesive dries.
- Reinstall Trim: Once the adhesive is dry (refer to the manufacturer’s instructions), carefully reinstall any trim pieces you removed.
 Repaired Car Headliner
Frequently Asked Questions:
Q: Can I just use any spray adhesive for this repair?
A: It’s highly recommended to use a high-temperature headliner adhesive specifically designed for automotive applications. Regular spray adhesives might not hold up to the heat inside a parked car.
Q: My headliner is extremely saggy. Is it beyond repair?
A: While this DIY method works well for most sagging headliners, extensive damage might require a professional reupholstering job.
Q: Can a diagnostic tool like those offered by Cardiagtech help me identify the cause of my sagging headliner?
A: While incredibly useful for diagnosing engine or electrical issues, CARDIAGTECH’s tools won’t be able to pinpoint the cause of a sagging headliner as it’s primarily a wear-and-tear issue.
Conclusion
Fixing a sagging headliner in your 2001 Mercedes SLK 320 is a manageable DIY project that can save you a significant amount of money and restore your car’s interior aesthetics. With a bit of patience and the right materials, you can have your SLK looking its best in no time.