A malfunctioning third brake light can be a nuisance, especially since it plays a crucial role in road safety. The problem often stems from a faulty light bracket. This guide will walk you through common causes of a “third brake light warning” related to the light bracket and offer practical solutions to get you back on the road safely.
Understanding the Third Brake Light Bracket
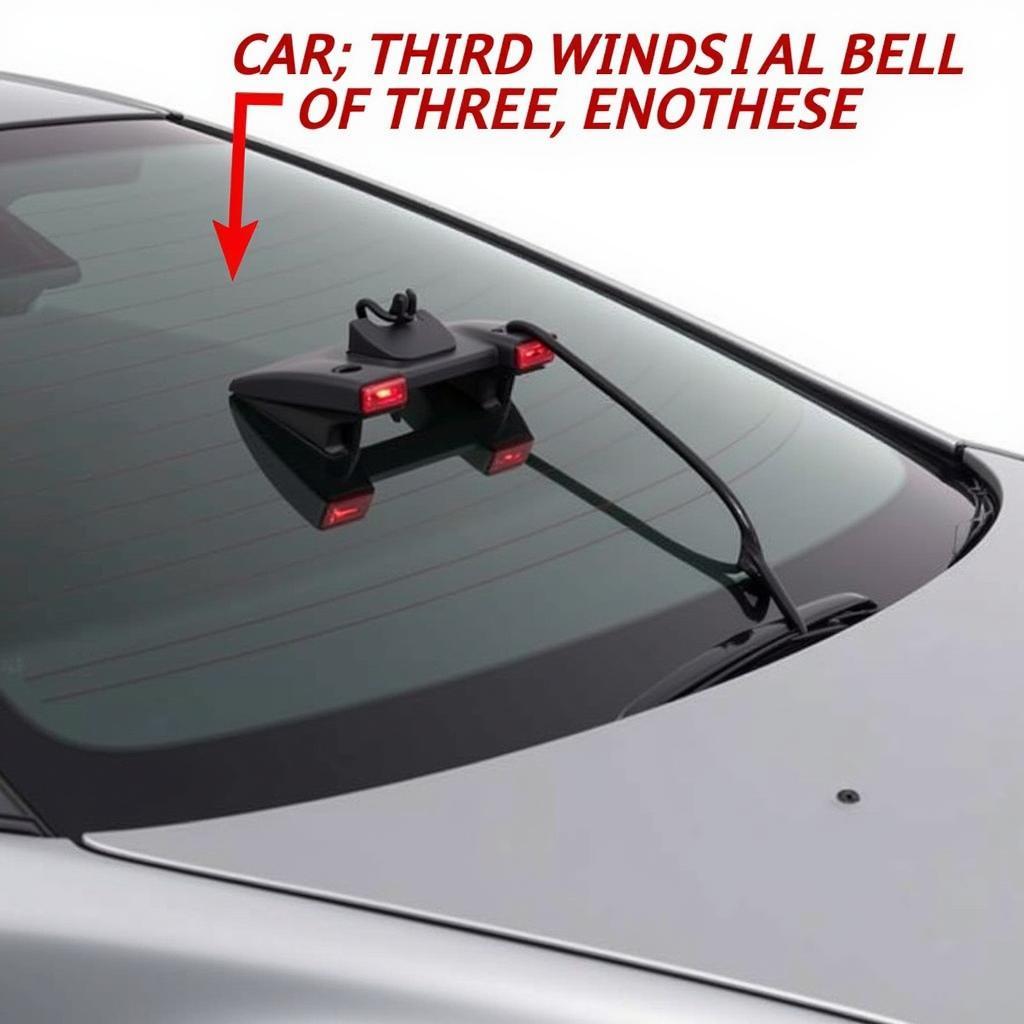 Third Brake Light Location
The third brake light, often positioned on the rear windshield or integrated into the spoiler, relies heavily on its bracket. This bracket isn’t just a mounting point; it ensures proper alignment for maximum visibility and houses the electrical components that power the light. A damaged, misaligned, or corroded bracket can lead to a range of issues, triggering a warning light on your dashboard.
Common Causes of Third Brake Light Bracket Problems
Several factors can cause your third brake light bracket to malfunction:
- Physical Damage: Impacts from minor collisions or even loose cargo can damage the bracket, leading to misalignment or breakage.
- Corrosion: Over time, exposure to the elements can corrode the bracket, affecting its structural integrity and electrical conductivity.
- Loose Fastenings: Vibrations during driving can loosen the screws or bolts holding the bracket, leading to instability and potential electrical issues.
- Worn-out Gaskets: The gasket between the bracket and the vehicle’s body can deteriorate, allowing water to seep in and cause damage.
Troubleshooting Your Third Brake Light Bracket
Before diving into repairs, it’s essential to pinpoint the root cause of the problem.
- Inspect the Bracket: Begin by visually examining the third brake light bracket for any visible signs of damage like cracks, bends, or corrosion.
- Check for Loose Connections: Ensure that all screws, bolts, and wiring harnesses connected to the bracket are securely fastened.
- Examine the Gasket: Inspect the gasket for any signs of wear and tear, cracks, or gaps that might allow water ingress.
Repairing or Replacing the Bracket
Depending on the severity of the issue, you can either repair or replace the third brake light bracket:
Repair:
- Tighten Loose Fastenings: If you find any loose screws or bolts, carefully tighten them using the appropriate tools.
- Clean Corroded Areas: Use a wire brush and a rust remover solution to clean any corrosion on the bracket and its contact points.
- Apply Protective Coating: Once clean and dry, apply a rust-resistant coating to the bracket to prevent future corrosion.
Replacement:
- Disconnect the Wiring: Before removing the old bracket, disconnect the wiring harness connected to the third brake light assembly.
- Remove and Install: Unscrew the old bracket and install the new one, ensuring proper alignment and secure fastening.
- Reconnect the Wiring: Connect the wiring harness to the new bracket, ensuring a tight and secure fit.
“It’s crucial to address any third brake light issues promptly,” says automotive electronics expert David Miller. “A functioning third brake light significantly reduces the risk of rear-end collisions, ensuring your safety and that of others on the road.”
Beyond the Bracket: Other Potential Causes
If inspecting and repairing/replacing the bracket doesn’t resolve the warning light, the issue might lie elsewhere:
- Bulb Failure: Check the third brake light bulb for any signs of damage or burnout.
- Wiring Problems: Inspect the wiring harness for any frayed wires, loose connections, or damage that could be disrupting the electrical circuit.
- Faulty Brake Light Switch: A malfunctioning brake light switch can prevent the third brake light from illuminating.
Preventative Measures
To prevent future third brake light warnings related to the bracket or other components:
- Regularly Inspect the Bracket: Periodically check the bracket for signs of damage, corrosion, or loose fastenings.
- Keep it Clean: Clean the bracket and surrounding areas regularly to prevent dirt and debris buildup, which can contribute to corrosion.
- Address Issues Promptly: Don’t ignore any warning lights or signs of malfunction. Addressing issues promptly can prevent further damage and ensure your safety.
Conclusion
A malfunctioning third brake light should never be ignored. By understanding the common causes of bracket issues and following the troubleshooting and repair steps outlined in this guide, you can ensure the proper functioning of your third brake light, contributing to a safer driving experience for yourself and other road users.